Hi there crafty friends,
I'm stopping by today to share a new layout with you that I've created for the Paige Evans Design Team! I've used Paige's newest, gorgeous collection, Bungalow Lane.
Since this is a fall themed collection, I wanted to make a layout with some kind of fall element to it, like leaves for instance. I haven't taken any photos yet this fall, so I went with a summer photo. Unfortunately we had pretty much fall weather on our summer holiday, so I thought this photo will work just fine!
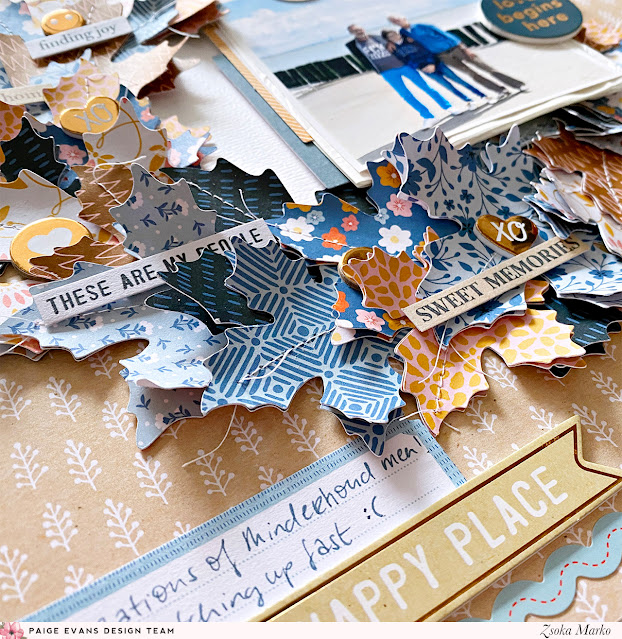
Lucky for me, all colors that are in my picture, are also available in Bungalow Lane - so basically I just pulled out all patterned papers that matched my photo. I then resized the Large Leaf cut file (Design ID: D-306955) to have a variation of sizes (I believe I had 3 or 4 different sizes) and die cut a bunch of leaves from each patterned paper I selected. I cut two layers for each of my leaves.
I then glued the two layers together - adding only a tiny bit of liquid glue in the middle, since I wanted to stitch down the middle with my sewing machine.
I bent up the sides of the leaves to give them a bit of dimension. Using one of our smaller plates as a template, I fussy cut out a circle from white, textured card stock. Obviously this would have been quicker with my Cameo, but I didn't think of it when I cut my leaves and then later I was too lazy to go upstairs again haha! Hence old school tools!
I adhered the white circle in the middle of my page, then I roughly arranged the leaves around it. Once I was happy with how it looked, I started gluing them down, to create a wreath.
I layered some tissue paper behind my photo, as well as a few pieces of die cuts on both sides. I added some foam tape as well, because I adhered the picture on top of the leaves. By the way, I flattened out and glued down the leaves that were under my photo, just so I didn't have as much dimension.
I then went through all embellishments and picked out some that went with my colors scheme: some card stock stickers, chipboard stickers, foam stickers and ephemera pieces. I stamped my date on a label sticker and partially tucked it in behind my photo.
I added a decorative border sticker at the bottom, as well as my journaling and my title. For my title I used one of the larger foam stickers. I placed some scallop chipboard stickers on the opposite side at the top, to create a more balanced overall design.
That's it for today! I hope I could inspire you in some small way!
Thank you for stopping by and have an awesome day!
X
SUPPLY LIST:
Bungalow Lane collection: Paper 23, Paper 19, Paper 17, Paper 14, Paper 12, Paper 10, Paper 7, Paper 4, Paper 2, Chipboard Stickers, Cardstock Stickers, Ephemera / Icons, Phrase Thickers, Sticker Book


