
Hello Pinkfresh fans,
I'm back to share my last cards for Pinkfresh Studio. I think Christmas cards are my favorite, I could truly create them all year long. I doubt I'm going to have time for more this year though! Lack of time is also the reason why I ended up making such simple and quick cards for today's post. These are great for some last minute crafting!
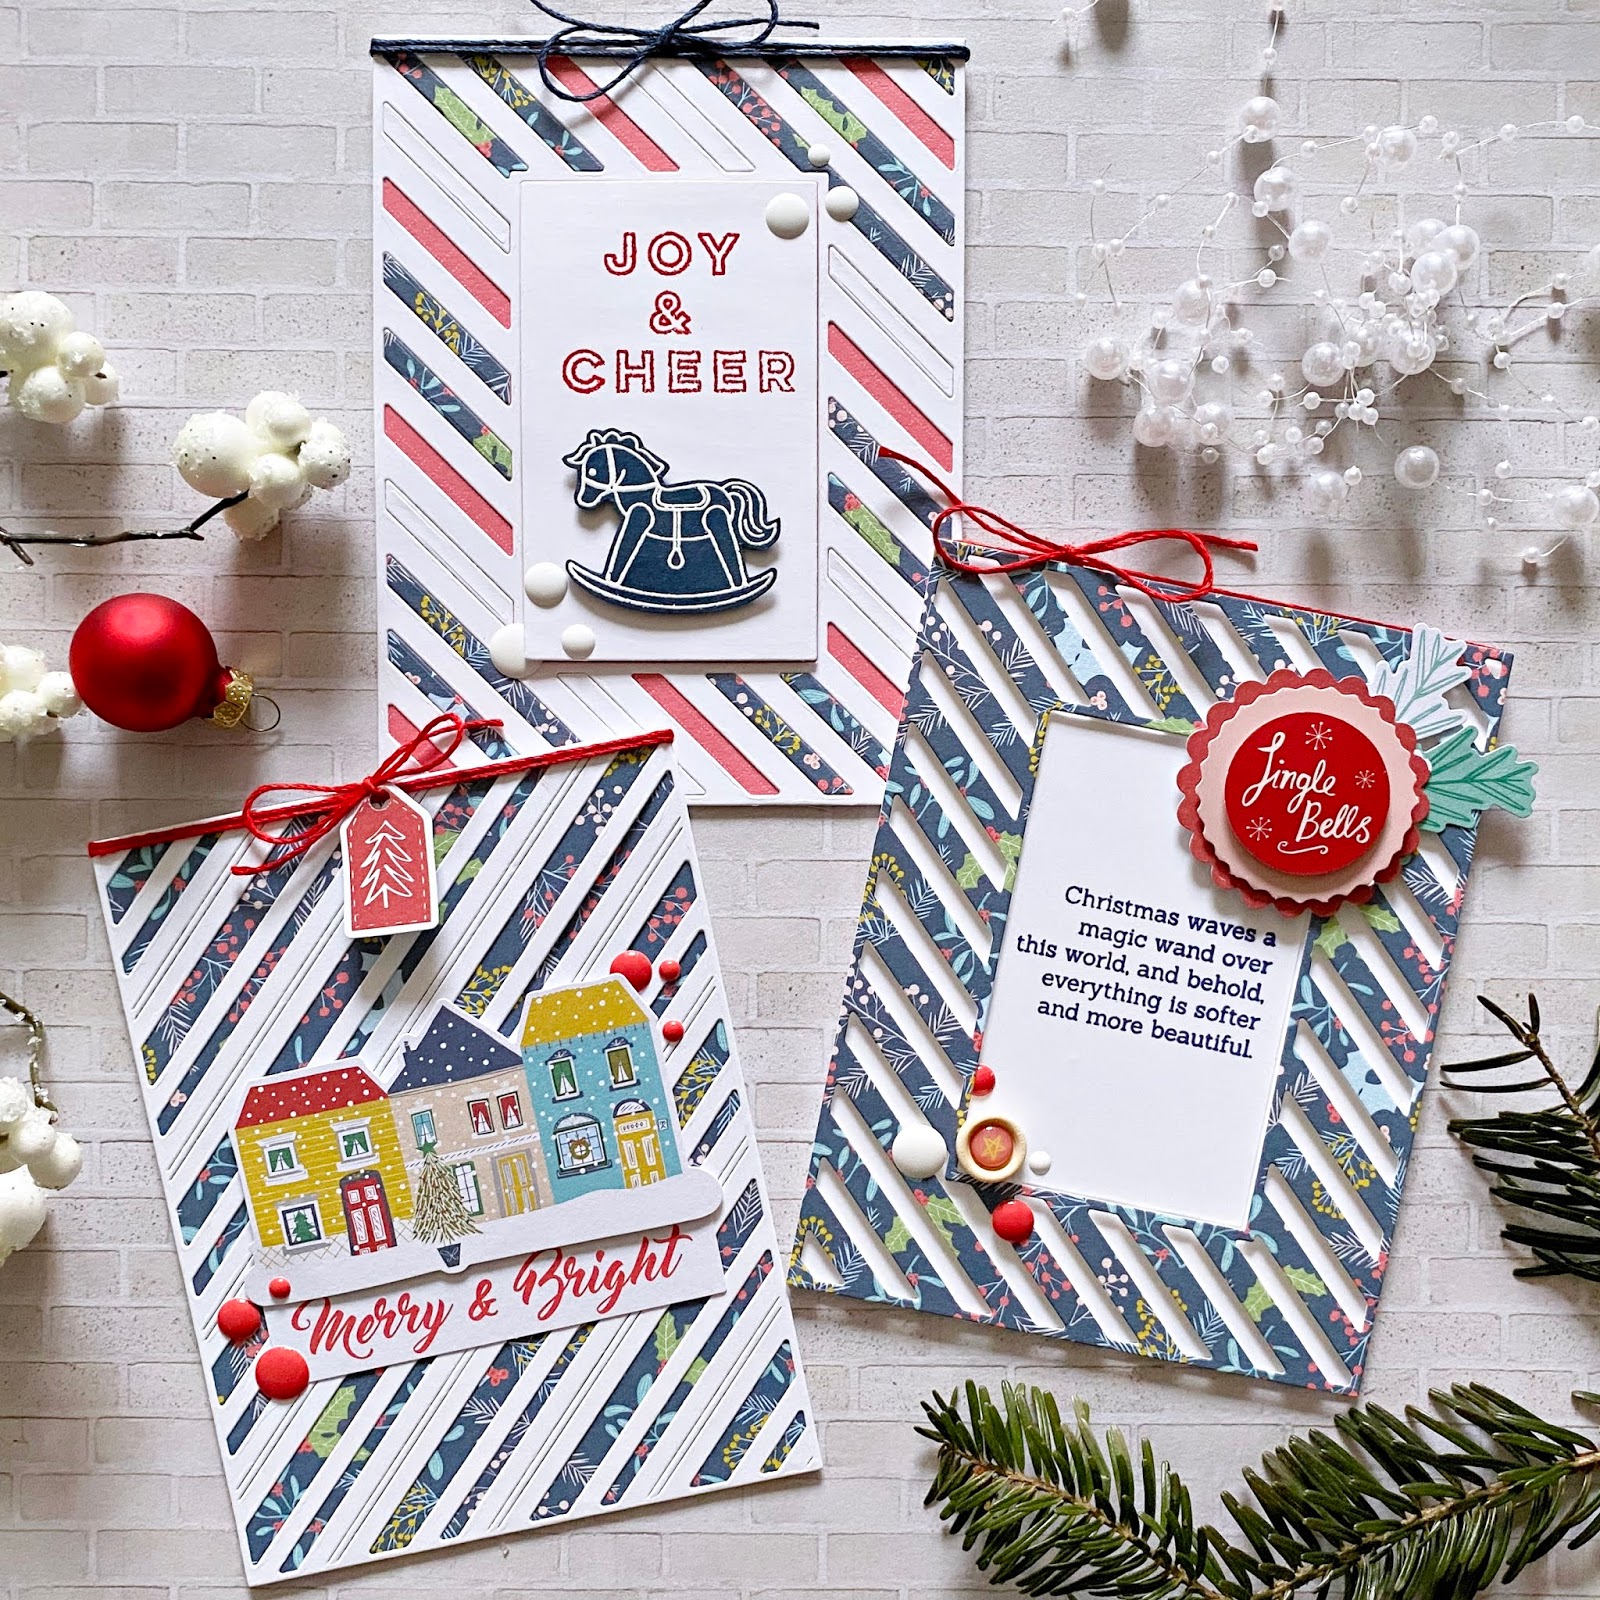
I was focusing on my favorite (6x6) patterned paper from the Home for the Holidays collection and some of the new dies from the latest release.
For my first card I used the Essentials: Diagonal Stripes with Window die to create a frame from patterned paper. I also die cut the center from white card stock and stamped a sentiment from the gorgeous Share Cheer stamp set in navy blue, using the Stargazer ink pad. I added foam adhesive strips to the back side of my die cut and adhered it to my A2 size, top folding card base. I also glued down the middle piece.

I then went through the Home for the Holiday embellishments and picked out a few: a layered sticker, some die cuts, a wood button and a few enamel dots. I glued these down in two opposite corners. To finish off this card, I added some red twine at the top.

My next card is the simplest of the three! I created an A2 size, top folding card base from white, heavy weight card stock and added a patterned paper layer on top. Then using the Essentials: Fancy Diagonal Stripes die and white card stock, I created my top layer.

I glued down the Merry & Bright die cut first, then popped up the houses using foam adhesive. Some red enamel dots and red twine finish this card off. Oh oh! And a teeny tiny red tag from the ephemera pack! Isn't that too cute?!

For my last card I made another A2, top folding card base, then added red patterned paper to it. I adhered a white die cut on this which I cut with the Essentials: Diagonal Stripes with Window die. I glued some of the white fall-out pieces back in place, plus a few patterned paper strips as well.

I dug up a cute little stamp set from last year, Merry and Bright Toy Shop, cut apart the long Joy & Cheer stamp and re-arranged it in a way that it all fit on the paper in the middle. I then embossed this with red glitter embossing powder. I stamped the rocking horse image onto navy card stock, white embossed it and fussy cut it out. Using foam adhesive I attached it to the middle. Enamel dots and twine finish off this card.

That's it for today! I hope you've found some inspiration in this post!
Wishing you Happy Holidays, a wonderful and relaxing time with your loved ones!
X