I'm back today with a new layout to share, that I created for the Paige Evans Design Team.
A few weeks ago, my boyfriend was feeling generous and got me some presents! One of them was the We R Memory Keepers Button Press, which I've been wanting since I first saw a demo with it. Obviously, I had to try it right away! So, as soon as it arrived, Maxim and I unpacked it, and tested it out. So much fun! I decided to make a layout primarily with buttons. I saw Angi use a photo to create a button with her Button Press, which inspired me. I based my idea on a layout I made some years ago, where I cut up a whole 12x12 patterned paper that was a big image, into circles and kind of pieced it all back together like a puzzle. Except here I did it on a smaller scale, I used a smaller photo (slightly smaller than 4x6") with the same technique. It would have been cool to use a 12x12 photo and cover the whole layout with buttons but I didn't have so many large buttons, plus it would be a pretty expensive layout, if you know what I mean. Maybe one day!
I chose a recent photo of Maxim, that I took when he came out of the orthodontist's practice, showing off his braces! I was not allowed to go in with him, due to Covid-19 regulations, so this was the first time I saw it! I went with a blue-yellow color scheme, since he is wearing these colors in the photo. This color combo is not my favorite when it comes to arts - I like it on kids, yellow jacket with blue jeans etc. But not in crafting or arts. Weird huh? Anyway, I thought it would be easy since Paige's collections always have these colors. I ended up using a mixture of the Go the Scenic Route, Horizon, Truly Grateful and Pick Me Up collections.
I first selected my patterned papers, then created my buttons. At the end of this post you'll find a process video - if you're interested in how I made the buttons! It's pretty simple, once you figure it out! Oh, I also used that smiley button with the braces, that Maxim got at the orthodontist's - I thought it would be fun to add this keepsake to the layout! Otherwise it would have ended up in the trash at some point, I'm sure.
I also created a button with the journaling - for this I wrote my text onto a ledger patterned paper, then I turned it into a button. I arranged everything on my layout and added a few embellishments: chipboard hearts and circles, enamel and puffy sticker shapes, a few card stock stickers. I also used a die cut tag at the top and created two more from patterned papers. I made a label for my date, as well. For my title, I mixed and matched some alphas from various collections, and I love how that looks! It's great that I managed to find the right shade of yellow embellies for this project, it's not always an easy task!
To finish off my layout, I added two strips of patterned paper at the bottom, in coordinating colors. That's it! Super simple and quick, but I hope I could inspire you in some small way! As promised, here's the process video too:
It's that time again! The Spellbinders February Club Kits are here! I'm a bit late posting this, we had some delivery issues and I just received the dies a couple of days ago. But better late than never, am I right?!
This month's kits are awesome, again! I can't wait to create with these dies every month to be honest.
I have two process videos for you, which I'll link into this blog post below, so if you are interested to see how these cards came together, please head to my YouTube Channel. You'll find all the supplies I've used linked in the description boxes of the videos.
As a reminder, Spellbinders have several monthly kits, which are really great! You can subscribe to:
You can find all necessary information about these kits here.
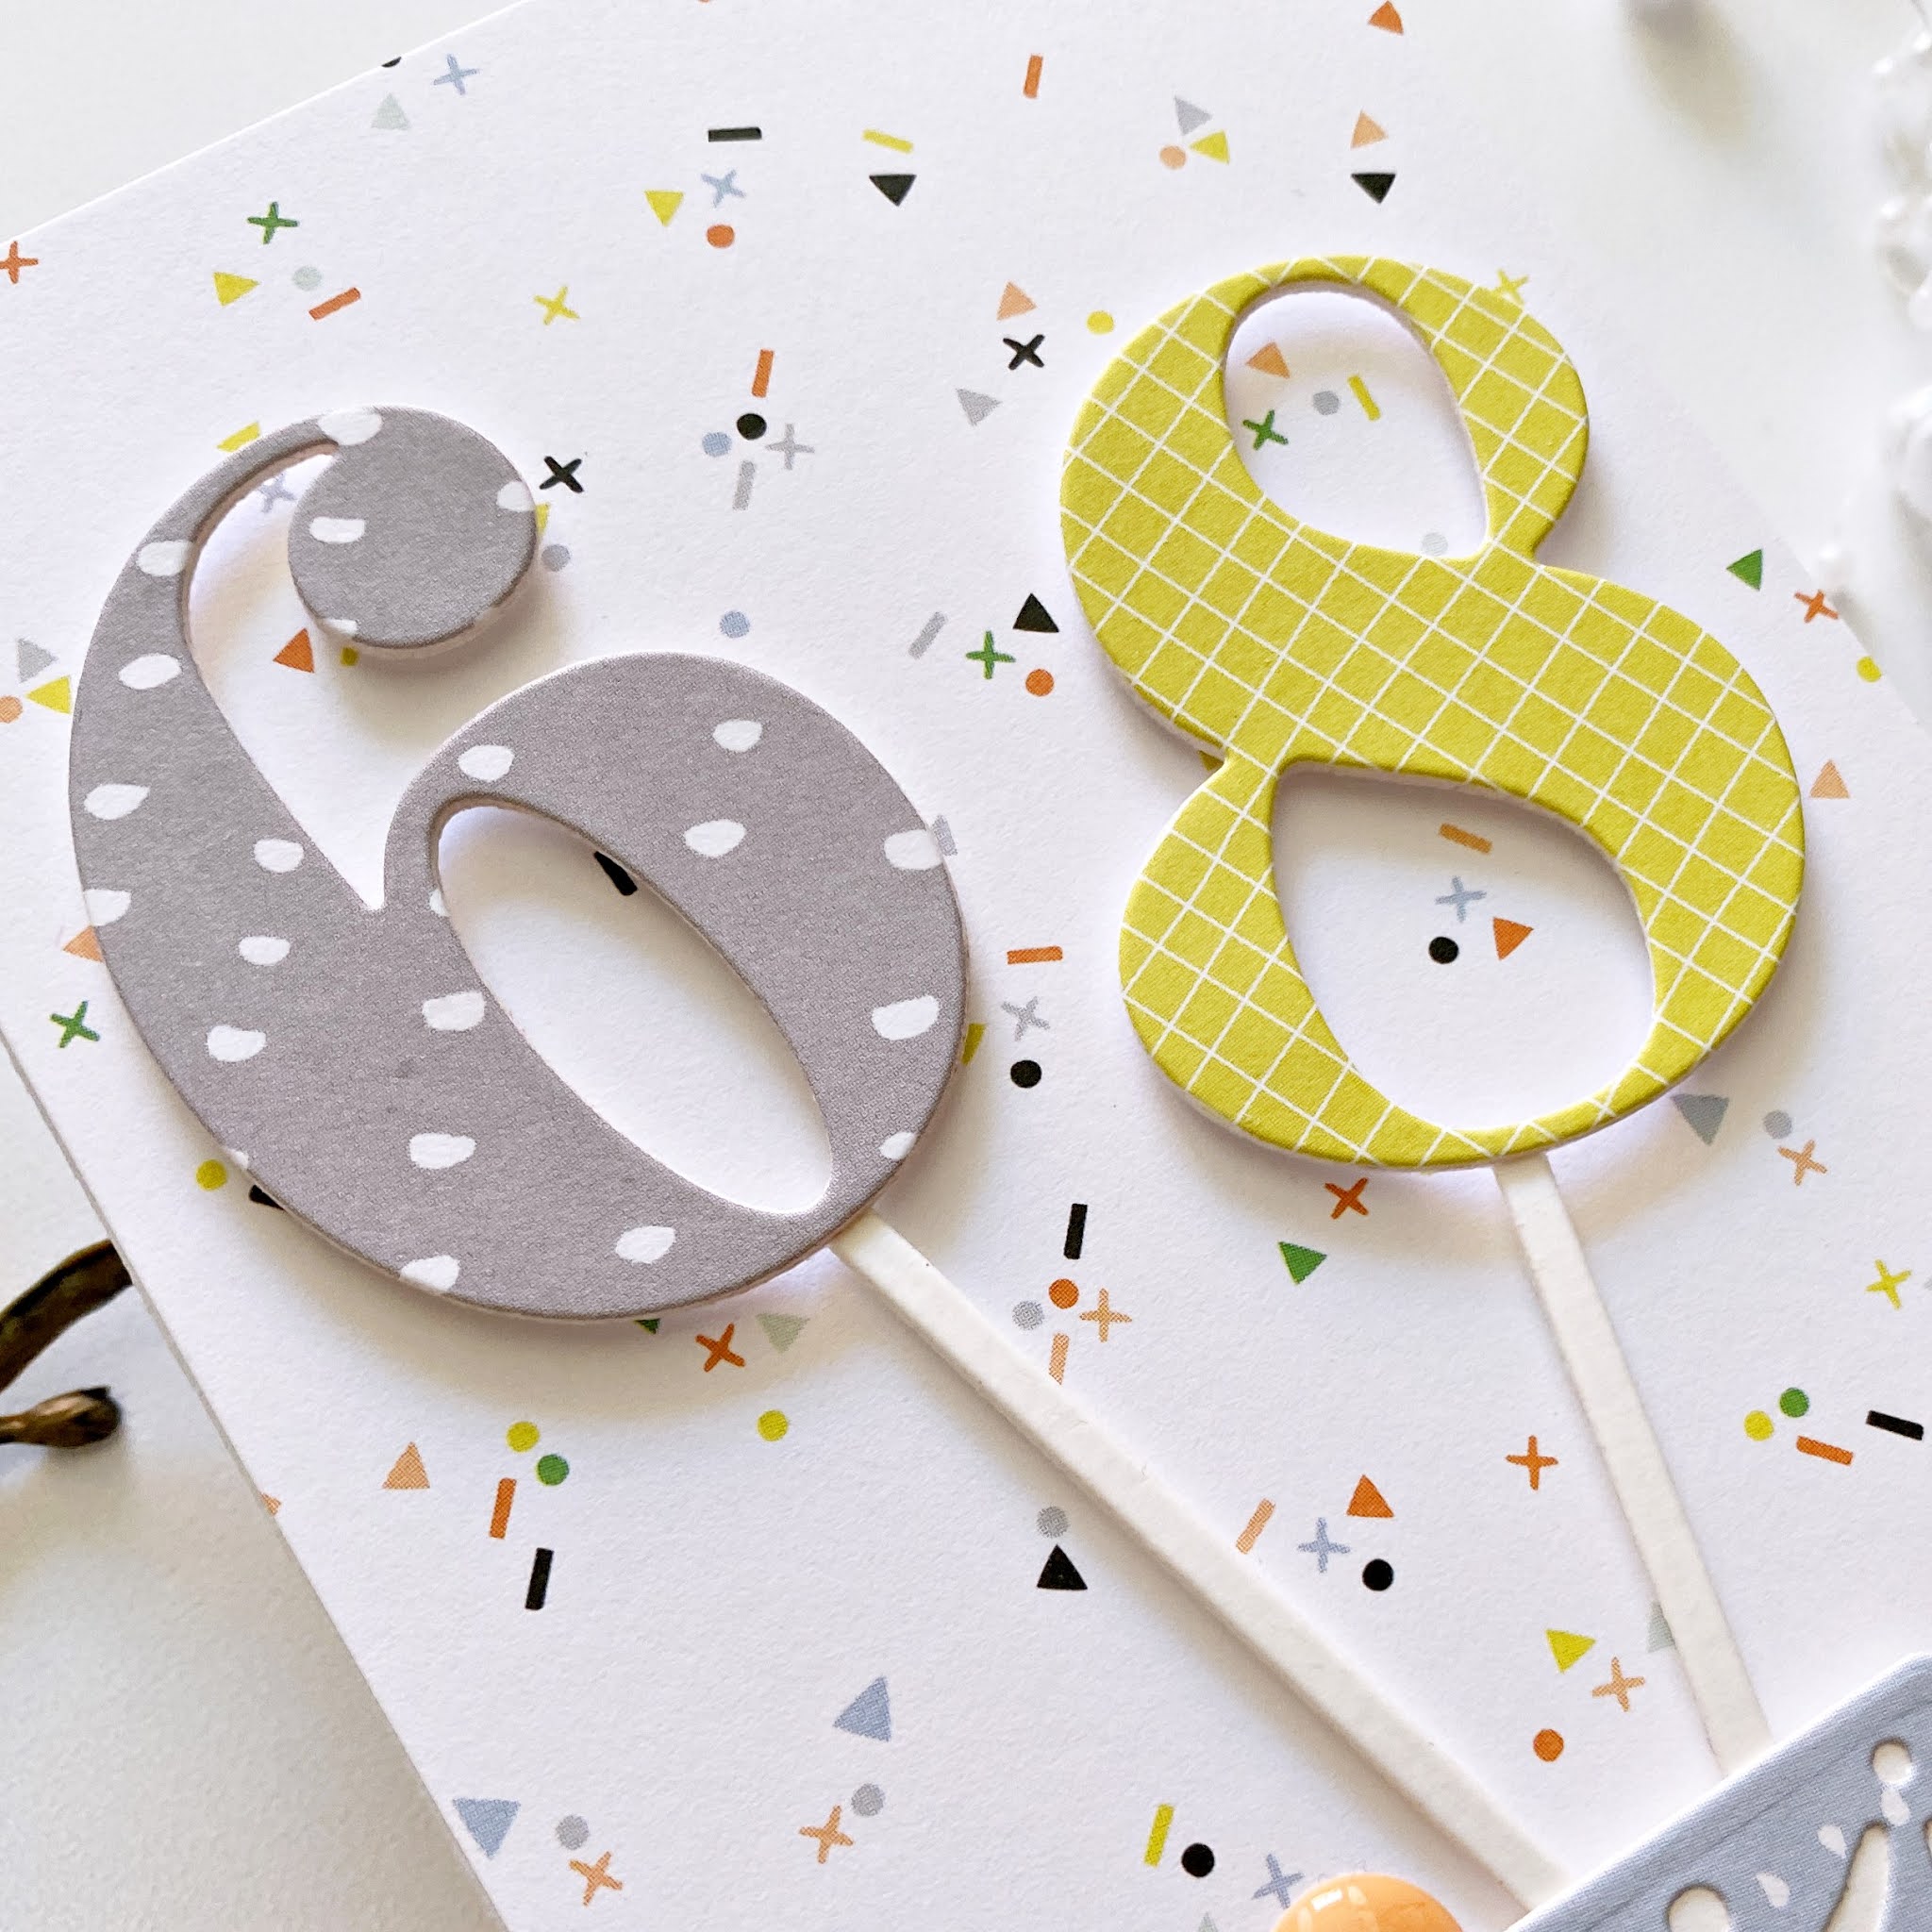
I'm going to start with the Large Die Kit of the Month, which is a super fun set. I'm sure all of you will love this one, because we all NEED it in our stash! Jumbo numbers! Whaaaaat?! Take a look!
Super easy to make birthday, anniversary, save the date etc cards with these, the sky is the limit! I've paired them with an older Spellbinders die set, that is unfortunately not available anymore and I only noticed when I was working on my supply list - but I've found two sets that are similar and you can achieve similar results with! Here they are:
I've used the Pinkfresh Studio Case of the Blahs collection - not because this is a party themed collection, but because the colors are great for fun masculine projects! Blue and lime green are my all time favorite colors and this particular blue (kind of periwinkle I'd say?) is just stunning.
I then created a second card, which is pretty much the same as the first one, except this one is feminine and I added a few girly touches, like flowers and a fabric bow. The papers, bow and enamel dots are all from the Pinkfresh Studio Days of Splendor collection. This is a gorgeous fall collection with amazing colors, but you can use it for so much more!
You can find the process video for the February Large Die Kit cards here:
Moving onto the Small Die Kit cards! I created two cards in a new to me format, that's apparently the newest thing in cardmaking? These are 3 1/4 x 6 1/4" mini slimline cards - I think it's a super cute format! I'm not sure if you can really tell from the photos, but they are small! Maybe it's easier to see in the process video, compared to my hands.
With this panel you can also create an A2 size card, if you die cut it twice and place the two die cuts side by side. The possibilities are endless!
I used the same Pinkfresh Studio scrapbook collection on these cards as before:
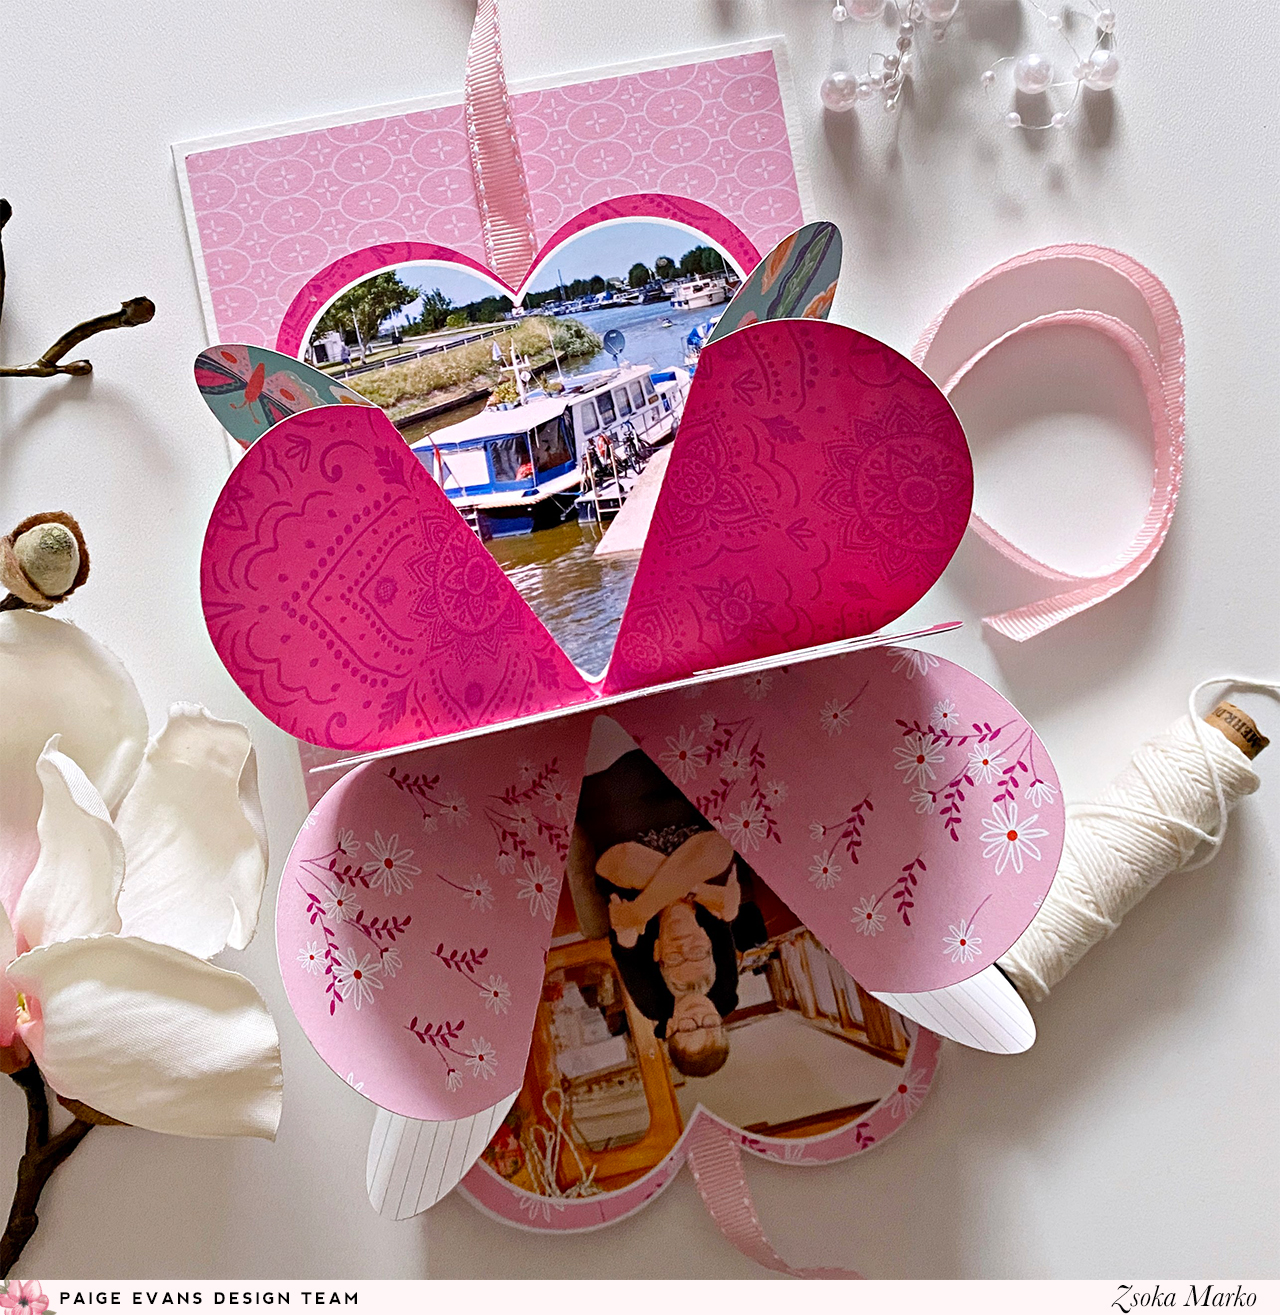
I'm stopping by today to share my newest projects I've created for the Paige Evans Design Team! Since Valentine's Day is creeping up on us, I thought I'd make some cards for the occasion. Not that we actually celebrate this day, but with the pandemic going on, I do mail cards to my parents more often than I normally would and my mom anyway has what we call name-day in Hungary on February 12, so 2 birds one stone, you know :). Since I made one for my parents, obviously I also made one for Martin's mom (and need to make one for his dad as well, but at the time I'm writing this post, that card is not ready yet).
I called these "cards with a twist" because the hearts reveal some photos when you open them. Both cut files I used are for mini albums, but I thought they would be perfect for my purposes.
In retrospect, I should have used the Folding Hearts on both, because that one ended up being less thick (better for mailing) and fits bigger photos too. I like both though, and for mini albums, where you don't need to worry about thickness, they would be both just as adorable!
I used the Go the Scenic Route collection and went with a pink/orange/red color scheme. I love this combo so much, it's cheerful and fun! Once I selected my papers, I sat down to my PC and sized the cut files to the right size - for this I drew a 5x7" rectangle, which is my card size, and placed the hearts on it, to see what size I want. Then I scaled down the cut file (all pieces grouped together). I then die cut everything I needed for both cards and printed my photos in the right size and shape too (for my first card I used heart shaped photos).
Putting together the heart is self-explanatory, you just need to fold the paper along the lines, and you'll see it all come together. I did film the process though, you'll find the link to the video at the end of this post, if you're more the visual type!
Once I glued all the hearts together, I added my photos as well. I only added two card stock stickers to embellish the photos, because I didn't want to add more dimension to the card. I was somewhat sad because I love layering things up!
I then started working on the card bases. They are very simple, I started with a layer of white card stock, then a slightly smaller patterned paper panel. And because I love adding patterned paper strips at the bottom of everything, I did that here too.
To close the heart, I added some ribbon - which I glued in between the folded hearts and the front cover. I also adhered a piece of heavy weight card stock to my heart cover, so it is sturdier and added some machine stitching for interest. Then I glued the mini onto my card front.
Finally, I decorated the front of the mini - for this I used a few flower die cuts from the ephemera pack. For my sentiment I selected letters in matching colors from the Puffy Word Stickers pack. I like to mix and match letters from this pack instead of using the words that are in there. I stitched these down on a piece of white card stock, which I then tucked under one of the flowers.
The mini album is a bit different on the second card - I needed 3 sections to have enough space for 4 photos, on the other one 2 was enough.
I die cut the base of the album from white card stock and used patterned paper for other pieces that you need to glue on the base to make your mini fun and colorful. This album is pretty straightforward too, as you fold and glue the pieces together, you'll notice which way to fold each section so it all collapses the right way.
Again, I only added 2 card stock stickers to avoid adding more bulk to the card. It's quite boring this way, but I figured, these are cards in the first place, so the hidden photos are already a bonus haha!
Originally, I was planning to punch holes and use eyelets on the right side of the heart, to close it with a ribbon, but I realized that the heart would then open up on the left side. So, I ended up adding the ribbon the same way as on the first card, but this has a downside too - the album doesn't open up the way it was intended. You can still open it and see the photos, but the album won't unfold completely. I guess that's OK though, in this case. If it was a mini album, I would probably just wrap something around it, that is removable.
Because I love the paper I used for the cover so much and even made sure I die cut the heart from the part of the paper that had all these colorful little hearts on it, I obviously was not going to cover it all up with embellishments. That paper is just too special! So, I decided to only add a sentiment. To finish off this card, I placed a few glitter enamel hearts on the paper strip at the bottom. They are the perfect colors too!
That's it! I hope you like this idea and will give it a try sometime.
Oh I almost forgot to link in the Process video! Here it is:
I managed to finish the third card, that I mentioned earlier, too, but I don't want to re-write the whole blog post, so I'll just add some photos here. This is the same as the first card, only with different patterned papers. I love blue, so this one may actually be my favorite!
Thanks for stopping by today! Have a wonderful day!