I'm back with a new layout today for the Paige Evans Design Team! I've used the lovely Wonders collection on this page.
I seem to be on a circular type design roll lately, because my previous layout featured a butterfly spiral, the one before that a large, layered flower and this one today has a large rosette. So basically, all of them have a big circular design element hmmm. I should remember to do something different next time ha!
Anyway, Paige had a virtual layout class recently, where she created a wreath design from smaller rosettes. I really wanted to try to create rosettes, but then I decided to make just one large one. I followed her instructions - it doesn't matter what size you create; the steps are the same. The number of petals is always 8 as well, as it turns out (I've tried several sizes to see what fits best on a 12x12" page).
I chose 8 papers (in rainbow colors) for my rosette and measured 5.5" on two sides, starting from the corner. I connected these two marks using a pencil and a ruler, to get an isosceles. I then cut off these triangles using my guillotine trimmer.
I took each triangle and scored them right down the middle, just so I knew to which point I have to fold in the two sides. It's probably better if you watch the process video, because I'm terrible at explaining things. I'm a visual type, I absolutely cannot follow written instructions, so I suggest you have a look at the video, if you want to see how to create the petals! Super simple - it's just hard for me to explain.
I then die cut a circle, maybe 3-4" in diameter, and glued the petals on it, so I could move the rosette easier, checking what background I want to use. I settled on this light green patterned paper - I liked that the circular design tied in so well with the rosette. I glued down the rosette.
I added some foam tape to my photo and placed it in the middle of the rosette. For my title I chose a chipboard sticker. Next, I glued down the right side of each petal, because I wanted to tuck my embellishments into the openings. I selected a few chipboards, card stock stickers and ephemera pieces in coordinating colors and glued them down using liquid adhesive.
I adhered a chipboard tab next to my rosette and wrote the date on it. Finally, I added my journaling.
Super easy and quick! I hope you like how it turned out!
Here's the video if you're interested:
Thank you very much for stopping by today! Have an awesome day!
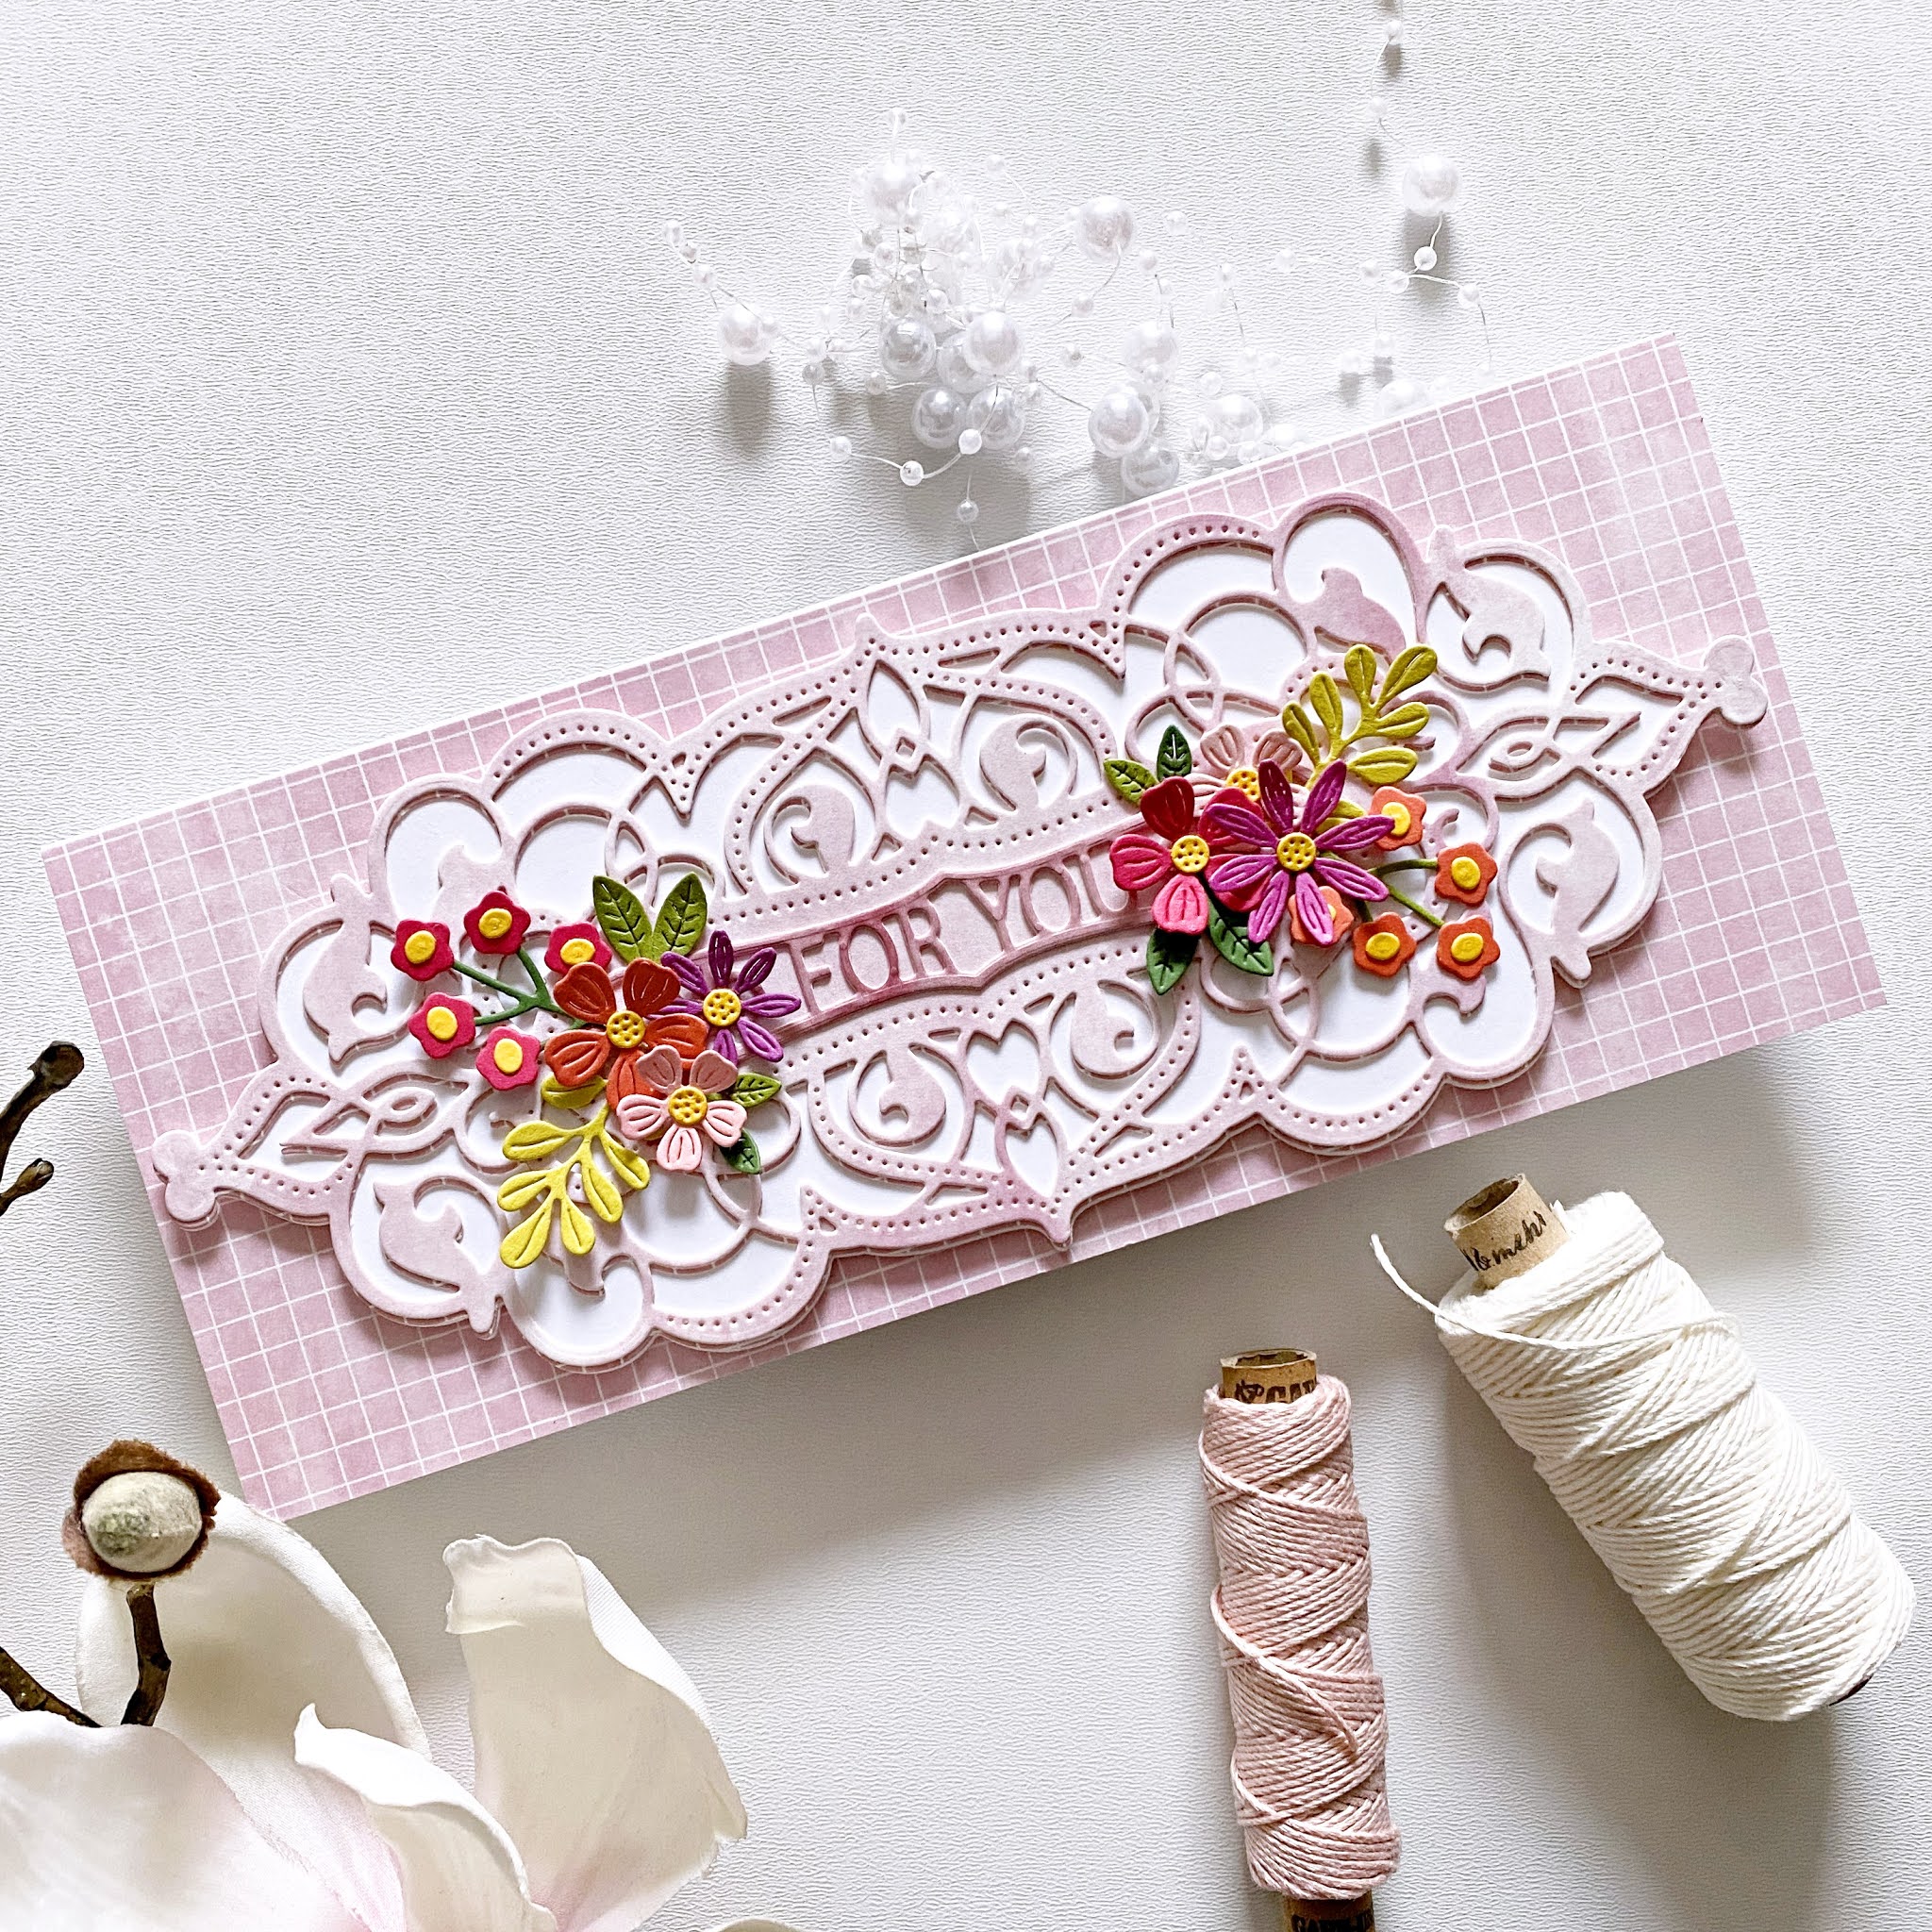
Today I'm stopping by to share two cards that I've created with the new, Stained Glass Bouquet Collection by Becca Feeken for Spellbinders. I've used two sets from this line and I'll link them in at the end of this post, should you be interested.
Here's the card duo I created this time:
All details on how I've made these cards are in the process video:
Unfortunately a part of the footage was damaged and I wasn't able to recover it - so the end of the video is missing, but I was only showing how I created the simple yellow patterned card base for my second card, so nothing complicated or important. I apologise for this, in any case!
I hope I could inspire you in some small way today! I'll be back soon with some new projects using fab new Spellbinders products so be sure to stop by my blog and YouTube! Happy crafting!
Today I'm back with some new cards with the beautiful new Slimline collection from Spellbinders! I've used two die sets from this line, you'll find them linked in at the end of this blog post.
Here's the card duo I created:
Instead of a step by step here, I have a process video for you:
I hope I could inspire you in some small way today! I'll be back soon with some new projects using fab new Spellbinders products so be sure to stop by my blog and YouTube! Happy crafting!
I'm stopping by to share my newest layout with you that I've created for the Paige Evans Design Team. Most important news, Wonders is in the house yay!!! I'm so excited! I couldn't wait to create with this gorgeous new collection!
I don't know about you, but I like to sit with a new collection for a few days. Like literally, I put it next to me on the couch and go through it many times over the course of a few days. I like to soak it all in and see what speaks to me. While I wait, I usually take the papers that are good for fussy cutting, start Netflix and just start cutting away! One of those papers was the butterfly paper. I was planning to use something else first, but then these beauties were calling my name!
Once you fussy cut all butterflies (I've used them all on this page), the layout comes together super quick. I arranged them into a spiral around my photo (which I die cut using a basic stitched circle die then added a cardstock circle behind it and some foam tape for dimension). Some of them have two layers, because I had more than I needed but I didn't want to save them for another project.
I then glued them all in place - adding just a little bit of liquid glue in the middle. Next, I stitched them down, then I bent up their wings.
I went through all the embellishments and picked out a few that went with my photo and also the colors of the butterflies. I added foam tape to all, then adhered them to the background. For my title I chose one of the chipboards. I looove chipboards!
Last but not least, I added my journaling and some white paint splatters. If you look closely, you'll see that the paint wasn't even dry when I took these photos hahaha!
You can watch the process video on my YouTube channel if you're interested:
That's it! I hope I could inspire you in some small way!
Thanks so much for stopping by! Have a beautiful day!
I'm back today with a new layout for the Paige Evans Design Team. As I was looking for some old project of mine a while back, I also found some layouts I thought I'd scrap lift at some point, and this is one of those pages. The original is from a few years ago and I actually also made it with one of Paige's collections, Pick Me Up. I'd link it in, but I don't have a blog post for it. It's only there on my old Instagram feed that I only kept so I see all my old projects in one place. Because finding photos on my computer is next to impossible really...
Anyway, here's the updated version! As I'm (not so) patiently waiting for Paige's beautiful new collection, Wonders, to arrive on my doorstep, I'm revisiting her old ones. This time, Whimsical.
My idea was, that this time I would go with rainbow colors, as in, I would die cut each layer of the flower from a different color, from purple to yellow. I wanted to use this gorgeous purple ombre paper for my background, so the largest layer of the flower had to be purple.
The cut file I've used is the Layered Flower (Design ID: 268549). I blew up the cut file to the size I liked, and die cut each piece.
I shaped the petals with my fingers (I am showing this in the process video) and glued down each layer. I used liquid glue for this - I didn't need foam tape because the petals created so much dimension already. I attached a yellow button with twine in the middle of my flower.
I arranged my photos and embellishments (lots of word/sentiment banners from one of the patterned papers, a die cut butterfly, a chipboard butterfly, some stickers). I stitched a butterfly charm onto one of my photos. Once I was happy with the arrangement, I glued everything down.
I also used some of the rub on stickers - I added these to my background.
As for my title...Well I wanted something along the lines of Sunday Walk, or something to do with walking and friends, but then I also wanted to use purple letters. And I obviously didn't have the right letters in purple. So, I did something I have never done before: I wrote down each letter I had in purple and tried to form a meaningful word, you know, Scrabble style haha! That reminds me, I haven't played Scrabble in over 15 years for sure. I'm going to make a note right now, so I introduce my kid to this fun game! I'm not even sure where my Scrabble is. I probably didn't take it with me when I moved to Germany 16 years ago!
Anyway, to my surprise, I found my title within seconds! My Heart - good enough LOL!
I glued down the alpha thickers, then I added my journaling and date with a white gel pen. Last but not least, I splattered some white acrylic paint all over my background.
Done, done, and done! Super simple and it came together really fast too. Having said that, I'm sure it was fast because I literally copied my previous page. Normally I spend so much time on my layouts because I figure out the design as I go.
You can watch the process video on my YouTube channel if you're interested:
That's it for today! I hope I could inspire you in some small way!
Today I'm back with projects with a super cool new die set from Spellbinders, the Simply Perfect Color Block Slices Etched Dies! Just imagine all the amazing backgrounds you can create with these simple dies! I'm sure this set will be very popular and rightly so! I for one, am in LOVE!
Here's the card duo I created this time:
Instead of a step by step here, I have a process video for you:
I hope I could inspire you in some small way today! I'll be back soon with some new projects using fab new Spellbinders products so be sure to stop by my blog and YouTube! Happy crafting!
It's that time again! The Spellbinders April Club Kits are here! And they are absolutely gorgeous again!
I will not go into step by step tutorials here, since I made process videos for all of today's projects - I'll just attach some photos! I'll link the videos down below, after each set of cards. You can also subscribe to my YouTube Channel and press the bell icon so you never miss a new video! You'll find all the supplies I've used linked in the description boxes of the videos.
As a reminder, Spellbinders have several monthly kits, which are really great! You can subscribe to: