Showing posts with label wood veneer. Show all posts

Thursday, December 6, 2018

Altenew December 2018 Artist Markers Set E + Scrapbook Embellishments Release Blog Hop

Hello crafty friends,

I'm super excited to join the Altenew December 2018 Artist Markers Set E + Scrapbook Embellishments Release blog hop! You should have arrived here from the Altenew Scrapbook Blog!

When I saw the products in this release for the first time I wanted to do a happy dance, because you guys, ENAMEL DOTS!!! They are my all time favorite embellishments and I especially love the ones where you have one color in different shades in a pack! And that's exactly what Altenew did here. They are even matching their ink colors! I die.

So most of all, I wanted to create something colorful! I also wanted to use the new Artist Markers Primary Colors set because it's so fun and full of color and life!


I went with some of my favorite stamp sets: Leaf Canopy and Ditsy Prints. Both are perfect for some simple, flat coloring as they are small images. First I created two A2 size top folding card bases. I then started stamping onto an A2 size white card stock panel. I used black ink to stamp my main images and light gray ink to stamp some of the solid images in the background. I stamped my sentiment in black too. I then quickly colored in the leaves. I decided to add some pencil details to them too. To embellish my card I used a few enamel dots in different colors.


On my second card I did pretty much the same thing, but here I used a few shades of gray ink for the background pattern, since this is a layering stamp set. For my focal image I used black ink, the Artist Markers and some color pencils. This time I white embossed my sentiment on a wide strip of black card stock. Notice that I totally messed up the stamping at the bottom, but by then most of the card was already ready and I didn't want to waste it...This wide sentiment covers up some of it and distracts from my mistake. That's what I'm telling myself anyway hehe! A bunch of beautiful enamel dots finish off this card too.


On my third card I used another scrapbook embellishment, namely a wood veneer word. I embossed LOVE with the gorgeous Razzleberry crisp embossing powder; I added two layers for a better coverage. 


I cut a piece of patterned paper (from the Reflection kit), slightly smaller than my A2 size card base. Using the Leaf Canopy stamp set, I embossed this patterned paper with the same Razzleberry crisp embossing powder. I love the monochromatic look! I wrapped some mauve/gold twine around this panel and using foam sheets, I mounted it on my card base. I glued down the wood veneer and added some light pink enamel dots, done!


And now...Giveaways, yay! Read on to find out how you can win! Good Luck!

Prizes: 
1. To celebrate this release, Altenew is giving away a $50 gift certificate to 6 lucky winners! Please leave a comment on the Altenew Card blog and/or Altenew Scrapbook blog by 12/12/2018 for a chance to win. 6 winners will be announced on the Altenew blogs on Sunday, December 16th, 2018!

2. I will also draw a winner to receive a $30 gift certificate! I will announce the winner on 12/12/2018.  Comment away!!!

*********************************************************************************
GIVEAWAY NOW CLOSED!

Thank you all for your sweet comments! I apologize for not answering all, I'm only able to answer from my phone and it takes ages. For some reason answering from my PC hasn't worked for months and I can't figure out why :(. I'm really sorry!

My winner is Martha (comment on Dec 7)! Congratulations!!! Please contact me at mzs6666@googlemail.com so I can tell you how to pick up your prize! XXX

*********************************************************************************

Thanks so much for stopping by today! Your next stop is Virginia Lu's blog.

Enjoy!

X

Wednesday, December 13, 2017

Merry - DT layout for Paige Evans + Silhouette

Hey there friends,

I'm sharing a new layout today that I created for the Paige Evans + Silhouette Design Team.

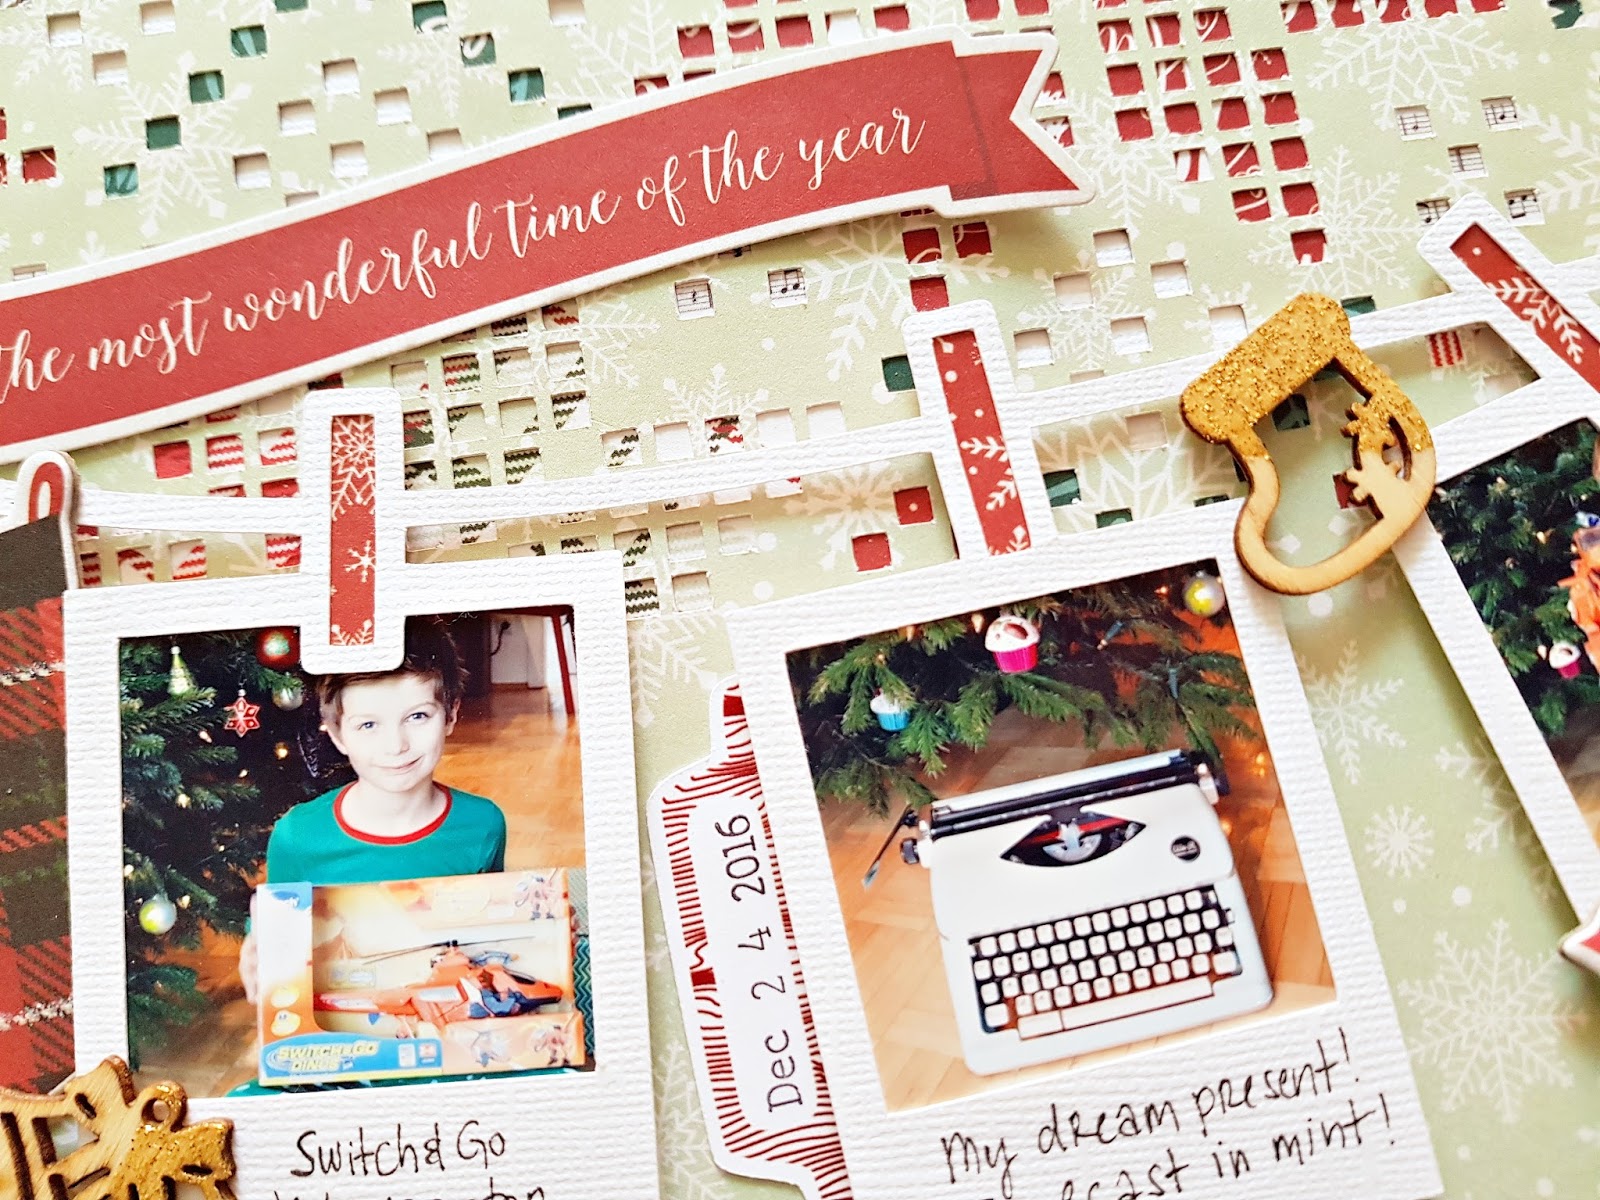
I used two cut files on this page, the Poinsettia Nordic Background (ID: #228022) and the Polaroid Frame Border (ID: #228024).


I only cut the middle part of the cut file and backed it with different papers from My Mind's Eye Comfort&Joy and Crate Paper Falala. My background paper is from the MME Comfort & Joy collection.

Then I designed the rest of my layout in the Studio program to make sure my idea doesn't only work in my head! 


Now, I generally don't use more than 1-2 photos (and never bigger than 4x4) on my layouts because I love working on the background design as much as I love having my photos documented. I realised I have many photos from Christmas last year that I haven't scrapped yet and when I saw the Polaroid Frames cut file I thought it would be a great way to use several photos at once.


I wanted to create two banners to hold 8 pictures, I figured otherwise I'd never catch up on documenting everything ha! I however wanted my photos to be a bit bigger than what the cut file provided, so I sized them in a way my photos fit (I'm not sure about the size now, it's what you get when you print 4 square photos with border on your Canon Selphy, maybe about 1.5x1.5 inch?) and then cropped them (I have 4 frames instead of the original 5 in the cut file).


I backed the little clothespins with patterned paper then adhered my photos behind the frames. I put foam adhesive behind each frame to pop them off of the background. 


I added many little pieces of embellishments to the clothesline and the frames: chipboards from MME Comfort & Joy and Christmas on Market Street, wood veneers which I partly embossed with gold embossing powder. I also found this chipboard banner I've been hoarding, waiting for the perfect opportunity to use it. Well I guess this was it! 


I wrote a couple of words on each frame instead of a long journaling and added my date to finish off my layout.

I hope I could show you a different way to incorporate many photos into a page design! Give it a try, it's fun! 

Thanks for stopping by, have a great day!

X


Tuesday, October 3, 2017

Take a break - #moodboardgirls

Hey there scrappy friends,

I can't believe it's October already!
We are back today with a new mood board and lots of inspiration!

Our beautiful October mood board was created by the super talented Anke. These fall colors are just so gorgeous right? I love the changing leaves in fall, however as I'm writing this it just looks miserable outside, rainy and windy and no color at all. Well, grey! So instead, let's enjoy the oranges, browns gold and blue in this mood board!


Photo Credits: Chestnuts (Anke's own) * Acorns * Pumpkins Green * Leaves * Mug * Blanket * Pumpkins white and orange * Bicycle * Wood (Anke's own)

And here's my layout:


I went through my stash looking for things to use. I was sure I have no brown papers and orange probably only in Halloween collections! But I found different wood grain papers that I thought would be a good fit as well as some shades of oranges yay! Gold was a bit more problematic, the only piece I found was some scraps from a recent Scrapbook Werkstatt kit. I used this one to cut a big circle and used the rest of the colors for leaves which I also cut with my Cameo. Some of them I stitched down in the middle for some interest.


I printed my photo in a large size to put behind my circle. I adhered this down and arranged all my leaves at the right/bottom side of the photo. I added my title and a few wood veneers and chipboards for embellishments. I also used some gold rub-ons around my circle.I wrote my journaling on the left to have a balanced look.


To finish it off I sprinkled some gold ink around.

I hope you find something here today to inspire you to get your crafts on!

Here's our line up this month (in no particular order):

Check out all these amazing Ladies too!

Have a great day and thank you for stopping by!

X

Zsoka

Tuesday, August 29, 2017

Explore - DT layout for Just Nick

Hi there crafty friends,
 
Zsoka here with you today with a new layout. I chose the Sunburst Background 2 cut file for this, I just love it!
 
https://justnick.myshopify.com/collections/all/products/sunburst-background-2
 
 
I'm not sure if you can tell, but I modified the cut file a little bit. When you blow it up as big as I did, the outlines will be much thicker. I wanted them thinner so more patterned paper shows through once I back the rays. I released the compound path, deleted the original outline, made the circle thinner, then I made a compound path on the two circles. I moved the circle out of the way and added outlines to the rays, made compound path and moved them into the circle so that the rounded ends disappeared. As a last step I welded the circles and the rays together. I hope it makes sense?
 
 
A while back I received the Simple Stories Summer Days collection kit from the awesome SCT magazine and haven't had the chance to use it yet. So I decided to use it for this layout. I also used bits and pieces from Freckled Fawn (like that awesome acrylic word, the flip flops and wood veneer) and the wood grain paper is from Jen Hadfield I believe.
 
First I printed my photo in a big size and glued the cut file on top. Then I backed the rays with different patterned papers, but only glued them down where they touch the circle. This way the white card stock can be lifted up a bit to create a nice dimension.

 
I used the acrylic word for my title and created a little cluster at the bottom of the page with it. I really like the look of this.

 
I didn't feel like this page needed a lot of embellishments. I just added a few bradz, wood veneers and some cloud stickers. Oh and a mini clothespin I got at Michaels!


I hope you like how this one turned out! Thanks for stopping by! Till next time,
X


Thursday, August 3, 2017

#Relax - #moodboardgirls

Hey there scrappy friends,

Do you still remember our #moodboardgirls initiative from a couple of months ago?!
After a much deserved summer break we are back!

This month the mood board was created by the awesome Birgit! It's fresh and summery, perfect to scrap those summer photos! I love the colors! Birgit compiled this mood board from her own photos - look at those blues! Gorgeous!
Again, there's no blog hop or prize or anything, just inspiration. We all are very different style scrappers, from casual and simple, elegant and delicate to messy and complex, so I think we bring something for everyone here today. Come check out all projects on Instagram!
This is my layout based on the mood board:


Thanks to Christin we now have our own little banner yay! So cute no?

Here's the list of talented Ladies who participate in this little get together this month (in no particular order)! Check out their projects on Instagram, ENJOY!
Have a great day you guys, thanks for stopping by!
X

Monday, June 26, 2017

Goodbye - DT layout for The Cut Shoppe

Hey friends,

So here I am with my last layout for The Cut Shoppe! I am so very grateful to Ashley for this wonderful year! She was the first scrapbooker whose work stood out for me and who I found very inspiring! She is the reason I bought my Cameo back then and started using cut files. Besides being so creative, she is also an amazing, down to Earth person, who has helped me grow in many many ways. I am sad there will not be a TCS DT anymore, but I am sure I will keep using Ashley's cut files! 

As for my layout. I thought it would be fun to create a layout saying goodbye to The Cut Shoppe! For this I used  the Thin Line Alpha and the Open Your Heart cut files.


I'm always trying to use older collections for my TCS layouts, otherwise I never get to and it would be a shame. Here I used Paige Evans' super pretty first collection, Fancy Free, for Pink Paislee.  I love the colours, patterns and awesome embellies in this collection!

I cut both files out of white textured card stock. I backed the letters with a pink ombre paper, so the top letters are more pale. The heart cut file I backed with a citrus green ombre paper, again, the lighter colours are towards the top of the layout. 


I then fussy cut some flowers and leaves from one of the 12x12 papers. I played around a little bit with placement until I found their final spot. 

I used some foam adhesive to pop up the letters so they stand out more and so I can tuck the flowers behind them.


Since the layout is quite white and so is the background of my photo, I layered a few different patterned papers behind the photo. This way it didn't get completely lost. 


I added a couple embellies, not many because I already had a lot going on. Just a few buttons, a wood veneer tab and a puffy sticker.


To finish it off I wrote up my journaling and stamped my date.


I hope you like my layout! Even though this is my last one for The Cut Shoppe, I promise I will be back with more cut file inspirations soon!

Thanks so much for stopping by today!
X