Showing posts with label chipboard. Show all posts

Wednesday, December 13, 2017

Merry - DT layout for Paige Evans + Silhouette

Hey there friends,

I'm sharing a new layout today that I created for the Paige Evans + Silhouette Design Team.

I used two cut files on this page, the Poinsettia Nordic Background (ID: #228022) and the Polaroid Frame Border (ID: #228024).


I only cut the middle part of the cut file and backed it with different papers from My Mind's Eye Comfort&Joy and Crate Paper Falala. My background paper is from the MME Comfort & Joy collection.

Then I designed the rest of my layout in the Studio program to make sure my idea doesn't only work in my head! 


Now, I generally don't use more than 1-2 photos (and never bigger than 4x4) on my layouts because I love working on the background design as much as I love having my photos documented. I realised I have many photos from Christmas last year that I haven't scrapped yet and when I saw the Polaroid Frames cut file I thought it would be a great way to use several photos at once.
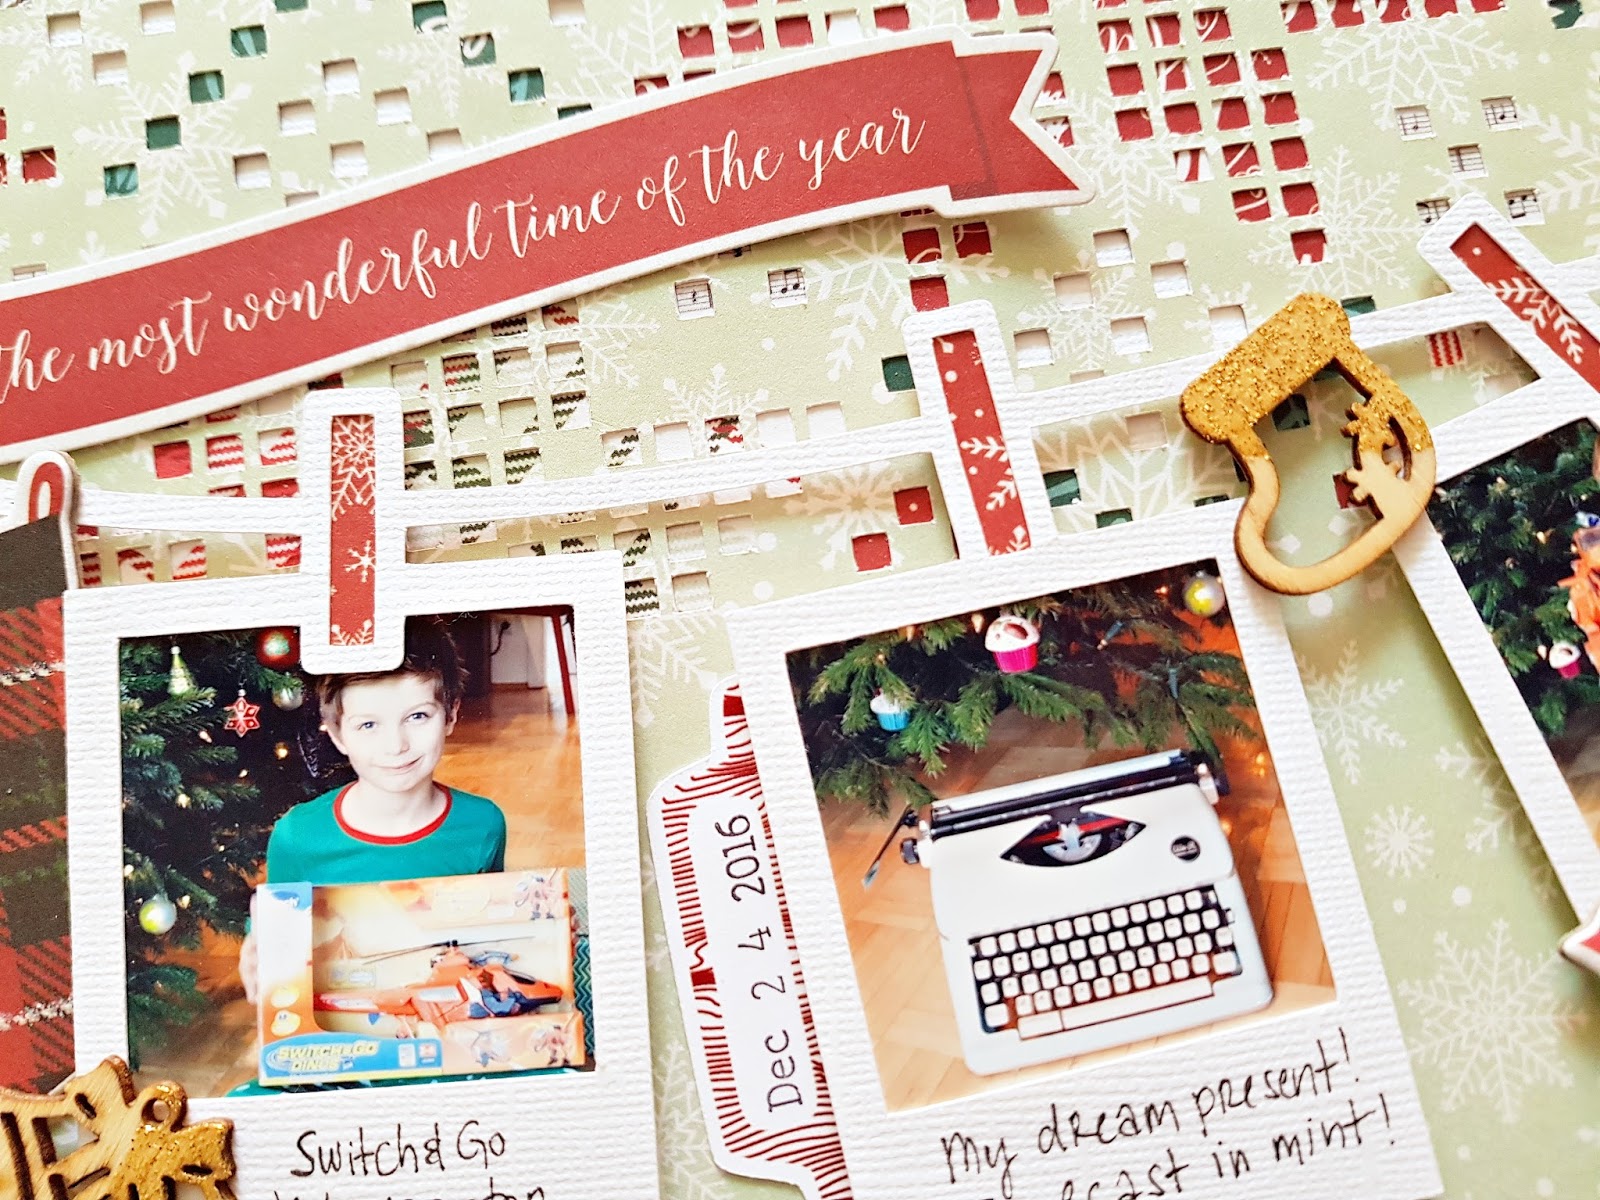

I wanted to create two banners to hold 8 pictures, I figured otherwise I'd never catch up on documenting everything ha! I however wanted my photos to be a bit bigger than what the cut file provided, so I sized them in a way my photos fit (I'm not sure about the size now, it's what you get when you print 4 square photos with border on your Canon Selphy, maybe about 1.5x1.5 inch?) and then cropped them (I have 4 frames instead of the original 5 in the cut file).


I backed the little clothespins with patterned paper then adhered my photos behind the frames. I put foam adhesive behind each frame to pop them off of the background. 


I added many little pieces of embellishments to the clothesline and the frames: chipboards from MME Comfort & Joy and Christmas on Market Street, wood veneers which I partly embossed with gold embossing powder. I also found this chipboard banner I've been hoarding, waiting for the perfect opportunity to use it. Well I guess this was it! 


I wrote a couple of words on each frame instead of a long journaling and added my date to finish off my layout.

I hope I could show you a different way to incorporate many photos into a page design! Give it a try, it's fun! 

Thanks for stopping by, have a great day!

X


Thursday, October 5, 2017

In the spotlight: Cocoa Vanilla Studio - Bohemian Dream at Scrapbook Werkstatt

Hi there,
 
I haven't done this in a while so I thought it would be about time...Here's a summary of my projects I created with the beautiful new Bohemian Dream collection!
 
I'll be honest, I prefer Wild at Heart from Cocoa Vanilla, but this collection is still gorgeous. I am crazy about the floral paper! And there are some new products in this collection too: 6x6 paper pad, a stamp set and white chipboard titles. You can buy all these and more at Scrapbook Werkstatt! The embellies might be sold out now but not to worry, a new batch is on its way. So if you missed out on this collection, make sure you keep checking the SBW website!
 
Without further ado...these are my projects:


Hope you like them! Should you have any questions, just write a comment :).

Thanks for looking and have a great day!


Supply list:


Wednesday, September 27, 2017

Look who's back - DT layout for Fancy Pants Designs

Hi there friends,
 
I'm back with another layout I made for Fancy Pants with the awesome Family&Co collection! This plaid paper is my absolute favourite! I love the bright colors in it.
 

I decided to go with a die cut title. I just selected a font and then typed up my title. I drew two rectangles and welded my letters with them, one for the top, one for the bottom of the layout. I glued these in place then hand stitched around them, using two different color floss, orange and dark teal.


My son lost his favorite toy, a hand puppet called Mr.Yummy (actually he is called Mr. Jummy in Dutch - he was the mascot of Sultana in Holland) during our summer holiday. He was so extremely upset, he just kept crying for days. We were all heart broken because I got Mr. Yummy when I was pregnant and he was with Maxim for almost 9 years. The hotel didn't seem to care very much so I contacted Sultana and told them about what happened. They didn't have the hand puppet we had but they had one that is a backpack and a hand puppet in one! They mailed it to Maxim's grandpa in Holland, his dad picked it up and when Maxim arrived back from my parents' we took it to the airport with us. He was sooo very happy, he just kept saying how adorable Mr. Yummy is :). We are incredibly grateful to Sultana! This is what this layout documents.
 

I printed two 3x4 photos and placed them in the middle of the page. I layered some tissue paper and different patterned papers behind my photos to mat them. Then I added some die cut pieces around my photo and used a tag for my journaling. Actually I combined two tags to make my own.


Thank you for stopping by today!
Till next time,

X


Tuesday, September 26, 2017

Love You - DT layout for Just Nick

Hi there scrappy friends,

I'm back today with a new layout I created for Just Nick.

I chose the Graphic Background cut file for this. I have used this cut file before, but not in a long time, so I thought why not use it again?


I went with white card stock again, like most of the time... I picked the wonderful Cocoa Vanilla Wild at Heart collection for this layout. I love this navy floral paper and I thought the white cut file looks great on it. I stitched down each part of the cut file with navy thread to add some interest.


I placed my photo a bit off center, to the right, and layered a few pieces of die cuts, chipboard frame and tissue paper behind it. 


Then I started embellishing. I wanted to keep all embellishments around the photo so that most of the background is still visible.  I added lots of die cut flowers; some of them I glued down with liquid glue, others I popped up with foam adhesive to create dimension. I really love dimension on my layouts! I also used flair buttons, stickers, chipboard pieces and some resin flowers from one of the earlier Cocoa Vanilla collections. I think those are my favorites, so cute right?


I know the title is not very original, but I love the way these big chipboard letters look and well this title does fit my photo so why not? With the amount of layouts I make it's hard to come up with creative titles, especially ones that are short (because I prefer them short). So I end up with a lot of Sweet, Cute, Love, Awesome etc titles I'm afraid, especially if the photo just captures a candid moment, not any special event.


Other than the stitching, which took a bit of time, this layout came together very quickly, which is unusual for me! I really like how it turned out, I hope you do too!

Thanks for stopping by today! Until next time,

X


Saturday, September 23, 2017

Star Cards for Paige Evans + Silhouette

Hi guys,
 
I'm back today with a couple of simple cards I created using some awesome cut files from Paige Evans.
 
I thought I'd pick the same theme for both cards and I went with "Stars". The two cut files I picked were the Spooky Stars and the Bright Star.

 
Both cards are 5x5" (and both have a slightly smaller, 4.75x4.75" square layered on top of them). I sized the cut files accordingly in the Studio program and cut them both from textured white card stock. I did modify the Spooky Stars cut file a little: I cropped the star background into a circle. I chose a couple of papers in yellow-green-blue tones and backed the stars with these. I then hand stitched around the edges of the white card stock to add some interest.
 
 
I chose a chipboard sentiment for this card which I placed on foam adhesive. I then added some fussy cut and chipboard stars plus some dark blue ink splatters. To finish off my card I adhered the white card stock to a mint patterned paper base.
 
 
For my other card I sized down the Bright Star cut file to fit my background. I backed it with a coral patterned paper. I glued a floral patterned paper square on my yellow card base and placed the big star on foam adhesive to give the card a bit of dimension.


I chose SHINE (bright) for my sentiment and used some of the Turn the Page chipboard alpha stickers for this.  I added a chipboard bird above my sentiment and I was done.


These are very simple cards that you can do in no time, last minute, when the other hundred cards you have don't fit the occasion (yes, that happens to me every single time).
 
I hope I could inspire you to create some handmade cards for your loved ones, no matter how they turn out, in my experience everybody is happy to receive them!
 
Till next time!
X
 
SUPPLIES: Turn the Page collection: patterned papers, chipboard alpha, and chipboard stickers


Saturday, September 2, 2017

Paige Evans + Silhouette Design Team - wooohooo

Hey guys,

One can tell I have no Instagram account, I have too much time on my hands! Well, the whole story managed to ruin a perfectly happy day yesterday and left me without any mojo - so blogpost it is :D.

If you follow me on Instagram (or Paige), you probably saw that she is now designing cut files which you can get your hands on in the Silhouette Design Store. 

I'm so honored and excited to have been invited to her Design Team! You know that I'm obsessed with cut files, I love Paige's collections, so I feel like this is a great fit for me!


We all created a layout for yesterday, here's mine. I used the Half Flower cut file and Paige's wonderful new collection, Turn the Page.


I cut out the file from white textured card stock, 2 bigger and 2 smaller ones. I then started backing the bigger ones with patterned paper. I was actually planning to have a colorful layout but while I was backing the files I changed my mind. It happens a lot!

Once I was done, I also backed the smaller ones, but these only with one paper. Then I arranged my flowers the way I wanted them and adhered them to the background. I used some foam adhesive to attach the smaller ones to add a bit of dimension and interest.

I fussy cut a few butterflies in different sizes as well as flowers and combined these with a few other embellies: die cuts, puffy stickers and wood veneer and glued these on my half flowers.


I tucked my photo behind one of the flowers and added my title for which I used the chipboard alphas. 


I wrote my journaling, added the date, and I was pretty much done. Oh, and black splatters of course! 

Hope you like my layout! I'll be back with a new one next week! 

Thanks for stopping by,
X

Zsoka


Wednesday, July 19, 2017

Love - DT layout for Just Nick

Hi there friends,
 
I'm back with you today with a new layout for Just Nick.
 
You probably don't know this about me because I mostly do boy pages, but I've been in love with flowers ever since I was a little girl. They make me happy. I love to touch them, smell them and yes, even talk to them. A while ago I decided I will not deny myself the joy of using floral patterns and flowers on my layouts just because I don't scrap girls. They cheer me up. And Nicole does the prettiest floral cut files, doesn't she?!
 
So today again I chose a floral cut file which is quite new still. I think this is my absolute favourite one right now!


Isn't it just fabulous?!
 
I decided to blow it up a little and turn it around so it's at the top of my page. I picked the gorgeous Oh My Heart collection from Paige Evans. I love the purples in this collection! I chose a purple paper for my background, then backed the flowers with different patterned papers from this collection. I hand cut some leaf shapes from different purple papers, which I then layered on the cut file for a bit of extra dimension. I glued some foam adhesive under the cut file so I can tuck my picture under it.


At this point I had no idea what photo I want to use. It happens very often that I do the background and then I find a photo. Mostly one that is already printed so I don't feel like I'm wasting anything ha! But then I realized I actually have a color photo in which I'm wearing some purple floral leggings! So I went ahead and printed out that one. I think it fits perfectly.


For my title I picked the cute wood veneer word LOVE which I believe is from Ashley Horton's first collection, Oakley Avenue. I glued this on top of a circle scallop wood veneer from the Paige Evans Take Me Away collection.


Other than this I only added a suede bow, a chipboard, a puffy sticker, a few buttons and some enamel dots. Generally I add more embellishments but I felt like the page was finished at this point. I didn't even add paint splatters which I do on most of my layouts!


I hope I could inspire you in one way or another! Thank you for stopping by today!
X

Wednesday, July 5, 2017

Too old for snapchat? - DT layout for Just Nick

Hi there,
 
I'm back with you today to share my very first layout for Just Nick! I'm so excited to be here, thank you Nicole for the opportunity!
 
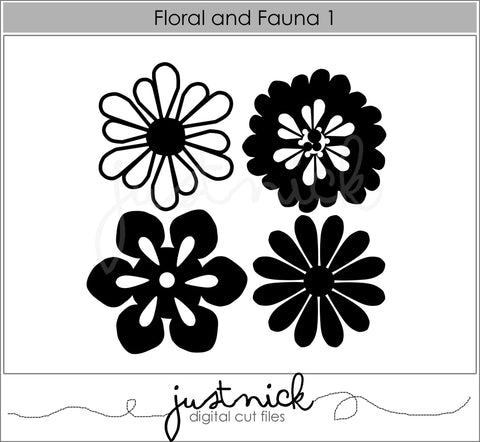
I picked one of the pretty flowers from the Floral and Fauna cut file set.
 
 
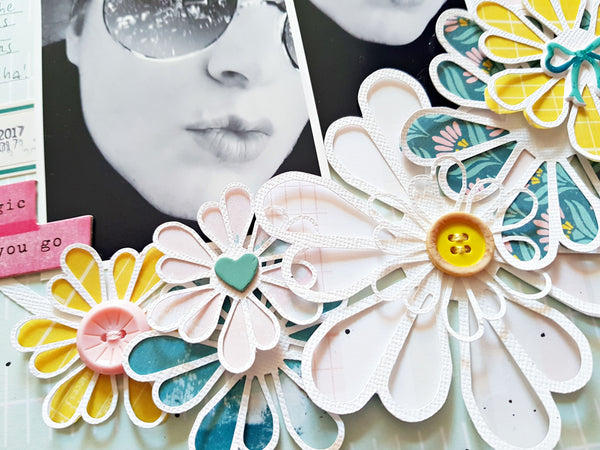
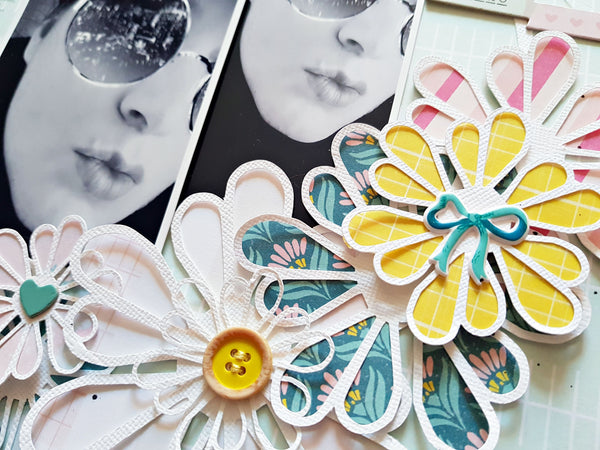
First I cut out a simple ring, then I cut several of the flowers, in different sizes. I backed my flowers with different papers from the gorgeous Maggie Holmes Chasing Dreams collection.
 
 
I created a bigger and a smaller cluster of flowers opposite each other on the ring. I added a few different bits and pieces to the middle of them: buttons, chipboard and puffy stickers.


I printed my photo in a couple of different sizes, I wasn't sure which one to add. I didn't like the shape of the photo for this background so I added the same photo in two different sizes.


Other than the flowers I didn't add a lot of embellishments because I wanted the flowers to shine! A couple of chipboards, stickers, title (which I stitched down so it doesn't go anywhere!), date and journaling plus some black paint splatters and done!
 
I hope you like my project! Thanks for stopping by today. See you next time X