Hello there lovely peeps,
I'm stopping by to share my newest cards for Pinkfresh Studio.
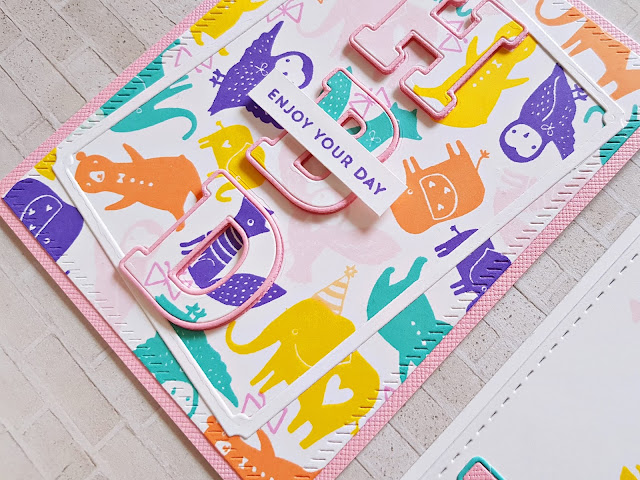
All these cards are top folding A2 size. For my first two sets of cards I chose one of my most favorite stamp sets from Pinkfresh Studio, Playful Animal Friends 1. Aren't these critters just adorable?! I also wanted to use some of the dies I haven't used yet from the Essentials collection (pretty much all the rectangles). On these first two cards I've used 3 sets of rectangles: Pretty Frames die set, Diagonal Stitched Rectangles die set and the Stitched Rectangles set. I also used the lovely Adore Alpha die set to create my titles.
As luck would have it, a few days after I made these cards, Jennifer McGuire posted a video of the same technique, using the same alpha dies. So instead of writing down how I created these, I'll link to Jennifer's video.
On my next cards I used the same Playful Animal Friends 1 stamp set again, as well as the Pretty Frames die set. This time I went with a monochromatic color scheme. You could actually create these two cards from one stamped panel but I didn't think of this when I made the cards, so first I only stamped a smaller piece that was enough for the big label.
I die cut the label from the stamped paper as well as some white card stock so I could add a white outline. I dry embossed some blue card stock, and added a white frame to it (also part of the Pretty Frames die set.) I actually die cut this frame 3 times and layered them up to add more dimension to this simple card. I adhered this panel to my card base and using foam adhesive I attached the label in the middle, adding some teal metallic thread behind it. Last but not least, I tied some twine around the top.
For the other card I stamped a full background which I adhered to my card base. I die cut a label from blue and white card stocks, then glued them on a card stock and fussy cut around the outline. I dry embossed the label and using some foam tape I adhered it down on the card base. I embossed a piece of card stock with WOW! Embossing Powder in Mint Macaroon and die cut my sentiment from it. This word die comes from the Essentials Classic Words die set. I cut the sentiment from white card stock a bunch of times and glued them together. To finish off this card I added a twine bow.
My last card for today is using the Essentials Classic Tags with Fillable Elements die set and patterned papers from the beautiful Everyday Musings collection.
I die cut a a tag with one of the fillable elements from 3 different papers so I could add different colors to those tiny hearts and dots. I created my background: I layered 3 papers on the card base.
Once done, I adhered everything down. For the tag I used some foam adhesive so that it stands out better. I die cut a sentiment using the same Essentials Classic Words die set once again. To finish off this card, I added a bow on top.
That's it for today! I hope I could inspire you in a small way!
Have an awesome day!
X


