Thursday, February 27, 2020

Creative World - DT layout for Alexandra Renke

Hello there crafty friends,

Today I'm stopping by to share a new layout I've created for the Alexandra Renke Design Team!

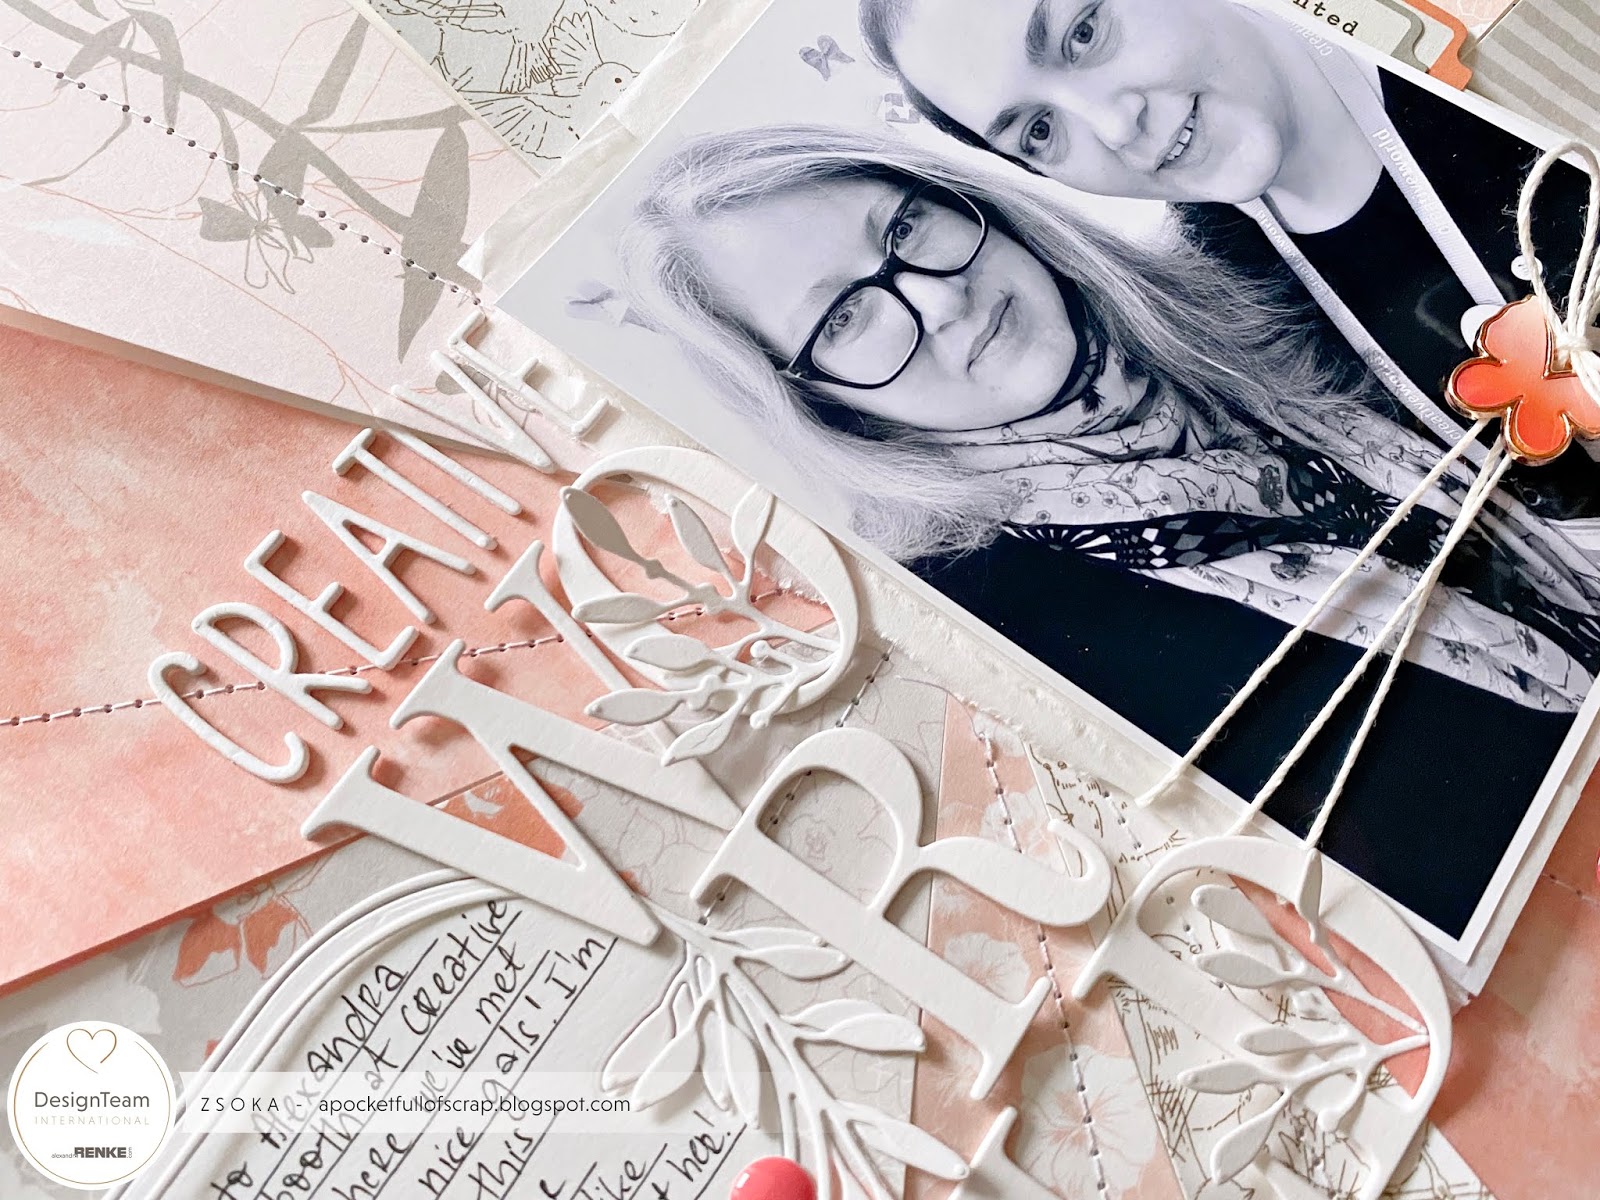
We had Creative World (for those of you who are not familiar with it, it's like Creativation just here in Europe. Apparently it's also much larger, it's really impossible to check everything even in 5 days if you ask me...) a month ago and since I had a few friends working the show, my boys and I came over to meet up with them! I also met a few people I haven't met before, Alexandra and a few of her DT girls, like Jana Maiwald-McCarthy! Since she took a couple of pictures, I decided to scrap one with some of Alexandra's beautiful papers!


I've made this type of layout a few times before, also cards (in fact I have one coming up in the next days), but I don't think I will ever get tired of it! I love the dimension and texture, and the fact that you can show off many different papers at the same time. 

I've used the following papers:
The white card stock I'm always using:


I first made a template from a 12x12 heavy weight card stock, cut it apart, then drew each piece on patterned papers. This way I knew exactly what shape to cut from which paper. Then I glued them on a 12x12 white card stock. I only added glue in the middle of each shape, so I could bend up the edges later. I also stitched them down in the middle.


I die cut my title using the following alphabet die sets:

I die cut each letter 4 times and layered them up. I also die cut this floral shape I used as a journaling spot twice:
I added some tissue paper behind my photo (when you get a package from Alexandra, everything is packed into white tissue paper, which I always keep and use for matting my photos!), I tucked in a couple of tabs and wrapped some twine around it too. I hung two tassels that I made from the same papers as well as a butterfly charm (from a Paige Evans collection) from the twine, then I adhered all this to my background.


I wrote my journaling on the oval die cut shape, arranged this and the title on my background and once I was happy with the way they looked, I glued them down.

A few enamel dots finish off this layout. And on that note, have you seen all the new enamel dots Alexandra has in her shop?! Check them out, you need them all hehe!

That's it for today! I hope I could inspire you in one way or another!
Happy crafting!

X

Tuesday, February 25, 2020

Braunfels day trip - Mini album with the gorgeous new Paige Evans Bloom Street collection

Hey crafty friends,

I don't remember when I made a mini album last time! Oh wait, I think I do, it must have been the exploding box mini I made years ago. I also used Paige's collection for that one ha! Holy moly, that was end of 2017, I just checked. OMG, where does time go?! Here's a link to that post, if you're interested!

I love looking at minis, but making them is a whole different story! I'm not big on planning and I feel like minis require quite a lot of planning, if I want to add nice or clever details. Anyway, when I saw the tassels in Paige's new, Bloom Street collection, all I could think of: I NEED to make a mini haha! As luck would have it, we went on a day trip last Saturday, to a nearby castle we've never been to, so I had a million photos for a mini, yay!


I was planning to make all kinds of different shapes for the pages, but somewhere along the way I got lazy so I just kept a simple (mostly) tag format. But hey, at least I made a mini AND that also means I scrapped a lot of photos yay!


For the tag base I've used the Jumbo Tag die from The Stamp Market. It's the perfect size and it comes with the hole reinforcer die too, so you really get a nice, clean finish! You can see that in the detail shots down below. So, what I always do when I make this type of mini album: I use patterned papers on both side AND I also cut the same shape from a heavy weight card stock, which I then layer between the two patterned papers. This way my pages, in this case tags, are sturdy and I don't have to worry they get damaged from flipping through them. I also stitched them together so I can be sure everything stays in place :D.


For the butterflies on the front I've used the Schmetterling ohne Fühler dies from Alexandra Renke. I love that they cut an outline too, so many possibilities!


As you see, I kept most pages really simple, photo plus a couple of stickers or other embellies. Mostly I was worried I'd run out of embellishments on my very first Bloom Street project haha!


The tiny puffy alpha stickers are from Freckled Fawn, from several years ago. I have a love/hate relationship with them! I absolutely love the mixed handwritten font, the color, the texture, so basically everything about the way it looks. However...they don't stick...and there's no glue that would keep puffy stickers in place either (not that I've found and god knows I've tried many). Also, they are way too skinny to apply any glue and achieve a clean finish. So my only option is to stitch them down and hope they won't fall apart! You can see how they curl up, they just don't stick. It's a pity because they look absolutely amazing!


I used some tags and die cuts for my journaling throughout the album.


I've created several pockets for loose photos, because I printed something like 60 and I wasn't going to create 30+ pages...haha! One is a see through pocket I've made from the acetate sheet and patterned paper (I just stitched together two rectangles, leaving an opening on the side, big enough for the photos to go in but small enough so they don't fall out). Do you see the iridescent foil polka dots? So fun! 

Then there is this patterned paper tag with literally a pocket on it, that I stitched down on the sides and bottom for reinforcement.


Here's the back of the above pages:


The stitching is clearly not as nice as on the right side but I really don't mind.


A few more pages and pockets:


This wreath I had left from an upcoming project and didn't have the heart to throw it away! I actually had two, so I added some heavy weight card stock in between the two and stitched them together. The Sakura Blossoms die is from Spellbinders and will soon be available! I had the honor of creating cards for the packaging of the Destination Japan collection last summer, which is why I already have the dies :). This is my most favorite Spellbinders collection to date, be sure to check it out! I'll post my cards with these dies in a few weeks, watch this space!


The little heart die is part of the Büttenrand Herzen die set from Alexandra Renke.


Another pocket I've made, this one is made of 4 layers of paper: 2 heavy weight card stock tags on the inside, 1 patterned paper tag on the front and for the pack I engineered a longer tag from patterned paper, so I could fold it back on the front. So what I did was, using the tag die and a longer strip of paper, I partially die cut the sides and the top - you need to leave the bottom part of the die off your cutting plates. Then I used a circle die to partially die cut the other end of this strip. I hope that makes sense? 


I then just glued and stitched everything together, and added two brads and thread so I can close the pocket.


The back side of these pages:


Lots of iridescent foil details! Really hard to photograph :)


Once done with all my tags, I put them on a pink ring and added the tassel that is solely responsible for me making this whole album haha! Oh and a cute flower charm! Super love that new embellishment in this collection!

That's it guys! I hope you'll be inspired to get crafty now!

Thanks for stopping by! Should you have questions, just comment below and I'll get back to you!
Have a wonderful day!

X

Thursday, February 20, 2020

Heights - DT layout for Alexandra Renke

Hi there friends,

Today I'm sharing my first official layout for the Alexandra Renke International Design Team! I'm so excited to be joining this amazing group of ladies!


On today's layout I decided to use the following two die sets (they happen to be my favorites hehe):
All these dies are relatively small in size so they were perfect to use with the 12x12" paper that has all these small sections with different designs. Unfortunately it seems this particular paper is not available right now, but here is the 6x6 pad with the same colors and designs!
These 6x6 papers are also available in the US, at Simon Stays Stamp! Great news, right?!


For my background I chose the subtle yellow striped paper from the Mimi's Stripes collection (it's more like a beige color actually):

You might have seen me use this paper in various colors, because I love it so much, it's so versatile!


I die cut loads of hexagons in both sizes - for this project I didn't use the outline part, but I did save those cuts for future projects. No wasting paper lol! I also die cut several flowers and shaped them a bit with my hands to create a more organic look.

I arranged my hexagons the way I liked them, then glued them down. I added foam tape to some of them for a bit of dimension. I also adhered the flowers, in a tone-on-tone look. 


I stamped a few sentiments in black, to add contrast. These sentiments come from the following stamp set:
Finally I glued down my photo, which I also printed in a hexagon shape, using foam tape. For my title I used the below alpha dies:
I've used these dies so many times before, because they are small and skinny and perfect for titles and sentiments alike!

I added my journaling and stamped the date and done! Oh, I also splattered some ink around my page in a plum color. That's it!


What do you think? I hope I could inspire you in some small way!

Thanks so much for stopping by!
Have an awesome day!

X

Friday, February 14, 2020

Love (again?!) - DT layout for Paige Evans

Hello there crafty friends,

Happy Valentine's Day all! We don't celebrate it, however I do usually buy something small for my boys, their favorite chocolate or something along those lines! What do you do for Valentines Day?

I'm sharing a new layout I've created for the Paige Evans Design Team today. Gosh, I am so creative with my titles that I just had to copy paste my previous blog post title OMG :D. I made the previous layout so long ago, I totally forgot about it. Oh well, both layouts will be in different albums eventually, when I can finally afford buying some! Random fact, last time we went to the US, I had to buy the biggest baddest suitcase ever in New Orleans just to fit the 12 albums and the huge amount of tools and supplies I bought there, including my first manual die cutting machine haha! I'm not sure when we go back, I can only hope soon, because there's hundreds of layouts all over our apartment and I'm not crazy enough to spend 40 eur on an album when you can get them at like 10 usd overseas...

Anyway, back to topic! I've used another older collection, Whimsical on this one. I feel like I haven't used Truly Grateful in so long, I need to do that before the new stunner, Bloom Street, is in the house!


The Love in Flowers cut file (Design ID: 313361) is just so pretty, I had to use it right away! Originally I wanted to make a colorful layout but then changed my mind while I was backing the cut file and ended up using a pretty limited color palette. I do like the softness of it though.


After backing the cut file, I pulled out all embellishments and selected a few that fit my colors. I will say, again, that rub-on stickers are one of my favorite products, this is my 4th pack in that collection! While I generally prefer dimensional embellies, these stickers are so versatile and perfect for little accents and finishing touches. I especially love the colorful faux stitching stickers - sure you could use your sewing machine, but changing threads all the time takes ages. So Paige, pls consider having full sheets of these rub on stitches in the future hehe!


Once I figured out where I wanted everything to go, I glued down everything, starting with the cut files. I then added some foam adhesive to my photo and added it to my page. I wrote my short journaling in between some border stickers, then stamped my date and splattered some ink all over my layout.


That's it! I hope I could inspire you in one way or another today!

Thanks so much for stopping by! Have an awesome day!

X

SUPPLIES:
Whimsical collection: Paper 19, Paper 18, Paper 14, Paper 10, Paper 6, Paper 3, Paper 1, Stickers, Rub-Ons, Chipboard stickers

Monday, February 3, 2020

In the spotlight: Spellbinders Small and Large Die of the Month kits - February 2020

Hello there crafty peeps,

I'm stopping by today to share some projects with the super cool Spellbinders February 2020 Small and Large Die kits! These dies are so unique and trendy, I love them! They are versatile too because you can create literally any number of patterns with them. Plus I saw that this month's Glimmer kit coordinates with the Large die kit - with which you can achieve some really great effects! Check it out!

As a reminder, Spellbinders have several monthly kits, which are really great! You can subscribe to:
You can find all necessary information about these kits here.

Let's start with the Large Die kit this month! How fun are these abstract shapes?! I think I don't have to write down how I made these card, because it's quite obvious or? It's pretty much just die cutting the same shapes over and over from various patterned papers and then arranging them in any which way you like.


Recently I dug out some older scrapbook collections I've been hoarding with the intention of using them in the next months. Well it didn't quite happen the way I was planning because life happens sometimes, but at least I've made these cards! This super colorful and fun collection is called Saturday Mornings by Basic Grey. Ah BG I miss you so very much! All these years later I'm still heartbroken they don't do scrapbook collections anymore.


Next up the Small Die kit! I've actually only used 3 of the dies here, but there are some pretty cool geometric patterned circles in the kit too.  Make sure to check it out!


I decided to create some striped panels and die cut from them.  For the card on the left I created the striped panel, then placed the 3 dies on it and die cut them. I haven't used the outer circle die so the pieces did not fall out but rather created windows in the panel. I ALMOST didn't turn this into a shaker card because I don't love making them! I find it's such a waste of expensive foam tape haha! But then I thought what the heck. OK, so I cut out those windows, then I cut the same 3 shapes using the outer circle die too, from white card stock. I layered these on top of the striped panel, but turned them a bit so the striped cuts are also visible.
 

I glued acetate on the back and added two layers of foam tape everywhere but behind the windows, obviously. I placed some beads and droplets on my card base, constantly checking if they are in the right spots. I then mounted the card front on it. A die cut sentiment finishes off this card. 

The next card is quicker! I created a striped panel again but with thinner stripes. I die cut the same 3 botanical circles from white card stock, plus using just the circle die, I also die cut 3 striped circles to back my white pieces.  I added some foam tape to the back of these and adhered them down to my white, embossed card base. Last but not least I placed some enamel dots and a die cut sentiment on it.


That's it guys! I hope you like today's inspiration!

I didn't have time to work with the card kit, in fact it's quite likely I won't have time for it in the next months unfortunately. However, I am giving away the January Card Kit on my Instagram account to my European followers right now (giveaway ends on Wednesday, Feb. 5, 2020) in case you're interested!

Thank you so much for stopping by today! Have a great day!

X