Tuesday, May 28, 2019

When dies meet scrapbook pages - DT projects for Pinkfresh Studio

Hey there crafty friends,

I'm back today with two new layouts I've made for Pinkfresh Studio!

If you've been following my work longer, you'll know my obsession with cut files. Well, over the past year it kind of subsided to be honest, I barely use my Cameo anymore. What I use instead every day is my Spellbinders Platinum 6 die cutting machine...I'm not sure what caused this change, since manual die cutting takes much longer? I just can't resist those gorgeous bevelled edges that the Cameo will never give me! So on that note, for today's projects I've used dies instead of cut files! Hope you like them :).

I've used a mixture of the Joyful Day and the Everyday Musings collections on these layouts. For the first one I die cut 5 wreaths from different pink patterned papers, using both dies from the Leafy Wreaths die set


One of them I backed with my black and white photo, another two with white card stock. I used one of these for my journaling. I then went through the embellishments and picked out some I thought would fit my color scheme, as well as my circle design. 


I assembled my background first, I attached some of the ombre striped paper to a white card stock, then added a lace trim where the two papers meet because otherwise it looked unfinished. I glued down the die cut circles and decorated them with some chipboards, die cuts, puffy stickers and stickers. 


On my second layout I used my favorite die set from the last release, the Lacey Edgers. I die cut a bunch of strips from patterned paper and arranged them from lightest to darkest from top to bottom on a light pink textured card stock. I then stitched them down to add some interest and texture.


I added some tissue paper behind my photo and glued it all in place. I embellished my page tone on tone, using a variety of puffy stickers, stickers, die cuts and wooden buttons. I also added a cute fabric banner on my photo.


Last but not least I added some white paint splatters and stamped my date. 


That's it for today! I hope you like these pages and I could inspire you to create your own!

Thanks so much for stopping by!

Have an amazing day!

X

Wednesday, May 22, 2019

Spellbinders Glimmer Hot Foil projects

Hello everyone,

I'm back today with a couple of cards I've created with some fairly new Spellbinders Glimmer Hot Foil goodies. Well, to be fair I've had these for a couple of months now, but never had time to play with them!

If you are not familiar with the Glimmer Hot Foil system, you can find lots of information on it on the Spellbinders blog, as well as many helpful videos on the Spellbinders YouTube channel. I myself had a couple of posts earlier as well, if you are interested.

For today's cards you need the following products:


I've created two A2 size top folding card bases. I embossed a white and a kraft card stock panel in the same size, using the Love Stripes embossing folder. I adhered these to the card bases.


I foiled a piece of white and a piece of kraft card stock using the Scattered Dot plate and the Blush foil. I then die cut a big rectangle from both with one of the dies from the Nestabilities Fancy Edged Rectangles die pack. I added foam tape to these and attached them to the embossed card fronts.


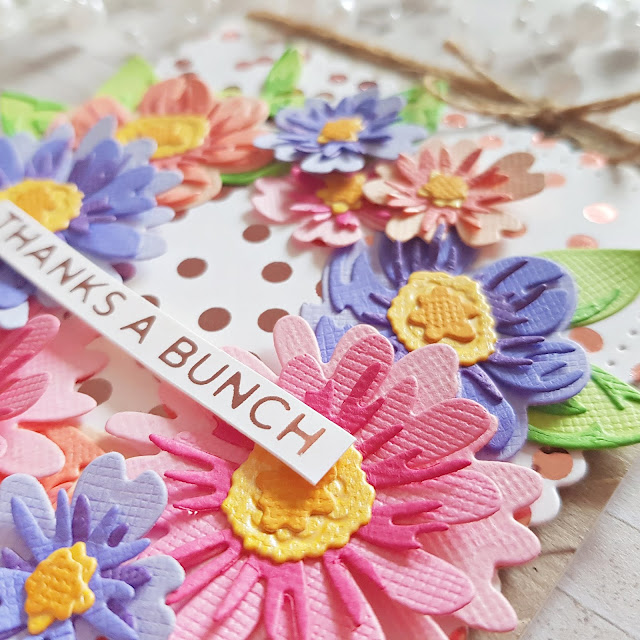
Using some of the plates from the Everyday Sentiments II pack I created a bunch of sentiment strips. I then die cut quite a few layered flowers in different colors. I love this die set and these flowers so much! I played around with floral arrangements, once I settled on these two designs, I glued them down alternating between liquid and foam adhesive to add dimension and interest. I popped up the sentiments.


Last but not least I added some jute which coordinates well with the kraft card stock. Easy peasy! These might take some time to make due to all the die cutting but I think it's worth it! What do you think?

Thank you so much for stopping by today!
I wish you a lovely day!

X

Tuesday, May 21, 2019

Family - DT layout for Paige Evans

Hi there crafty friends,

I'm stopping by to share my latest layout I've made for the Paige Evans Design Team using the gorgeous Horizon collection!


I cut the beautiful Flower Circle cut file (Design ID: 272982) from textured white card stock. I also cut a few extra flowers - to do this, I just erased the rest of the cut file, only leaving me with the flower. Some parts will not cut since there are no cut lines but these small areas are very easy to fussy cut.


I then backed the cut file with different patterned papers, the single flowers I backed with white vellum. I glued down the circle onto my chosen background paper - only the circle, not the flowers or anything else. I added machine stitching so I could be sure my layout won't fall apart at some point. I cut off the patterned paper behind the cut file so I could back it with white vellum.


I added foam adhesive to the back, also behind the flowers where it's not visible. I then placed some crystals and sequins on a white heavy weight card stock and adhered the patterned paper front to it - I hope that makes sense. Basically just like you would make a shaker card.


Last but not least I embellished my page: I added some word stickers, epoxy stickers, chipboards, die cuts, a Globe clip, my title and journaling and done! Oh, and I also glued the vellum flowers on top of the patterned paper ones! Done and done!


I hope you've enjoyed today's inspiration! 

Thank you so much for stopping by!

Have a fabulous day!

X

SUPPLY LIST:

Monday, May 20, 2019

Pinkfresh Studio May Essentials Release Blog Hop


Hello there crafters,

Welcome to the Pinkfresh Studio May Essentials release blog hop!

You should have arrived here from the amazing Yoonsun's blog, but I'll attach the full blog hop list at the end for your convenience, in case you're lost.

Today, besides the awesome new dies, Pinkfresh is releasing 2 new products too - Jewels and Crystals. Jewels are iridescent and have a flat back so you can glue them down on your projects (like I did on some of my cards today). Crystals on the other hand are not iridescent and don't have a flat back, so they are meant to be used in shaker pockets or any other ways you can think of where you don't have to glue them down. The colors are wonderful and it's pretty handy that you have 12 different ones in a box! I hope you are as excited about these new additions as we are!


As for my projects today...First up, the Basic Label Frames die set! There's three shapes in this pack, I've used the hexagons on my cards.


I die cut a million hexagons using the smallest die and patterned papers from the Everyday Musings collection. I then built two backgrounds with them. It takes awhile but it's very easy to line them up.


I didn't want to cover up much of the background since I spent so much time on it, so I die cut a sentiment using one of my most used products as of late, the Essentials Classic Words die set. I die cut this from pink card stock, plus another 4 times from white and layered them up so the sentiment pops up. To finish off this card I added some ribbon and a button. I've always loved using twine, ribbons and co, but I didn't have these shabby ribbons before, which my DT peer Ivana uses so often! I love the soft touch it adds to her cards, so I've now ordered them in all the colors too haha! Thanks girl for the inspiration!


On my second hexagon card I kept the background simple - I did mix the 12x12 and the 6x6 paper, so if you look closely you'll notice the scale of the pattern is different. I thought this adds a bit of interest without being distracting. I then cut a few white hexagons and stamped a floral spray on them using the gorgeous Embroidered Blossoms stamp set (co-ordinating dies also available!). Another favorite of mine, I think it's my most used Pinkfresh stamp set! I love building colorful patterns and this set is perfect for it!

I die cut several layers for these hexagons so they stand out. To finish off this card I created a sentiment like on my first card, added some twine, button AAAAAAND some of the new Jewels in white!


Next up my favorite die from this release, Lacey Edgers 1! Sooo fab! Love all the different designs! I used all five of them to decorate my cards. So simple but it adds so much texture and interest to your project!


On these two cards I used a mixture of Everyday Musings and Out and About papers. I glued down the die cuts at the bottom, then added a dry embossed panel as well as a strip of patterned paper for contrast at the top. 


A simple die cut sentiment and a few Jewels finish off both these cards! And a bow! My favorite part and I almost forgot! I used a die from the Partial Cut Bouquet and a Bow die set to create these adorable little paper bows. Another set you MUST have! Haha! Sorry, not sorry :D.


That's it! I hope you like my projects and are inspired to get crafting RIGHT NOW! 

And now for the fun part! 

Giveaways:

1. Pinkfresh Studio is giving away the full May Essentials release on the Pinkfresh blog and Instagram as well!

2. On each blog we are giving away a $25 gift certificate too!


As always, the winners will be selected from the comments left on all blog posts. Winners will be announced on May 27, 2019 on the Pinkfresh Studio Giveaway Page. You must claim your prize within 2 weeks so don't forget to go check the above page! Comment away! Good luck!

Shopping Promo:
There's two shopping promos during the release:

  • Get a free XO die with ANY purchase! No code necessary, this die will automatically be added to your shopping cart.

  • Pinkfresh Studio is also offering free/discounted shipping from May 20 - May 26th on orders $50+. You just need to use code MAYESSFREESHIP50. Shipping in the US is free, and there's $5.50 off on international shipping.

Phew I think that's it for today! I hope I didn't miss anything :).

Since I'm the last one in the hop, you'll be returning to the Pinkfresh blog now!

Thank you for stopping by!

Have a fabulous day!

X

BLOG HOP LIST

You are invited to the Inlinkz link party!
Click here to enter
<!-- end InLinkz code →

Monday, May 13, 2019

One stamp three ways - DT project for Pinkfresh Studio

Hello there friends,

I'm stopping by today to share my latest projects for the Pinkfresh Studio Card Design Team.

I thought for today's post I'd make some cards using the same stamp set in different ways. Of course you could use this stamp in so many more ways too, but I hope these three will give you some ideas to get started!

I chose the gorgeous Hanging Florals stamp and die sets. I'm guessing most people would color this beautiful image, but since I don't LOVE coloring all that much (other than flat coloring), I tried to look at this set differently. Having said that, I did color on 2 of these cards haha :).

OK, so first up, a favorite technique of mine for sets with no fill in stamps is paper piecing. For this I simply stamped the image or parts of the image, on different patterned papers and fussy cut them. 


I also stamped the full image on white card stock and glued the fussy cut pieces on top. I then worked on my card base: I cut a 4.25x5.5" piece of patterned paper (Joyful Day collection) as well as some heavy weight card stock in the same size. I glued the patterned paper on the heavy weight card stock - I did this because I wanted to turn this card into a shaker and I like my cards to be sturdy. I attached the floral wreath on top. I then fussy cut out the middle for a window.


I adhered some acetate to the back of this panel, then added two layers of foam tape too. I stamped my sentiment in the middle and placed some sequins on top, then attached the card front to an A2 size top folding card base. Instead of stamping the cute bow image from this stamp set for the top of my wreath, I die cut a bow using the Partial Cut Bouquet and Bow die set. I'm so in love with this bow, it's the perfect size and shape! To finish off this card I added a few white Nuvo drops.


Next, I decided to color the wreath with alcohol markers. Just some quick and simple coloring really. Once done, I die cut the image using the coordinating die. I dry embossed the middle piece to add some texture and trimmed off the top. I glued these two pieces onto a heavy weight card stock for stability and fussy cut around them.


I then die cut a panel using the gorgeous Fancy Floral 1 cover die. I glued this onto the card base. Lately I'm obsessed with white on white...I love the subtle texture this creates in the background. I adhered the wreath to the top of the card, using foam adhesive. I splattered some gold ink all over the card.


To finish it off, I tied a twine bow at the top, added a bunch of white Nuvo drops and my embossed sentiment. This sentiment is from the awesome Abstract Builder stamp set which I'm yet to use!


For my third card I decided to go completely colorless :). I don't often do one layer cards but they are growing on me! I just need at least a little dimension!

I stamped and embossed a part of the wreath twice on my gray card base. I also embossed the sentiment in the middle. This sentiment is from the You've Got This stamp set. The bold font embosses well!


I then colored in the images with white and various gray Polychromos pencils. Once done, I adhered this panel to an A2 size top folding card base. 


Last but not least I splattered white ink all over my card front and as before, added white Nuvo drops and a twine bow.


That's it! Which one do you like most? I think the white one is my favorite! Anyway, I hope I could inspire you in one way or another!

Thanks so much for stopping by today!

Have a wonderful day!

X

Saturday, May 11, 2019

In the spotlight: New May Glimmer Hot Foil Plates at Spellbinders

Hello lovelies,

I've had the honor of working with the new Spellbinders Glimmer Hot Foil Plates and I'm excited to share with you today the projects I've created.

You can see the five new designs here. In this post I'll be showcasing three of them!

First up the gorgeous Flower Pattern Glimmer Hot Foil Plate, which is my favorite! The pictures don't do these foils justice, they are absolutely beautiful! On these two cards I've used three foils: Fuchsia Flower, which is a purple color, then Tangerine and Bright Pink.


I foiled a bunch of A2 size white panels, then picked out these two. However, when I pulled off the foil and saw the negative design...I just could not throw it away! I had to find a way to get that image on card stock too. Unfortunately I don't have a laminator or the products I heard work for this the best, but I do have Bonding Powder from WOW! Embossing Powder. So using that and an iron I managed to make it work! I then fussy cut out most of the flowers. 

Next I made two A2 size top folding card bases and adhered some patterned paper on top. I trimmed down the foiled panels to a slightly smaller size and attached them as well.


I've wanted to use these adorable wood veneer embroidery hoops for awhile and thought they would add a fun look to my cards!  So I glued them down in the middle, then added my fussy cut flowers around them. I also used the lovely Cottage Bloom die set to create two 3D patterned paper flowers. I attached some lace to these blooms and glued them on top of the foiled flowers. I embossed two sentiments from the Text Happy stamp set and adhered these to the hoops as well. To finish off these cards, I added a few enamel dots.


Next up is a card I made using up all the flowers I had left from my previous projects! Lately I'm obsessed with embossing folders, I love adding texture to white cards. I think this is because I don't do a lot of white space...This way at least I have the feeling that the background is not empty. And the Fiddle Leaf embossing folder is my absolute favorite. Isn't it gorgeous?!  

After creating my card base, I attached the embossed panel. Then I played around with arrangements and finally settled on a floral wreath.


I glued all flowers down, then started to think about what sentiment to add. But then I realized that one of the new plates is actually a big sentiment, the Hello Glimmer Hot Foil Plate. So I foiled a few and eventually chose to go with Fuchsia Flower color. I added foam adhesive to the sentiment and placed some tangled thread behind it, glued it all down. I used copper thread which actually looks very similar to the Tangerine foil


Last but not least I made two small round cards. I used all three circle plates from the Circle Pattern Glimmer Hot Foil Plate set to create the design you see. I foiled white card stock and a blue patterned paper with Blush foil and using one of the circles from the Nestabilities Hemstitch Circles Etched Dies Romancing the Swirl die set I die cut the designs out. 


I die cut some additional circles from heavy weight white card stock (same one I use for all my card bases) because the papers were so thin, they wouldn't have been strong enough for a card. I attached one of these to each of my circles. Then to create the cards, I needed one more circle for the back. The easiest way to do this, in my opinion, is to use a bone folder to score a line maybe about half an inch from the top; then put glue only on that small part and attach it to the card front. This way you can open the card easily and you have the full circle design as opposed to other methods where you'd only have a partial circle.


Using copper embossing powder I created two sentiment strips. These sentiments are also part of the Text Happy stamp set. I adhered these to the middle of my cards. Finally, I punched a small hole at the top of both cards, added copper eyelets and some lace ribbons! Done!


That's it for today! I hope I could inspire you to get foiling!

Thank you for stopping by today! I wish you a wonderful day!

X

SUPPLIES:
Spellbinders supplies:


Other supplies: 
  • Neenah Solar white 80lbs card stock
  • Heavy weight white card stock (local brand)
  • Lace ribbons
  • WOW! Embossing Powder in Opaque Bright White and Copper
  • WOW! Embossing Powder Bonding Powder
  • Patterned papers: Pink Paislee/Paige Evans - Horizon
  • Eyelets
  • Metallic copper thread
  • Enamel dots


Friday, May 10, 2019

Viking hat or not? - DT layout for Paige Evans

Hello there crafty friends,

I'm back today with a new layout I've created for the Paige Evans Design Team. I've used the fabulous Horizon collection! I seriously can't get enough of these papers! 

I've been on a rainbow kick lately it seems...But when all the colors of the rainbow are there in a collection, I find it hard to not use them all haha!

I've had this photo of Maxim on my desk for months now and just couldn't use it on any layouts before. Normally I do the layout and then select a photo that matches from the pile I have on my desk. It is not a huge pile but normally it works. But this one just didn't make sense on anything, even though the colors were perfect for any rainbow layout. So I asked Paige to design a Viking Ship for me because I REALLY wanted to scrap this photo. So there you have it, the coolest Viking Ship cut file (Design ID: 293122)! I love it, it's so perfect!


I cut the cut file from textured white card stock, then backed it with loads of different patterned papers. It was important that I can use rainbow colors (Maxim's scarf has rainbow colors) and the flag was perfect for this! I also added rainbow colors behind the shields (according to my kid those are shields, so...shields then!). The waves needed to be blue of course as well as the background and I'm super happy with this background paper because it looks like sky and water! And the boat itself...I thought green will be fine and when I placed this paper behind the cut file, it looked like dragon scales to me. Happy accidents!


Once done, I was trying to figure out what I want to do with the page. I glued down the ship in the middle using foam tape to add dimension and also because I wanted to tuck embellishments behind it. 


I layered some tissue paper behind my photo and glued it down, sort of like he is sitting on the ship lol! I loaded his suitcases too :D. Too funny.  This collection is perfect for travel photos, which is what I have the most of so of course I love working with it! I especially love all the sticker/puffy sticker word strips because there's a few themes to choose from, they come in rainbow colors, so I can add them to pretty much all my layouts! One more thing I did, there was this triangular sticker that just screamed flag to me - I made a pole for it from a chipboard frame and tuck it behind the photo.


I added my journaling with a white gel pen and as I see I forgot to stamp my date haha! I wanted to add it on that chipboard ticket but would have had to sit down to my PC and search for the picture so I decided to do it the next day...Obviously it did not happen. Oh well :). 

Last but not least I splattered white paint all over my page.

That's it! I hope you like how it turned out and I could inspire you in a small way!

Thanks for stopping by today! Have a wonderful day!

X

SUPPLY LIST:
Horizon Collection: Paper 24, Paper 22, Paper 19, Paper 16, Paper 15, Paper 14, Paper 13, Paper 10, Paper 8, Paper 7Paper 6, Paper 5, Paper 4, Paper 3, Paper 2, Paper 1, Shaped Paper Clips, Stickers, Chipboard Stickers, Alpha Thickers, Epoxy Stickers