Hey there crafty peeps,
Welcome to the Altenew September 2018 Holiday Stamp/Die Release Blog Hop + Giveaway! You should have arrived here from the ever so inspiring
Therese Calvird's blog!
I'm so excited and honored to join this hop! This is such a wonderful release, again! I've had so much fun playing with these gorgeous stamps and dies!
It's hard to pick favorites but I think from this release the gorgeous
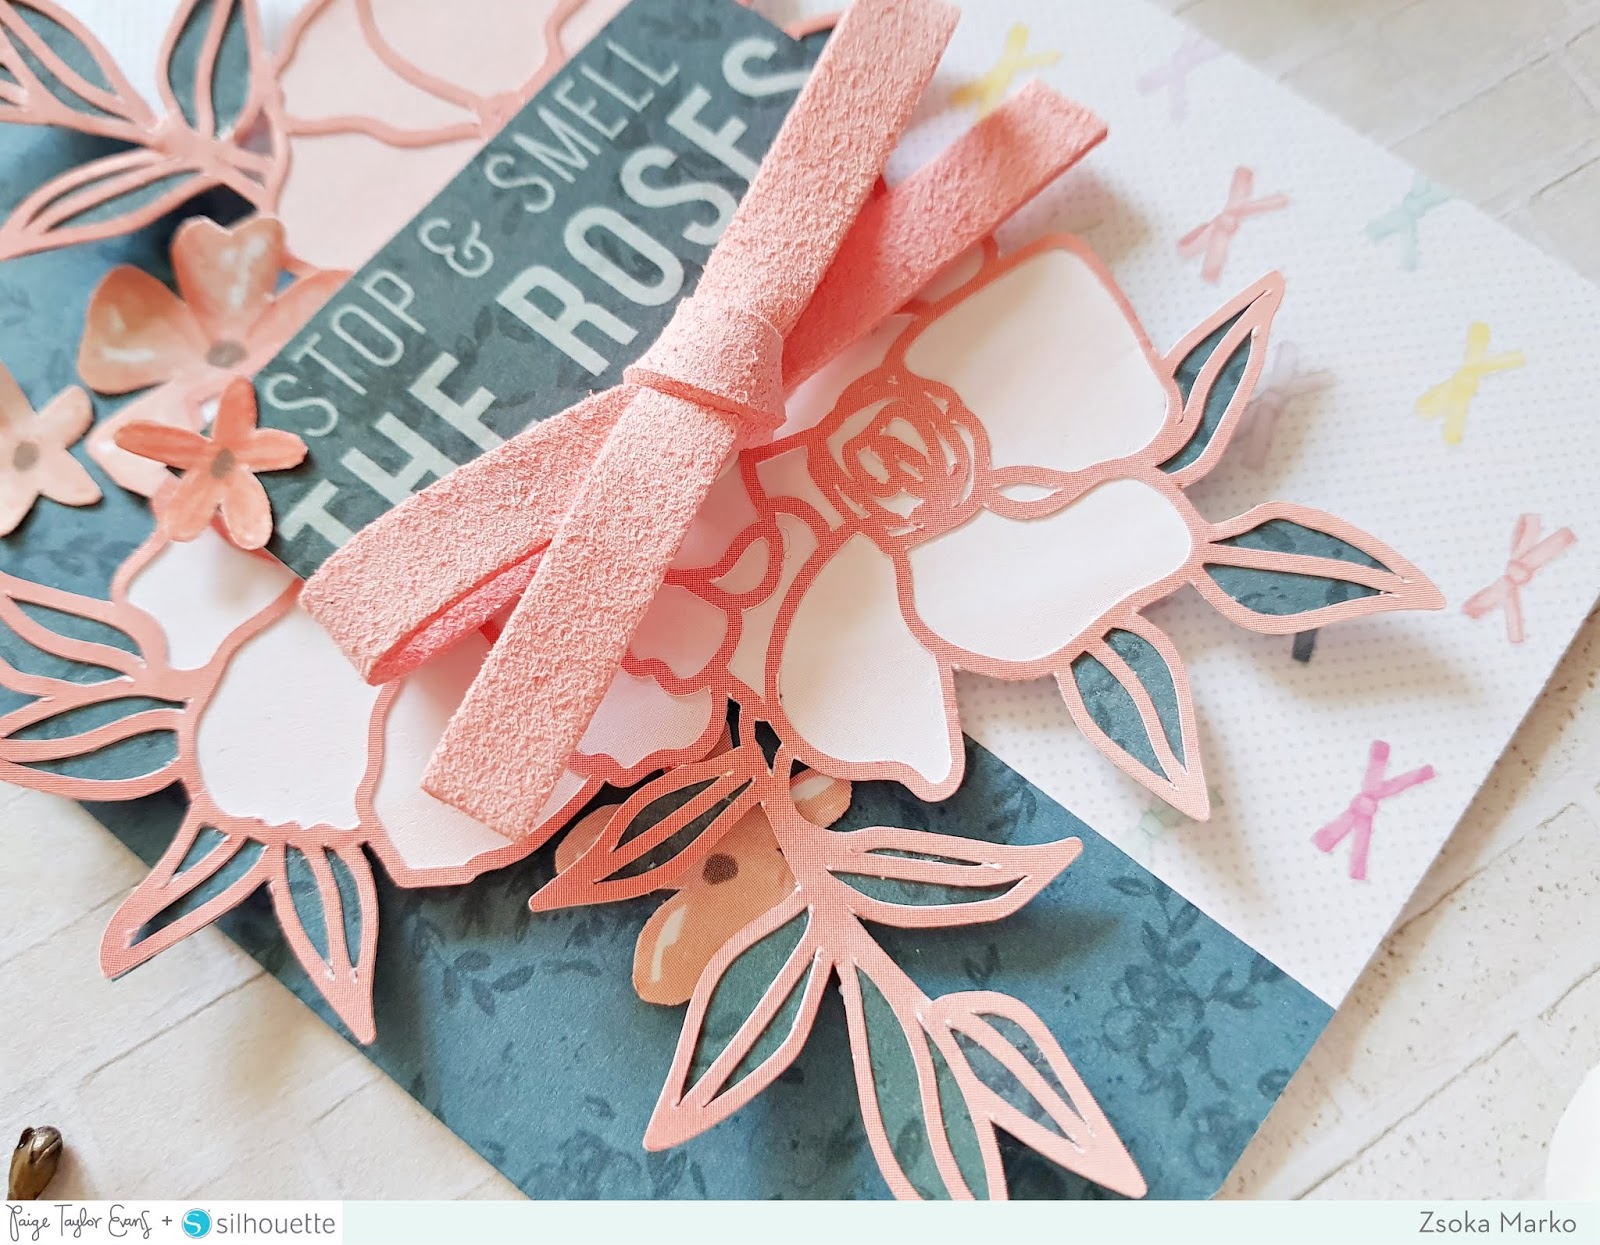
Bountiful Branch stamp set has to be my fave. I love wreaths so I think it was love at first sight! The detail...Just amazing.
This first card is the odd one out, where I used non-traditional colors. I believe this is the second month where the stamps come with an inspiration booklet and there was this gorgeous blue card in there that I just had to have for myself. The best thing is, even the ink colors used on those samples are listed in the booklet, so it is really easy to case them. This is a simple one layer card, where I just randomly stamped a bunch of branches and using the
Mini Christmas stamp set and the
Altenew Golden Peach embossing powder, I embossed a sentiment. To finish off the card I added some Nuvo drops and pearls.

Next up the card on the left. I created a white A2 size top folding card base (all my cards are A2 size and all of them are top folding, only some are in landscape direction, if that makes sense!). I then stamped two partial branches on a 4.25"x5.5" white card stock. I stamped and embossed my sentiment (also part of the
Bountiful Branch stamp set). I wanted to add some texture and dimension so using the
Altenew Classy Stripes Stencil and some modelling paste I added some white stripes in the middle. As a finishing touch, I created additional "berries" with Nuvo drops.
As for the second card. I stamped a few branches on a 4.25"x5.5" piece of white card stock. I trimmed off a bit on one side, using the
Creative Edges: Notebook die. I embossed my sentiment in
Altenew Pure White embossing powder on a 4.25"x5.5" piece of red card stock. I assembled my card and to finish it off I added some twine and Nuvo drops.

As for favorite products! Another absolute favorite of mine has to be the new
Cozy Flannel Cover Die! I love everything plaid so this is just perfect. For my next card I again stamped a bunch of branches and then using the Cozy Flannel cover die, I diecut it. I attached this panel to my light green card front, then added back the little squares on foam dots. I was not planning to do this but I felt like not enough of the gorgeous pattern was visible. I created a red bow using the
Holiday Bow stamp and
die sets and added this to my card front. I made two little tags and stamped some tiny, cute, holiday sentiments on them (these are a part of the
Christmas Stockings stamp set), then hung them on the bow.

On my next cards I focused on the
Holiday Bow stamp and
die sets. In this set there's not only a layering bow stamp but also a layering poinsettia! I love poinsettias for the holiday! I stamped a bunch of them in red and since my fave poinsettia is actually white with a teeny green, I tried to recreate that too. For the first card I stamped a light beige background with the
Rustic Linen stamp set. I then arranged my poinsettias and branches and glued them down. I stamped the sentiment from the
Mini Christmas set in black and splattered some black ink on my card. To finish it off I added some twine.

I diecut several plaid backgrounds with the
Cozy Flannel Cover die because I wasn't sure what colors I wanted to use. On my card on the left I used white card stock that I raised with foam adhesive and backed with a gold glitter card stock. I added 3 red poinsettias and branches and I stamped tiny words for sentiment. My card on the right is even simpler. I just added the kraft die cut to my white card base and layered some poinsettias in two opposite corners. I embossed a sentiment on black card stock and glued it on. Black ink splatters and done!

The next two cards use two layers of the Cozy Flannel die cut panel. The left one has a light and a dark grey layer - I simply glued on the bottom layer in a different direction and cut off the excess. I glued this on top of a white card base and added a strip of black glitter card stock for accent. I embossed the sentiment at the top of my card. The card on the right is a little bit different in that I did not cut off the excess white die cut at the top, I just left it as a single layer. The second die cut layer is gold on this one. I glued the two together, then added foam adhesive and attached the panel to an A2 top folding card base. I glued a strip of gold card stock towards the top as well as a sentiment strip towards the bottom. As a last step I added a pink/red bow to both cards.

My next card is using up all kinds of scraps I had left from my previous projects haha! I don't know about you but I hate throwing anything away. Even the smallest of pieces. So I thought I might as well use them now on a card! The stamped piece on top is the negative die cut I had left after using the
Creative Edges: Notebook die. The squares at the bottom are negative die cuts I was left with from one of the Cozy Flannel die cuts. I also had an extra bow I had stamped before! The only thing I stamped new for this card was the stockings! I used the super cute
Christmas Stockings stamp and
die sets to create them. Some gold splatters and done!

Oh I do have one more card in a bit less traditional color scheme! My inspiration for this card was the ever so talented May Sukyong Park! I love her cards where she creates backgrounds with smaller stamps because they look like patterned paper to me! And we all established that I'm a patterned paper girl hehe. So I stamped my sentiment in the middle to start with, then kept adding more and more stockings in a few different color combos until I was happy with the way they looked. To finish this card off, I added mini dots in different colors a'la May.
So that's it! Phewww if you managed to make it to this point, well done! Ha! I know it's a long post, but I can't just do a couple of cards with such an amazing release! I apologize for this.
And now for the fun part! GIVEAWAYS!!! Woot woot!
Here is what you have to do:
1. To celebrate this release, Altenew is giving away a $50 gift certificate to 6 lucky winners! Please leave a comment on the
Altenew Card Blog and/or
Altenew Scrapbook Blog by Wednesday, September 19th for a chance to win. 6 winners will be announced on the Altenew blogs on 9/22/2018.
2. I will also draw a winner from comments left on this blog post! One lucky commenter will receive a $30 gift certificate! I will announce the winner here in this blog post by September 19, 2018.
******************************GIVEAWAY NOW CLOSED***************************
Thank you guys for all the love!!! I apologise I haven't answered to all of your wonderful comments, but I simply haven't had the time! I've read them all and I really appreciate you all!!!
And the winner is......Annalisa Young! Please drop me an email at mzs6666@googlemail.com so I can tell you how to pick up your prize! CONGRATULATIONS! X
*********************************************************************************
Your next stop is the talented
Svitlana Shayevich. Below you'll find the full blog hop list for your convenience.
Thanks for stopping by today and enjoy hopping!
X