Monday, September 20, 2021

In Focus: Spellbinders Susan's Garden Club Collection

Hi there friends,

Here's post Number 2 for today!

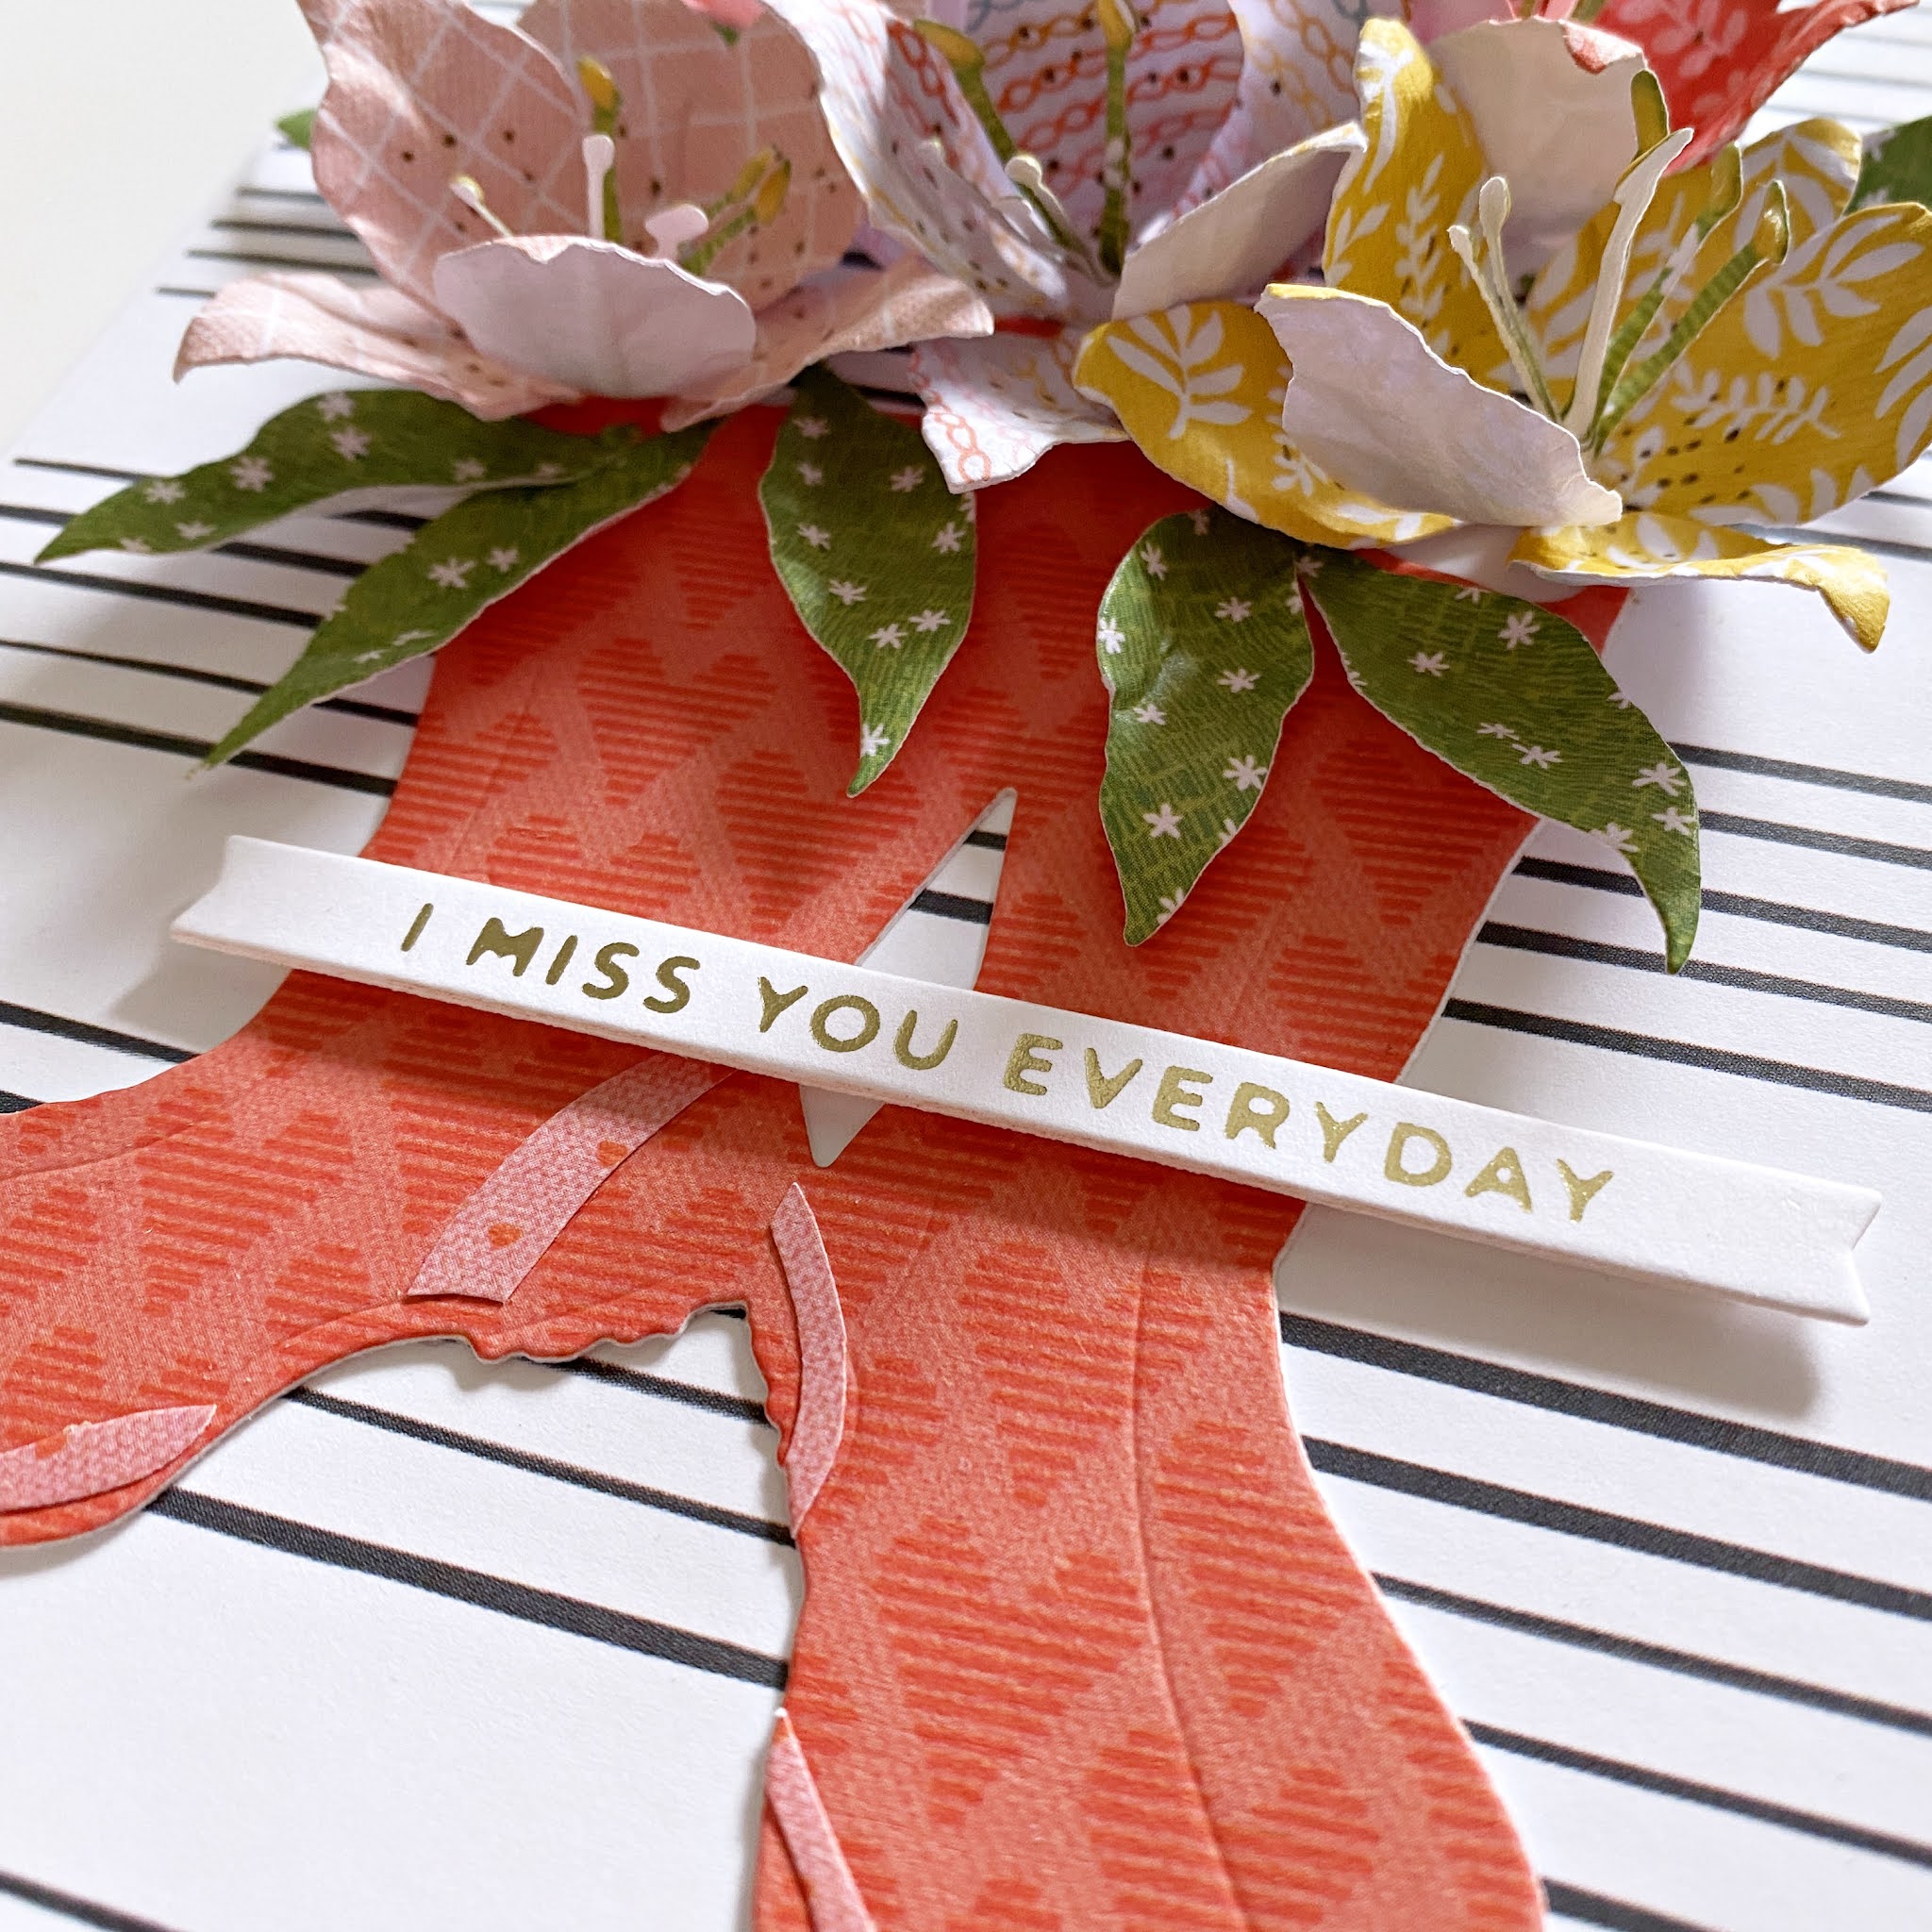
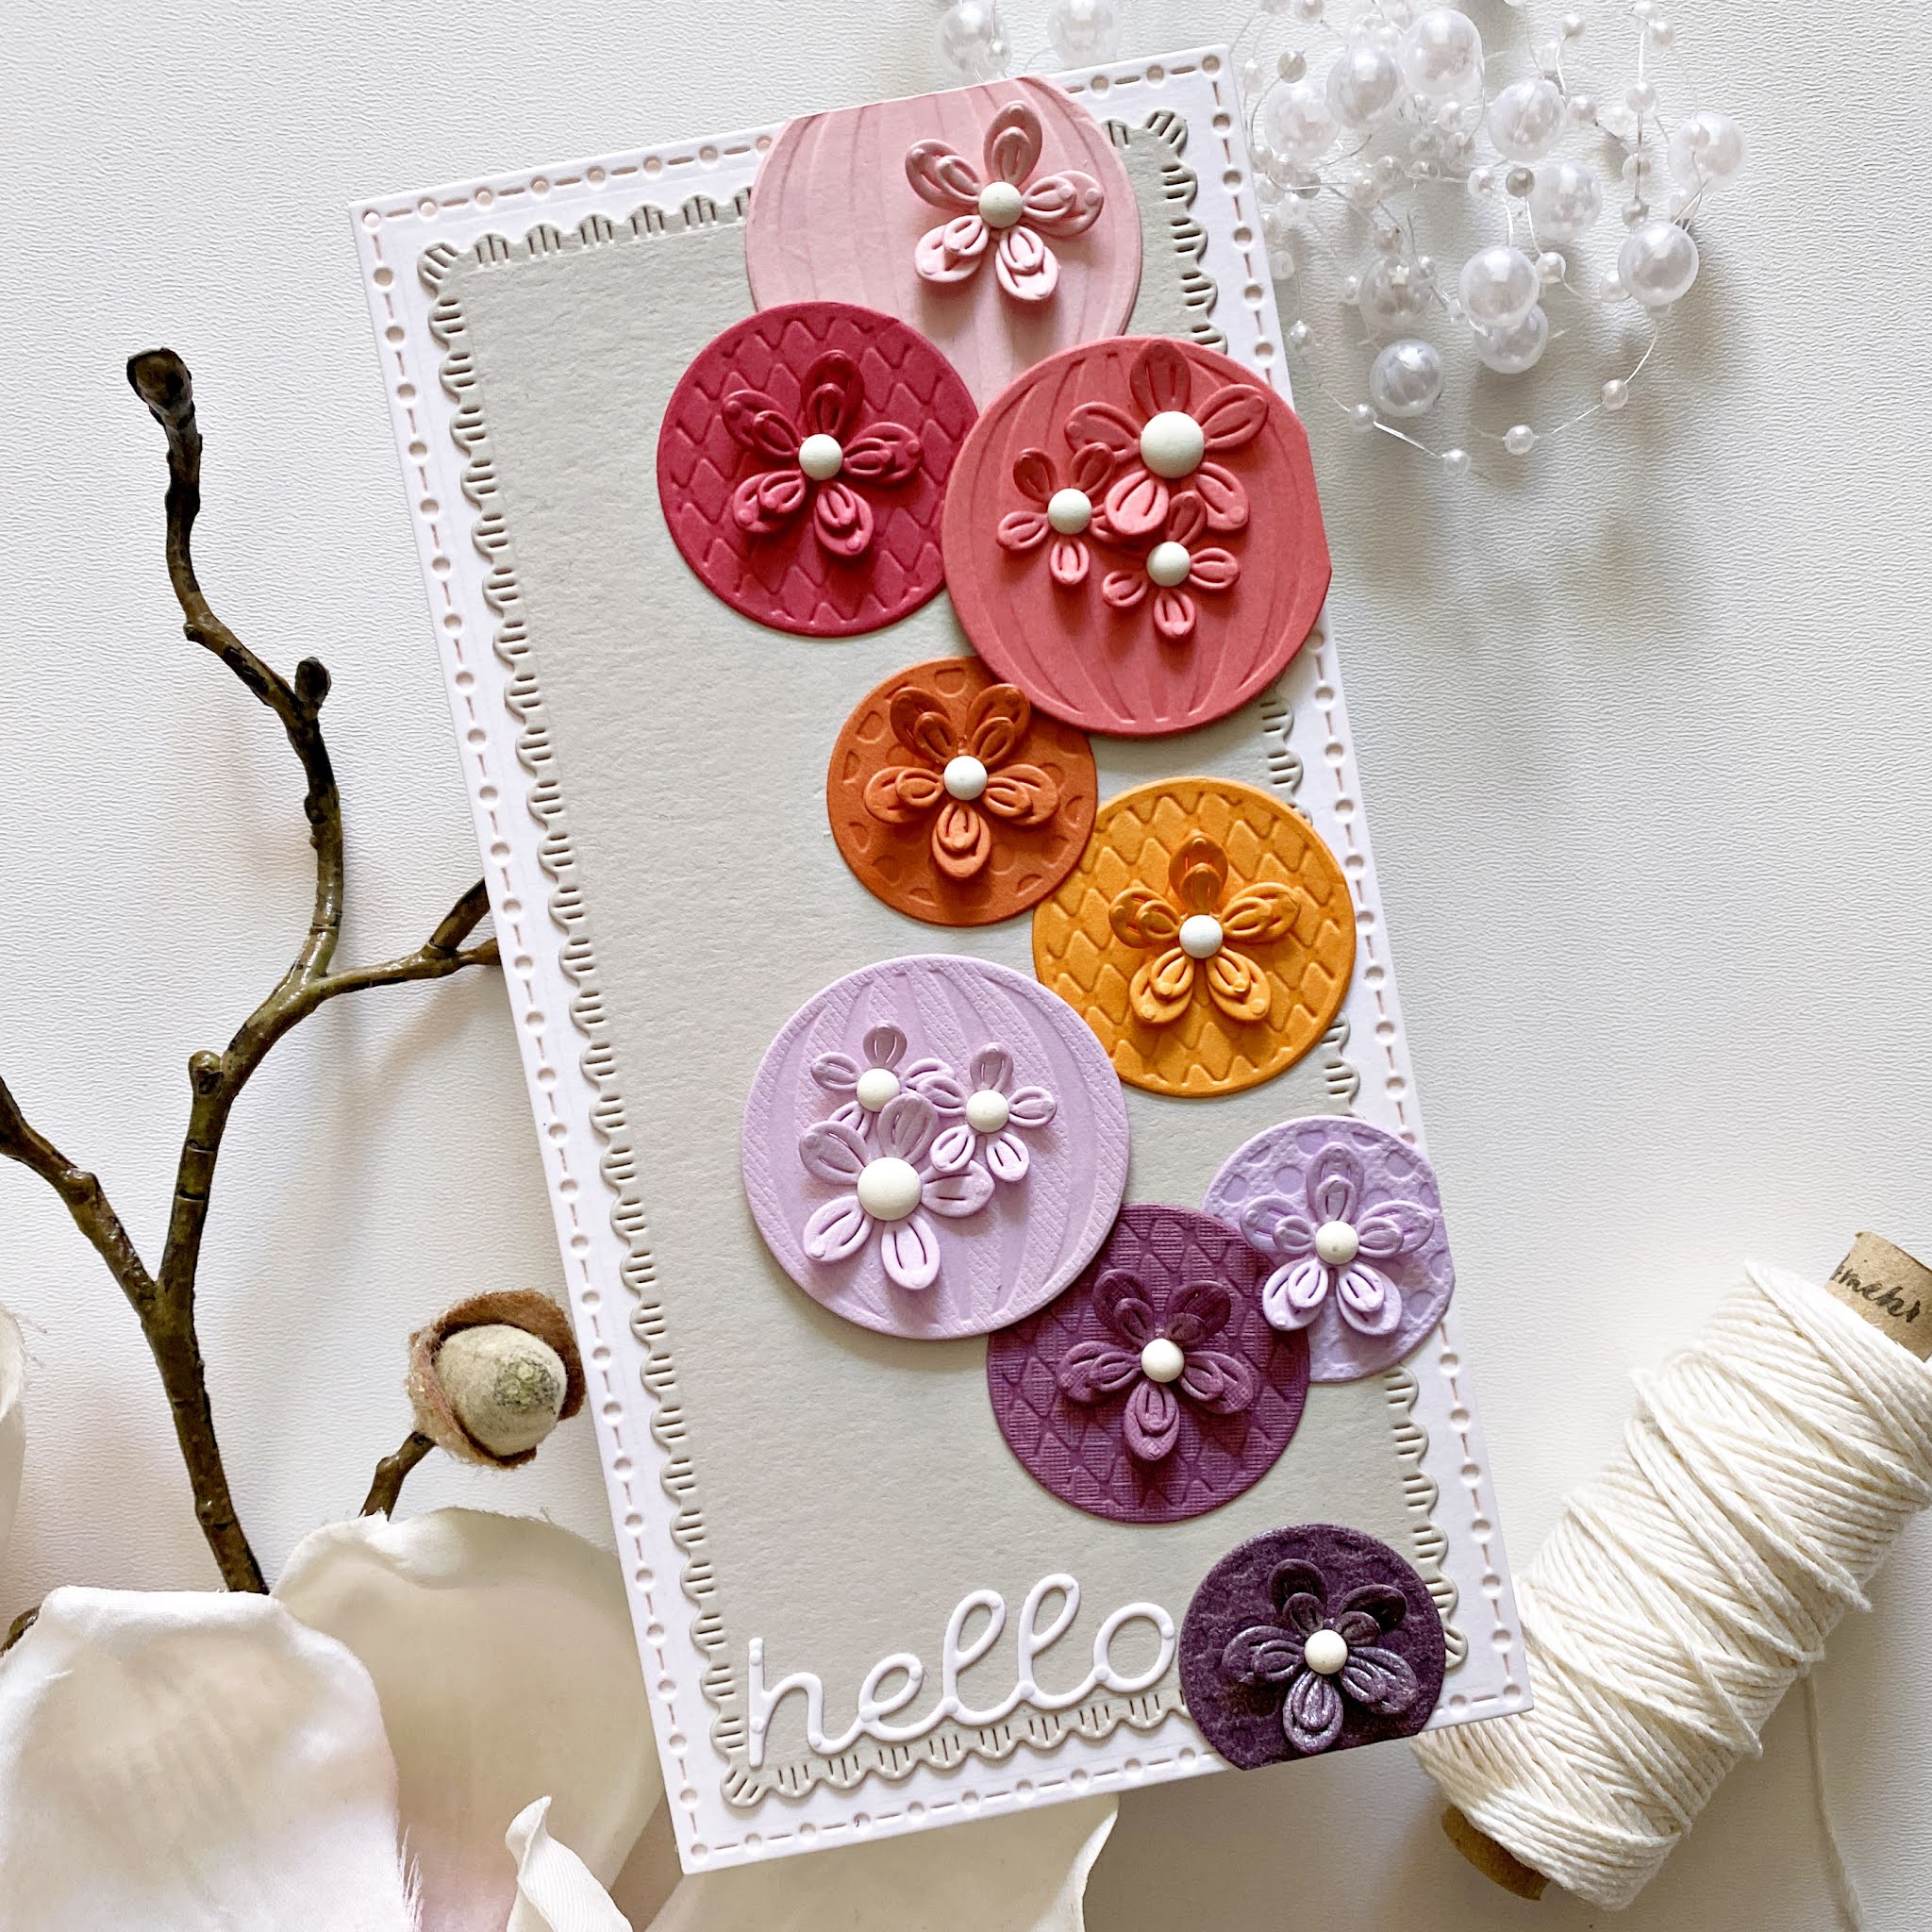
I'm sharing two cards with the new Susan's Garden Club collection by Spellbinders! This time I actually went with patterned papers on my projects, because I'm all about patterned papers and wanted to see what these gorgeous flowers, that normally look very realistic, would look like, made from patterned papers!

The sets I worked with on my cards are:

To create these flowers, it's best to have shaping tools, such as Susan's Garden Ultimate Tool Kit. If you are not into patterned papers, and would prefer to color your own flowers, Susan's Specialty Cardstock is an amazing card stock for these projects. It really makes a difference what paper you use.

I have a process video for you at the end of this post, so I'll just leave you with photos here. If you're interested in how these came together, what supplies I've used, please stop by my You Tube channel! All supplies are linked in the description box below the video. 


Here's the video, if you want to see, how these cards came together:


That's it for today guys!

Thank you so much for stopping by!
Have great day!

X

In Focus: Spellbinders Merry Stitchmas collection - A Rainbow Christmas

Hi there friends,

I'm stopping by to share some cards I've created with 2 die sets from the Spellbinders Merry Stitchmas collection. Now I realise, stitching is not everybody's thing, but I think both these dies look wonderful without any stitching too. I am obsessed with the background die, it looks like lace, just so pretty!

The sets I worked with on my cards are:

I have a process video for you at the end of this post, so I'll just leave you with photos here. If you're interested in how these came together, what supplies I've used, please stop by my You Tube channel! All supplies are linked in the description box below the video. 


Here's the process video, if you're interested:


That's it for today guys! I hope I could give you some inspiration in one way or another. 
Have a wonderful rest of the weekend!

X

Friday, September 17, 2021

Hello 7th Grade - DT Layout for Paige Evans

Hi there friends,

I'm back with a new layout for the Paige Evans Design Team! This is my very first page with the amazing new Bungalow Lane collection! I'm so in love with the colors, patterns and all the wonderful embellishments!

I don't have fall photos yet this year and I'm too lazy to go through old photos, so I decided to go with some recent photos of my kiddo's first day back at school. My whole life, school start meant fall - only since we've been living in Germany does school often start already in summer. There was one year where it started beginning of August and I was so upset haha! I mean, normally it's the biggest heat here, and I was just so sorry for the kids having to sit in a class room instead of being at the pool! I always started in September and I can't accept this early start LOL.

That said, this year he started at the very end of August, so we can consider that fall - the weather was anyway pretty bad. The clothes he was wearing that day match Bungalow Lane quite nicely too! 


I chose the Geometric Apple cut file (Design ID: 381364) because it goes well with the school theme and because it has lots of openings that I could fill with various patterned papers. When I create my first layout with a new collection, I usually want to use every single thing, so a cut file like this is perfect for adding as many patterned papers as you want.

I cut it from heavy weight white card stock in a larger size, then backed it with pattern papers in pink, red and yellow tones. I considered going the blue boy layout route for a hot minute, but I prefer lots of color! It's weird though, because blue is my favorite color, so I should not have a problem creating a blue boy layout...


I layered tissue paper and a few ephemera pieces behind my photos to add some dimension. I glued down the apple on a navy striped background, then my photos as well. I started adding a few embellishments, die cuts, stickers, alpha thickers for my title. I wrote my journaling onto a label sticker and partially tucked it behind my photo. 


Since the upper left side felt a bit empty, I attached a chipboard there with my Tiny Attacher. I also splattered some white paint in that corner as well as the bottom right. 


I do have a process video to go with this page, if you're interested:


Sunday, September 5, 2021

In Focus: Spellbinders Open House Add-On dies from the Fall Traditions & Halloween collections

Hi there friends,

I'm stopping by to share 2 cards using a bunch of die sets from the Spellbinders Fall Traditions and Halloween collections. All these dies were designed to work with the Open House collection, with which I shared a few Christmas projects a while back.

The sets I worked with on my cards are:

I have a process video for you at the end of this post, so I'll just leave you with photos here. If you're interested in how these came together, what supplies I've used, please stop by my You Tube channel! All supplies are linked in the description box below the video. 


Here's the process video if you're interested:


That's it for today guys! I hope I could give you some inspiration in one way or another. 
Have a wonderful rest of the weekend!

X

Friday, September 3, 2021

Wonderful - DT Layout for Paige Evans

Hi there friends,

I'm back today with a new layout I've created for the Paige Evans Design Team! While I'm waiting for the amazing new collection, Bungalow Lane, to turn up on my doorstep, I created another page with Wonders!

This one is super simple and quick - honestly, it was not my plan, but sometimes things just happen...All I knew was that I wanted to use the fussy cut WONDERFUL letters for my title, in a rainbow sort of order. 


I had a scrap piece of this green patterned paper and since my son is wearing a green T-Shirt in the photos, I thought it would be a good match. I hardly ever use white card stock for my background, I'm not even sure why I went with that! I guess I just wanted something light and airy, maybe, hmm. But I couldn't just leave that green paper as it was, so I figured I could add a cut file to it. The first one that caught my eye was the Flower Borders cut file:
I picked one of the borders, then repeated it 4 times and welded them together, to create a background. I guess I could have at least backed a few of them with different patterned papers, but I didn't even think to do this at the time. Guys, it was sooo hot when I made this, I think my brain was fried hahaha! You might even see in the video how the fan that was next to me, was blowing things away on my desk :D Well, I guess hindsight is 20/20?


Anyway, I glued down the cut file, mind you, not everywhere, so I could still have some movement and dimension. I added a few puffy sticker flowers on top. I layered a few things behind my photos, such as tissue paper, die cuts and some stickers. I also attached some stickers and chipboard stickers to the photos. For my title I used foam adhesive so that it pops off the background.


Finally, I added my journaling and stamped my date. That's it!

I guess sometimes all you need is a simple layout to document those memories. Most important thing is that you do document them, right?!

Here's the video as well, in case you're interested:


Thanks so much for stopping by!
Have an awesome day!

X


Thursday, September 2, 2021

In the spotlight: Spellbinders Small and Large Die of the Month kits - September 2021

Hi there friends,

It's that time again! The Spellbinders September Club Kits are here!

I will not go into step by step tutorials here, since I made process videos for all of today's projects - I'll just attach some photos! I'll link the videos down below, after each set of cards. You can also subscribe to my YouTube Channel and press the bell icon so you never miss a new video! You'll find all the supplies I've used linked in the description boxes of the videos.

As a reminder, Spellbinders have several monthly kits, which are really great! You can subscribe to:

You can find all necessary information about these kits here.  

First up some cards with a mixture of both the September Small and Large Die Kits, since the Small Die Kit has sentiment dies this month and I didn't want to use them on their own!


You can find the process video here:


Next up, my projects with the Large Die Kit! I also used a banner piece from the Clear Stamp of the Month kit for which you can purchase a coordinating die set separately if you want.


Here's the process video, if you're interested:


That's it for today guys! I hope I could inspire you in some small way!

Thank you so much for stopping by! Have a wonderful day!

X