I'm stopping by to share a few projects I've created for the Paige Evans Design Team!
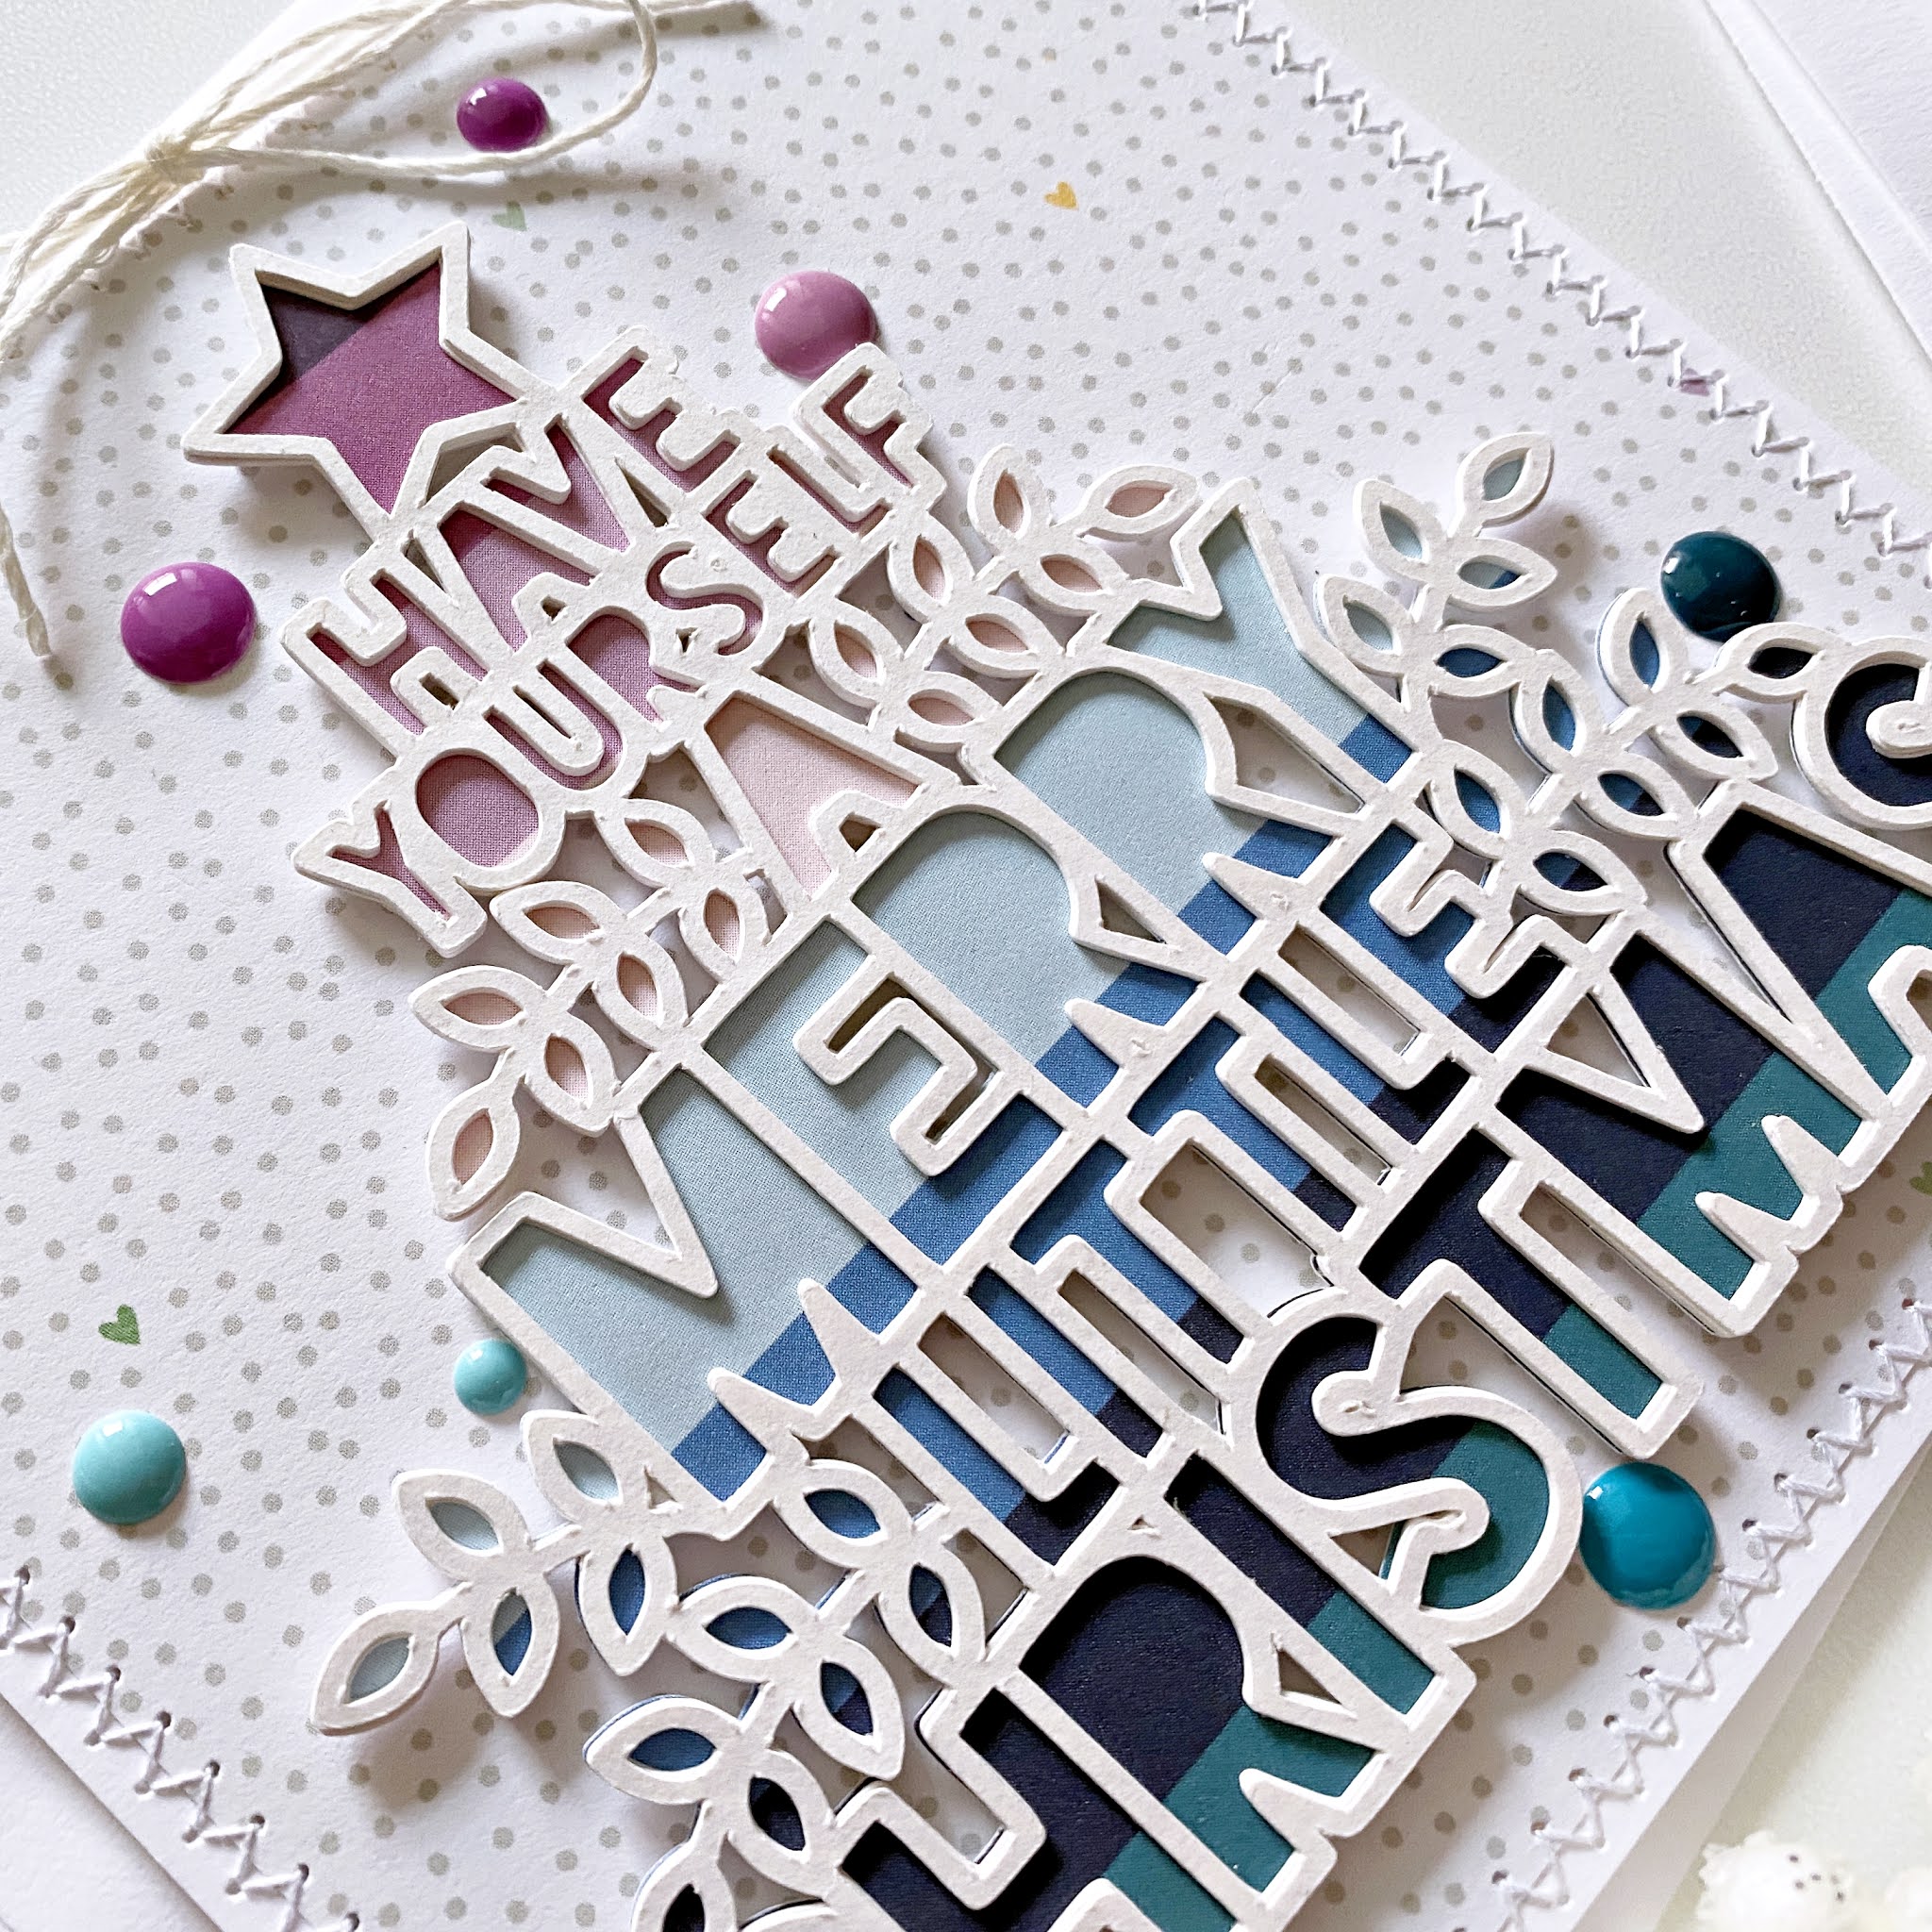
You probably know by now, that Paige is offering a bundle of cut files called "25 Days of Christmas Cut Files", where you get a Christmas themed cut file mailed to you every day until Dec 25th. Of course you can still purchase this bundle, should you have missed it! Today's cut file is this "Merry Little Christmas" tree, which I love so much, I had to use it on multiple things, cards, December Daily filler page and even a scrapbook layout!
I mostly used the Whimsical collection on these projects - it's my go to if I want to make rainbow projects! Of course, you can create rainbows with any of Paige's collections, but my most fave is Whimsical, it has the perfect shades of all the colors and the loveliest patterns!
I'll keep this post short because I'm in the middle of Christmas baking hehe, plus I have a process video for everything you see in this post, so no need to detail how I made them! I'll attach lots of photos though, in case you like to look at those.
You'll find the video at the end of this post!
Without further ado, the layout:
The December Daily page:
The cards:
You can watch the process video on my YouTube Channel:
I hope you like these projects which are in fact my last ones for 2020! I would like to thank you for your support throughout this harder-than-usual year and I wish you and your loved ones a very Merry Christmas and a wonderful, healthy and happy New Year!
I'll be back with lots of projects at the beginning of January!
Today I have some more Christmas cards to share with you! I was thinking, since this post is going up beginning of December, there's still time to create some last minute Christmas cards to send out to loved ones. These ones are really simple and don't take very long to create either. I mean, compared to most cards I make anyway.
I noticed that Paige has a bunch of cross stitch cut files for Christmas, and I was really in the mood to stitch, so that got me thinking, why not make cards instead of a layout for today's post? First, I selected the following cut files:
I then sized them to fit onto a 4x5.25" panel and die cut them out of white, heavy weight cardstock. I used these as templates to poke holes in the patterned papers. I recorded the process, so you can check how I did this, in the video at the bottom of this post. Basically, these cut files are not stitching cut files, but it's super easy to use them as templates to achieve the same result. Eventually, I didn't use the Snowflake because in the size I wanted it, it seemed a bit too small, with the holes being too close to each other.
I searched for some patterned papers, that I thought would work. I found the three I used in the Whimsical collection. I cut them down to 4x5.25" and started poking holes. Once done, I stitched them all with white/light blue/red/beige/brown embroidery floss.
Something I only noticed while editing the video (not even when I was editing these photos), is that I missed a stitch on this red poinsettia. I have no idea how I didn't notice earlier?! At this point I can't add it anymore, so I'll have to embrace imperfection once again :D
I added some adhesive foam sheet to each of the stitched panels and glued them onto 4.25x5.5" top folding card bases. The blue panels on white card bases, the beige ones onto kraft bases (well technically only the card front was kraft, the card base was still white - see video).
I was struggling with the sentiments because I'm not quite used to use Alpha Thickers for this purpose and also, I just couldn't find the right letters in the right colors in Paige's collections. There are actually 2 packs (Truly Grateful and Pick Me Up) that have the right color (red), but I didn't have the right letters anymore. Only the white foam mini alphas are Paige's, from the Pick Me Up collection. Otherwise, I had to resort to my stash of AC Thickers...Of course you could stamp your sentiments, but I only wanted to use scrapbooking supplies on these cards, if that makes sense? Anyway, since most of these are quite large, I opted for shorter sentiments. I would have loved to have Peace on Earth instead of Peace, but there just wasn't enough space.
Last but not least, I added enamel dots and some twine to my cards to finish them off.
As you see, you really don't need a lot of supplies or expensive supplies to make these cards. You can just use whatever you already have in your stash!
Here's the process video:
I hope I could give you some ideas with my projects today!
Thank you so much for stopping by! Have a wonderful day!
I'm stopping by today to share my latest projects I've created for the Paige Evans Design Team. This time I have cards for you with the Go the Scenic Route collection.
This year it's been even more important than before to tell our friends and family that they are loved, life is beautiful, and everything is going to be alright. What simpler way is there, than to create some handmade cards and mail it to them?
I decided to make some slimline cards that are all the rage now. Now, generally my slimline cards are about 3.5x8.5" but these three cards ended up being slightly wider, 4", because of the quilt patterned papers. I wanted to leave the circles complete, and luckily I got a full pattern with the 4" width. Does that make sense?!
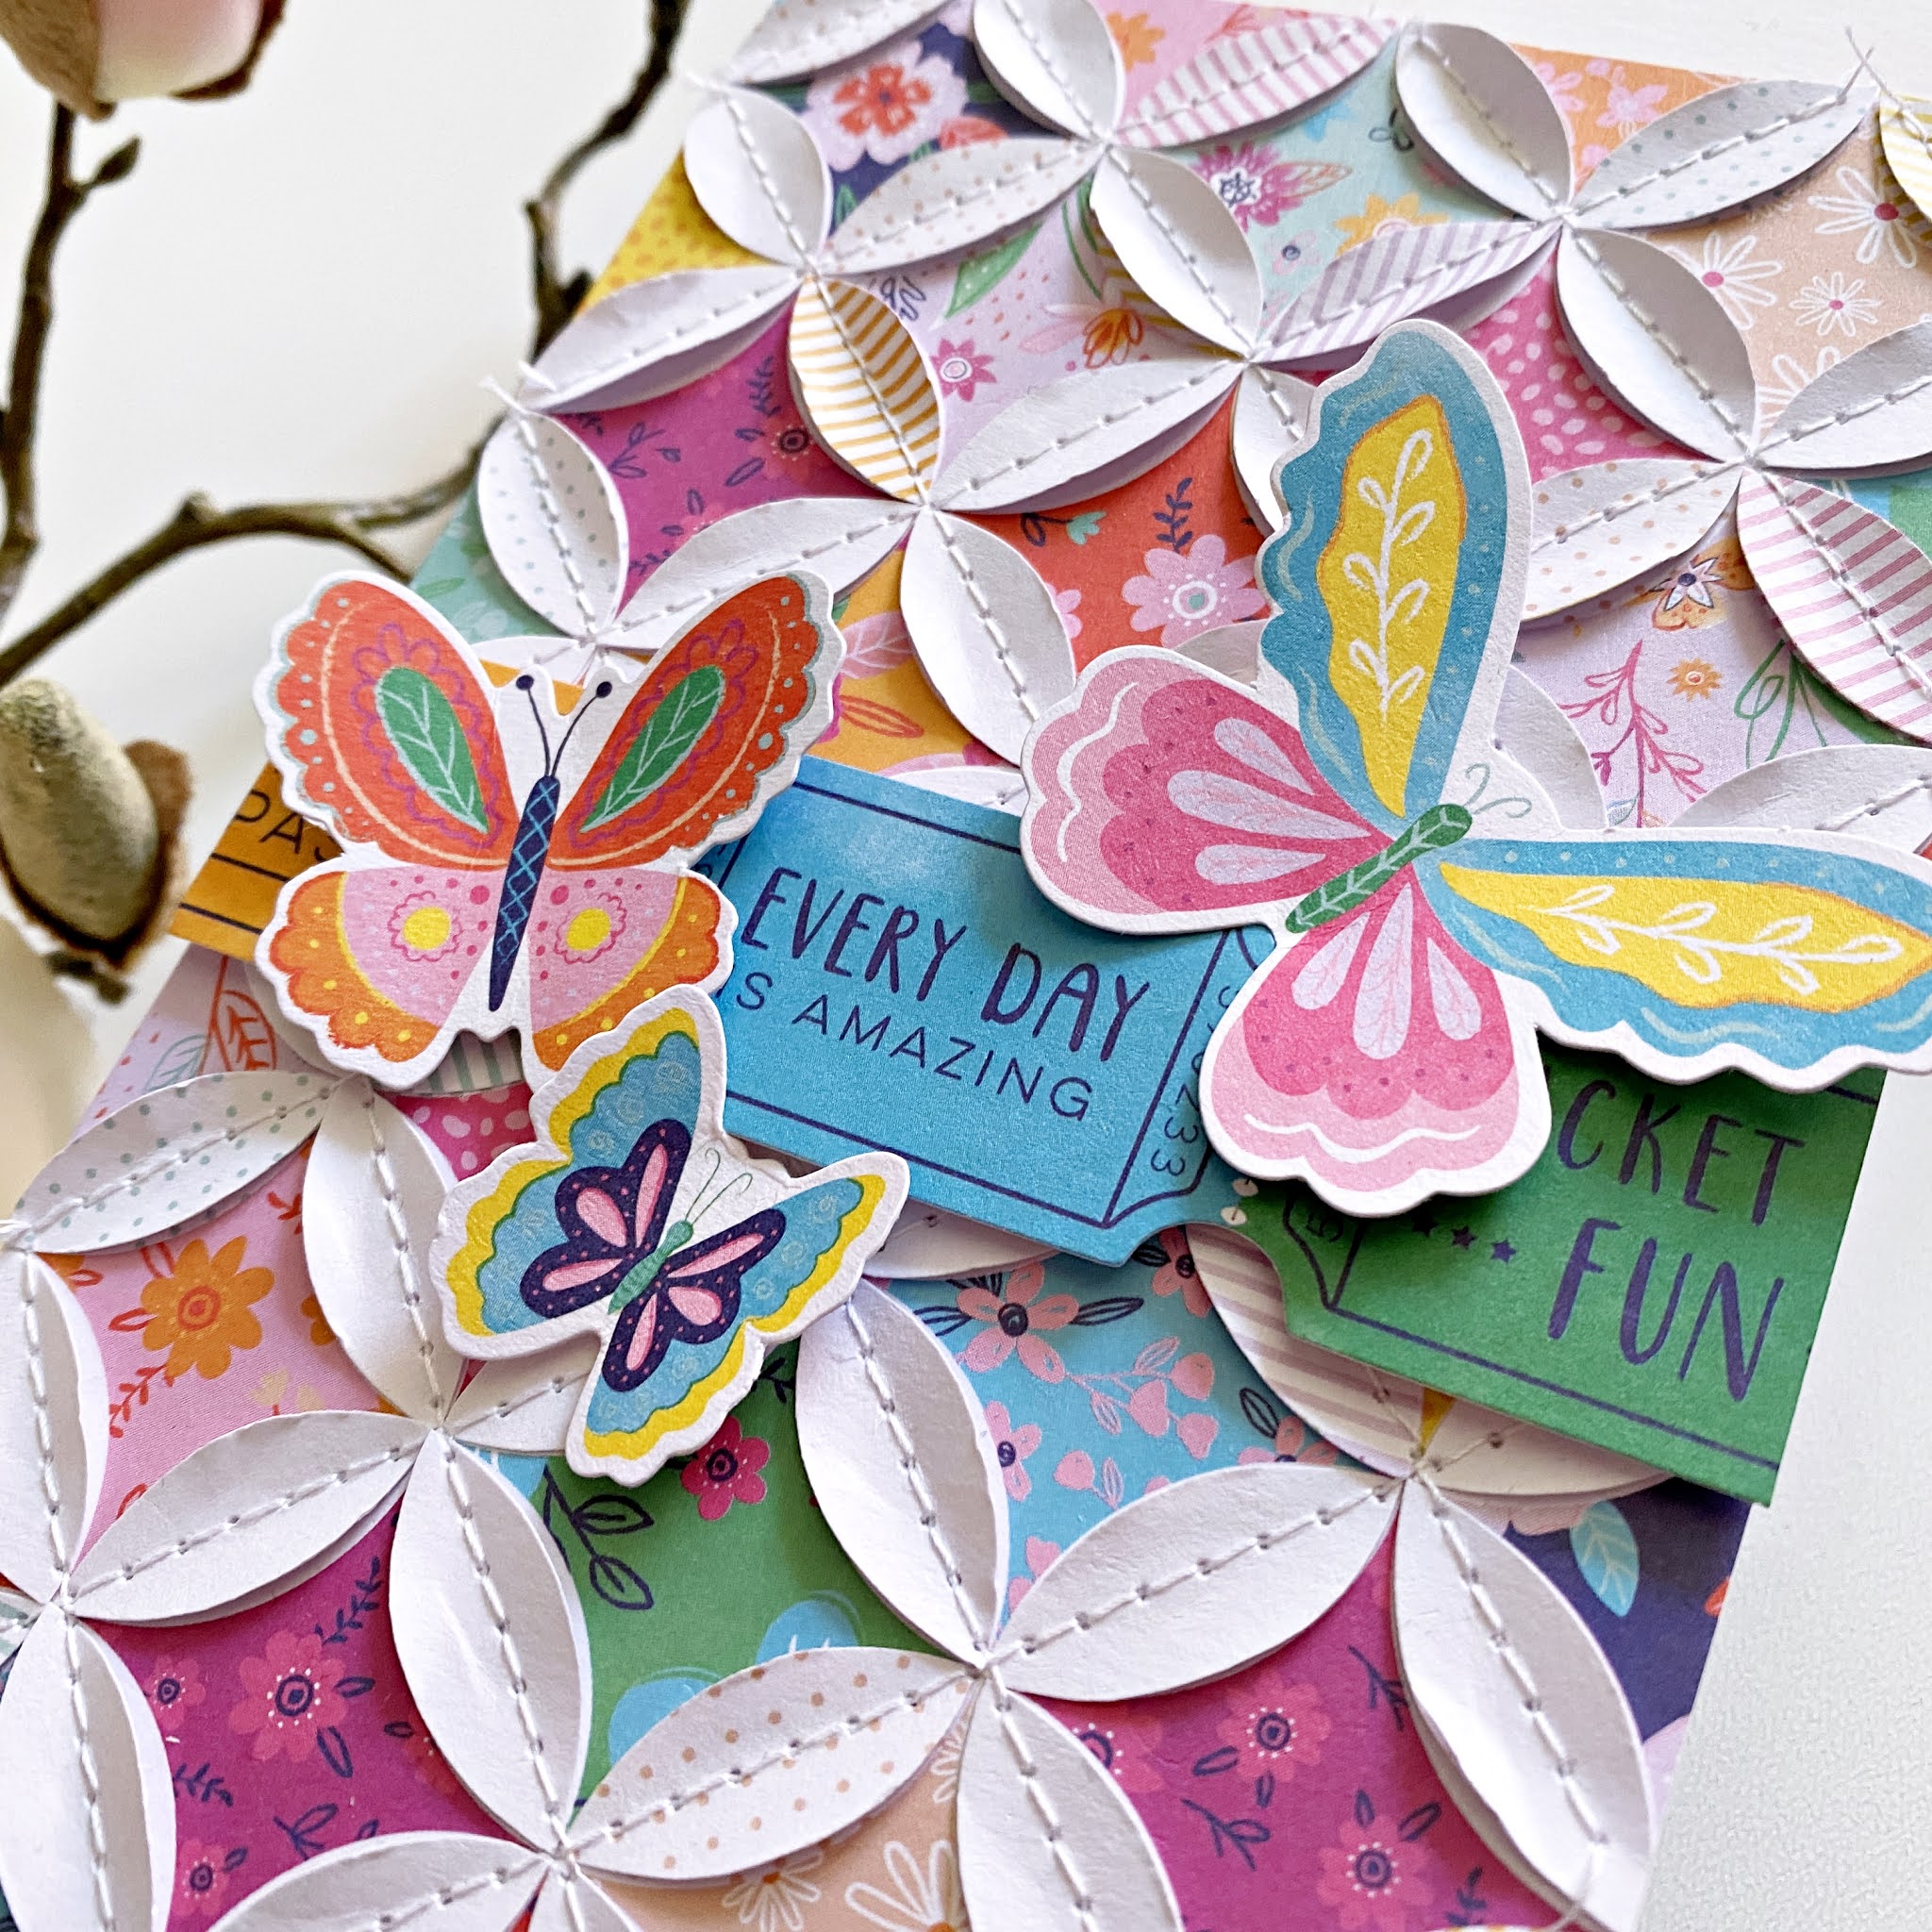
For my first card, I chose a quilt patterned paper from the 6x8" paper pad. I cut it down to 4" wide, I'm not sure about the length, I just made sure that I have full circles - probably it's about 6.5"? There's two of this paper in the pad, and I fussy cut out the white shapes from the second paper. I then adhered these down, on top of the other paper, using only a tiny amount of glue in the middle of each shape, because I wanted to stitch them down and bend them up later. This creates such a wonderful texture and dimension!
I glued the patterned paper piece onto a white card stock, and then adhered these both to my card base. To finish off the card, I added a sentiment, for which I used some tickets from the ephemera pack, and I also placed some butterflies around it.
For my second card, I fussy cut a bunch of simple leaf shapes from a variety of patterned papers. I went with a blue-red-pink-orange color combo. To do this, I just drew a simple leaf shape onto a piece of heavy weight card stock and fussy cut it out. This served as a template for all the other leaves. Easy and quick, and one doesn't need any fancy tools!
I cut two layers for each leaf - sometimes when I do this design, I go with more layers, but 2 is perfectly enough. So I glued the two layers together, but only in the middle, because I wanted to stitch these down and bend up the sides as well.
Once I was done with all the stitching, I adhered the leaves to my card base. I added some gold splatter for interest. I trimmed down a die cut from the ephemera pack for sentiment and using foam tape, I added this to my card too.
The third card is very similar to the first one, the paper has the same pattern, only a different scale. But I did the same thing with it: that is, added a second layer of shapes, stitched them down in the middle, and bent up the sides.
I added three strands of twine above the patterned panel, as well as a bow. For my sentiment I used the lovely colorful alphas from this collection!
That wraps up today's post, I hope I could inspire you in some way!
I also have a process video, that you can watch here:
Thank you so much for stopping by! Have a wonderful day!
It's been a long while since I joined one of these blog hops but luckily this month I had a little extra time and I managed to create a set of cards! If you had followed the hop, you must have arrived from the talented Joy Baldwin's page! I'm attaching the full list of participants at the end of this post for your convenience.
I've used the Large Die Kit on these cards. I have a process video too, if you're interested! I'll link it in at the bottom of this post, too.
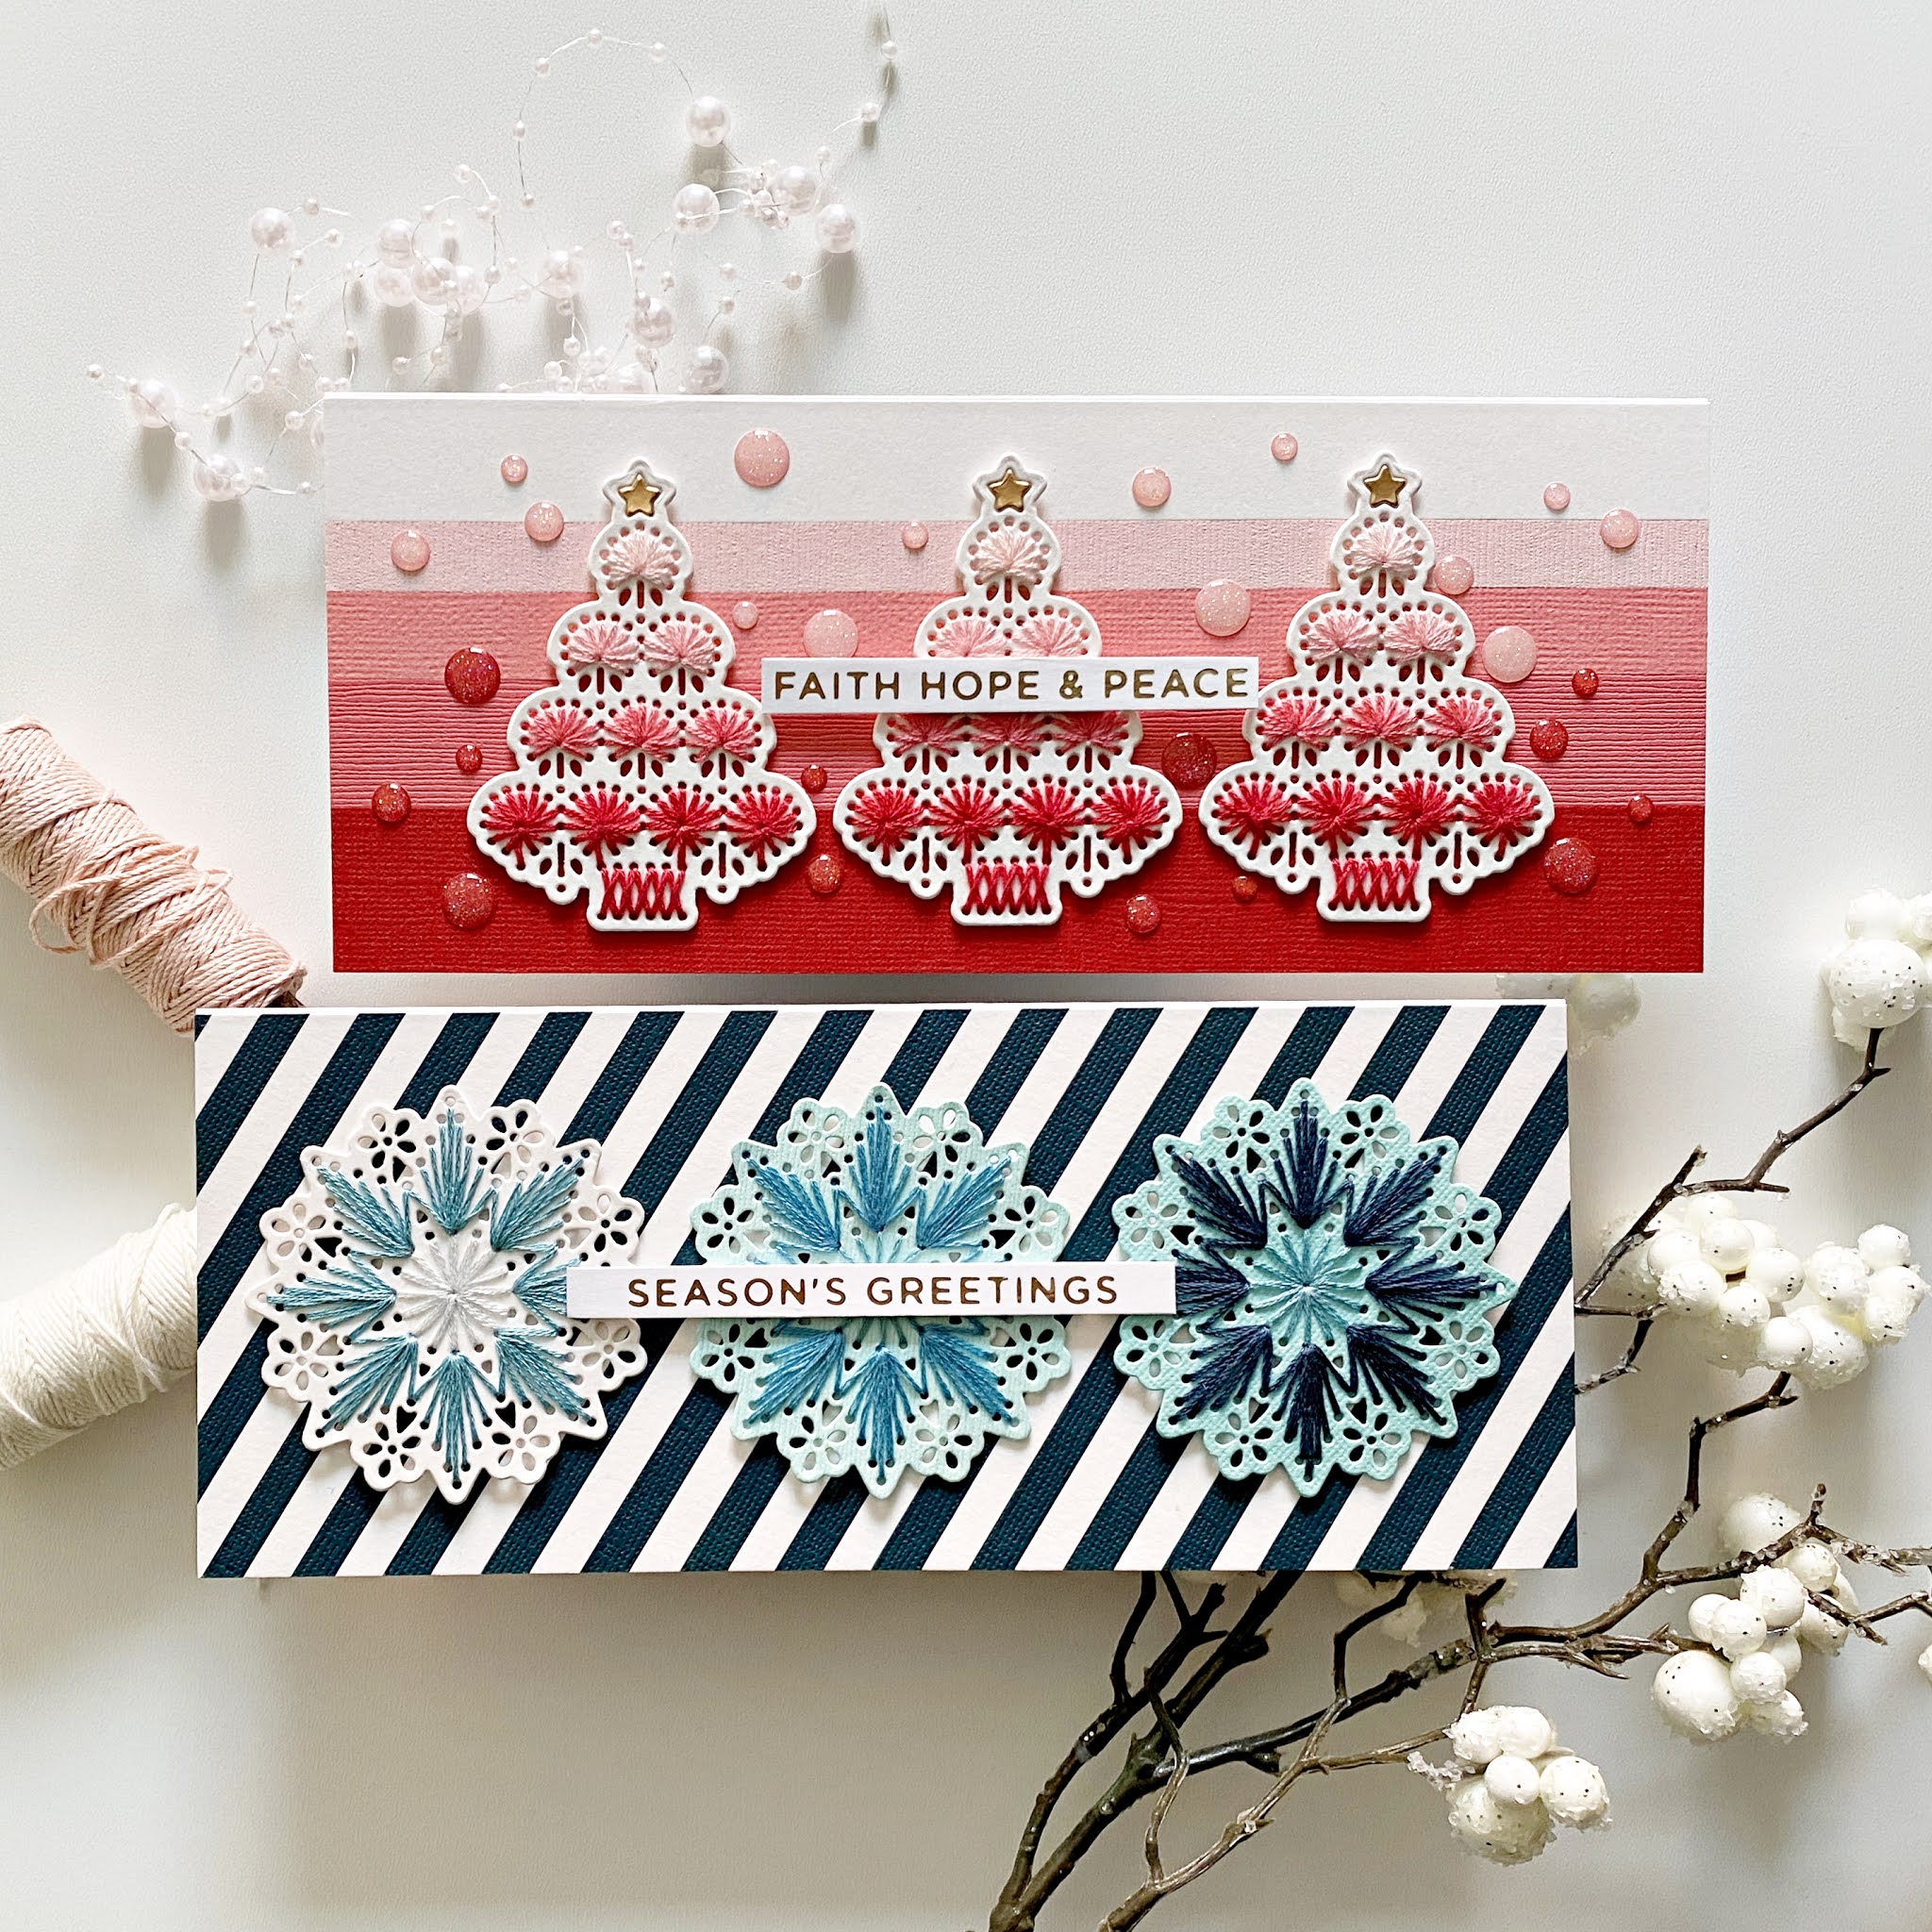
Both cards are top folding, A2 size (4.25x5.5"). I chose some pinks, white, gold and warm grays for my color scheme today. The grays almost look brown here!
I die cut two circles, one with the tree design, one with the snowflake. I actually die cut both twice, then layered them up, so they were strong enough to be hand stitched. These are very easy to hand stitch without any tutorial, the pattern kind of guides you really.
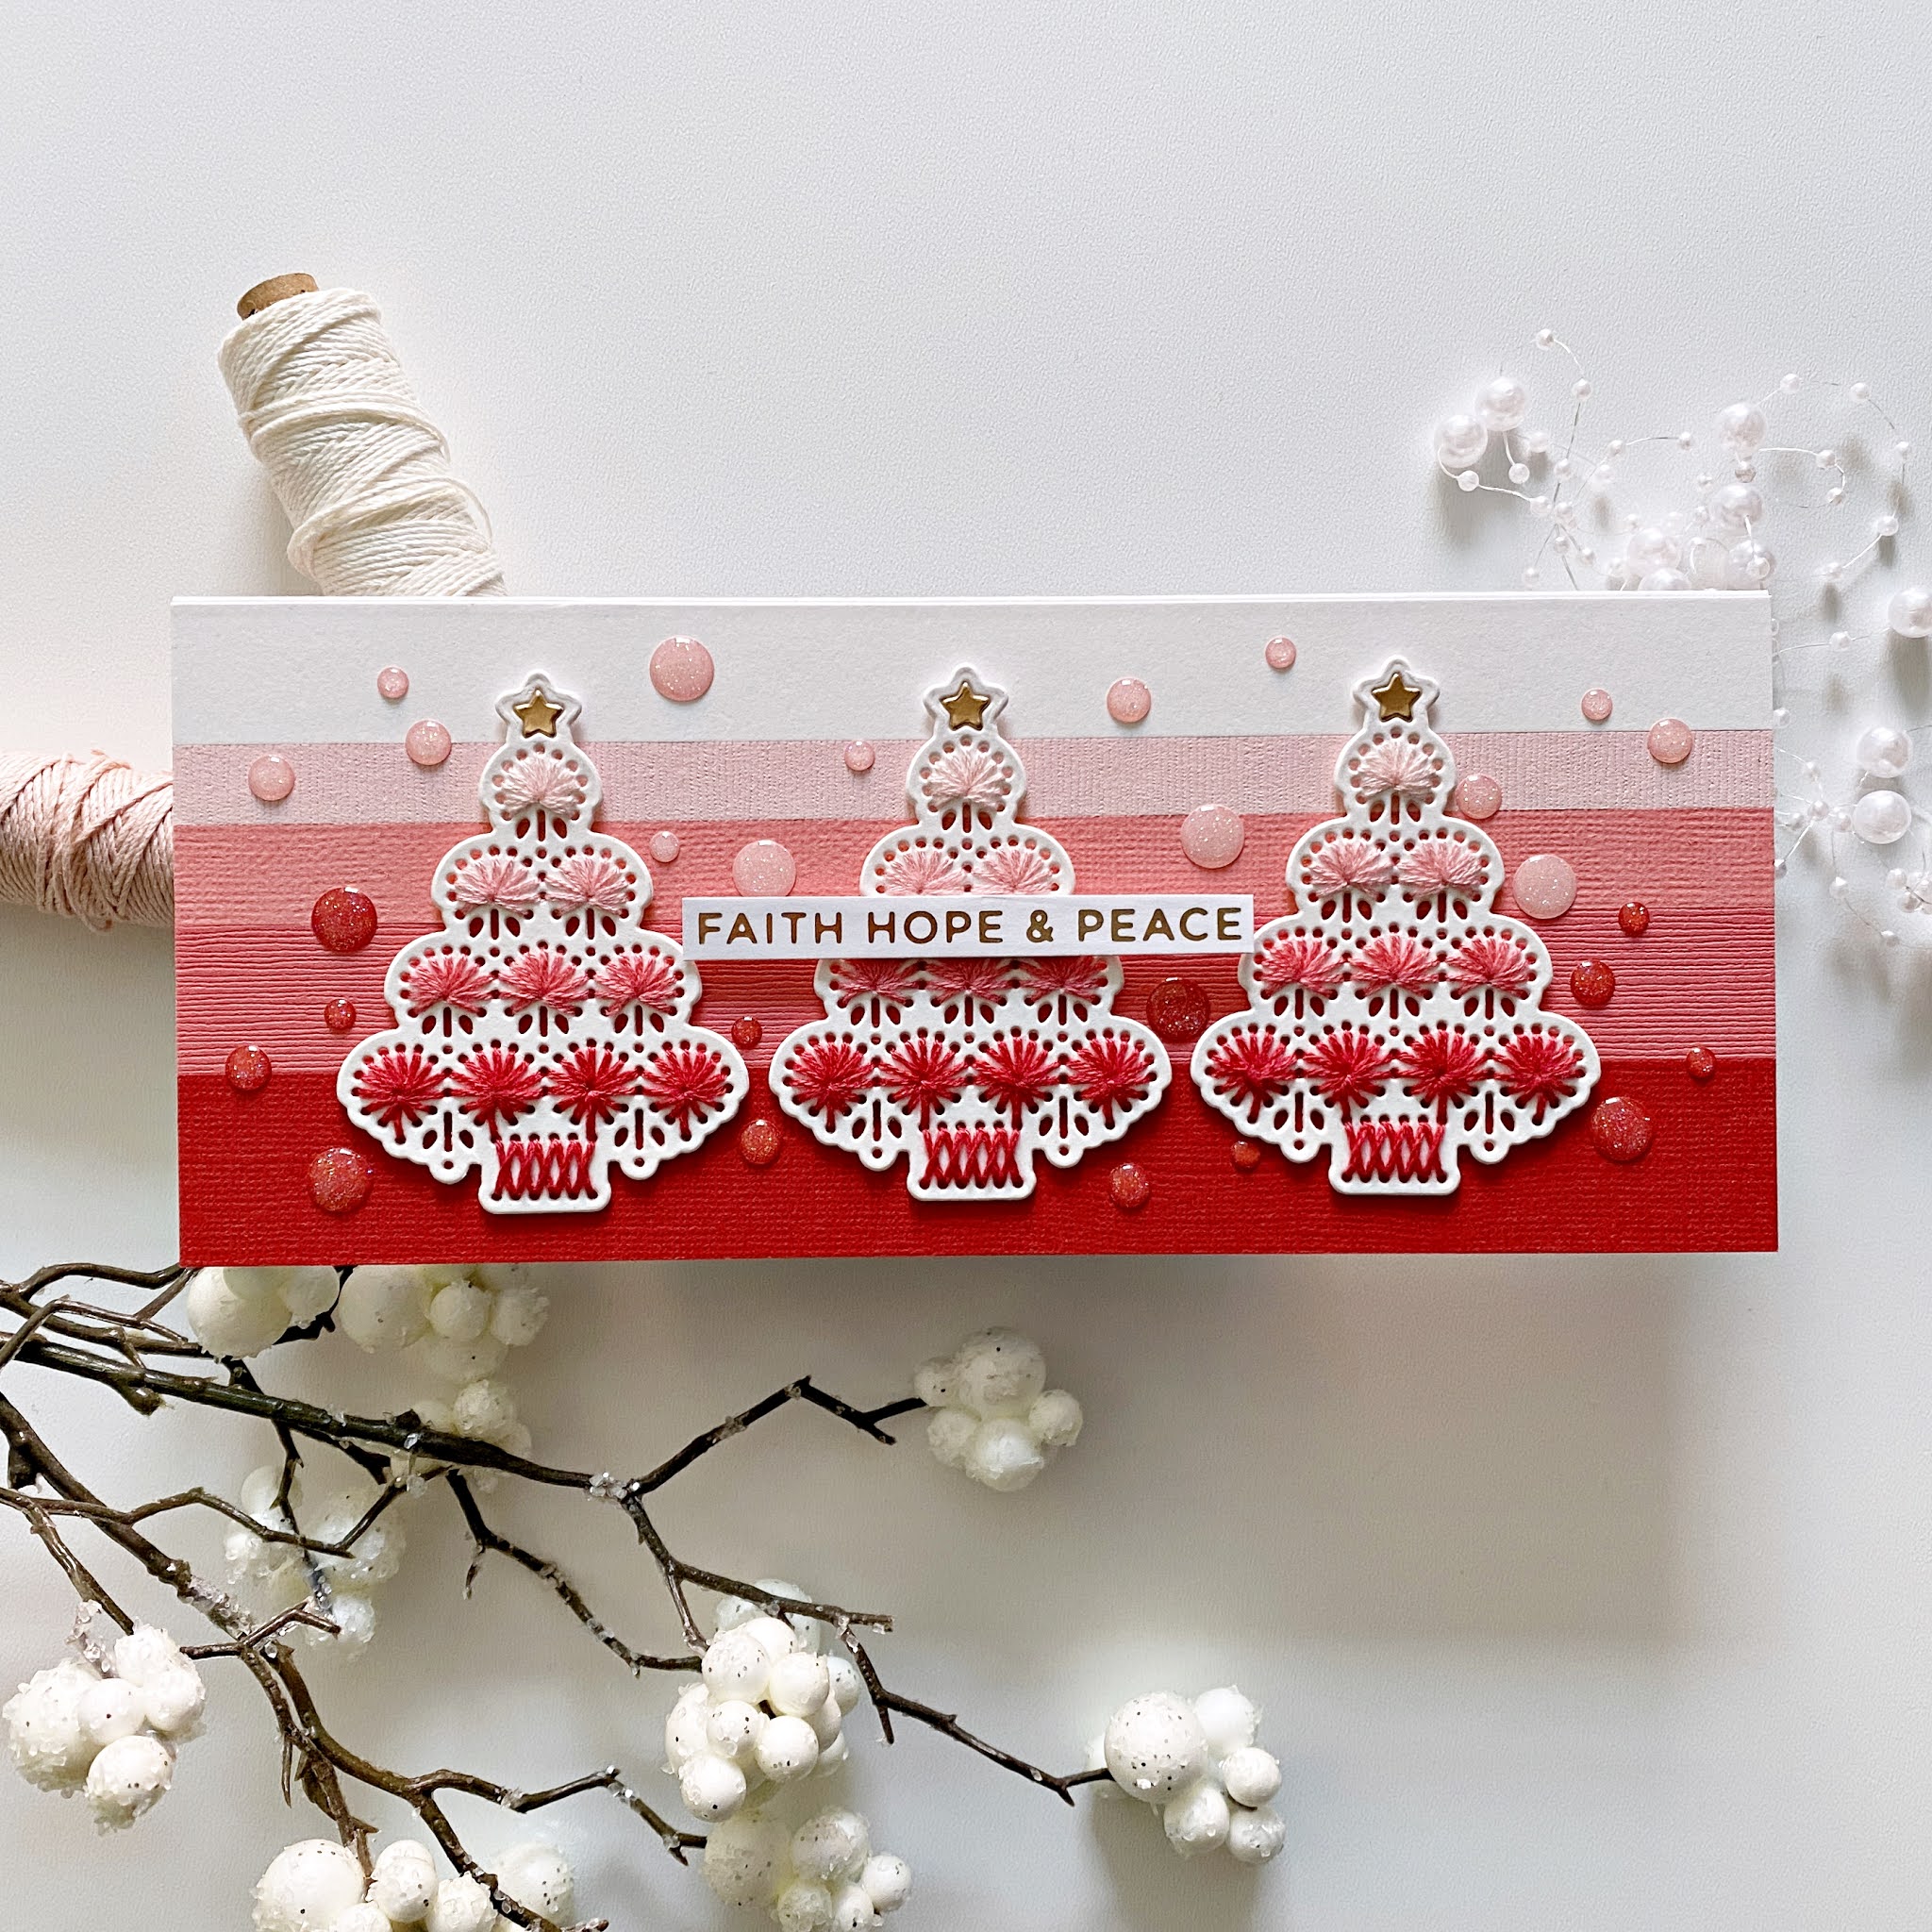
For my first card, I cut a few thin strips of card stock in the colors I chose. I also cut an A2 panel from the darkest gray and die cut the border at the bottom. I stitched this too, but not the complete pattern, because I knew I would have a paper strip overlapping at the top. I then glued down the strips, and if you look closely, you'll notice I made a mistake :D. I even laid out the strips before, so I knew in what order I wanted to glue them down and yet, I still managed to skip a pink one in the middle. Oh well, perfection is overrated, right?!
I added this panel to my card base, then started working on the rest of the elements. I die cut a gray circle that's slightly larger than the stitched white one, just so the design stands out more. I added foam tape to the back of the stitched circle and glued it onto the gray one, then attached this piece to my card front. For sentiment I've used a gold foiled holiday sentiment from my stash - I always foil a lot of these sentiments, so I can easily grab one when I need it.
Last but not least I added a bow, that was actually part of a Lindt chocolate packaging that I had been hoarding for awhile! I'm always glad when I can give things a new life!
For my second card, I first created a template for the background design from some scrap card stock, then I fussy cut out each shape from color card stock. I pieced them back together on the card base and first glued them down in the middle, then also stitched them down. I bent up the edges to add dimension and texture.
I would have loved to add a gold circle behind my stitched design so the gold could have peeked through the little holes, but I don't trust any of my glues to stick to the slick surface of the gold card stock :(. I never use metallic/mirror papers for any layer but the top for this reason. What I could do was, I die cut a circle from white card stock, then one from gold and I used the smaller circle die to cut out the middle part of the gold card stock. I then glued the gold frame onto my white die cut, and added the stitched circle on top, using foam adhesive. Hope that makes sense? This way I at least had a gold frame!
To finish off this card, I added a gold foiled sentiment and a few crystals in matching colors.
Here's the video, should you want to watch how these cards came together:
Now for the fun part! To celebrate this release, Spellbinders is giving away a $50 gift certificate to 5 lucky blog readers! Winners will be selected from the comments on the Spellbinders blog. Giveaway closes on Sunday, November 15th, 11:59pm EDT. The winner will be announced in the blog post the following Tuesday. The winner is responsible for shipping cost, duties and taxes. Please note, that gift certificates cannot be applied to Club Subscriptions, however, they can be applied to shop past Club products, Club extras and regular releases.
I'm stopping by today to share my newest layout I've created for the Paige Evans Design Team. I've worked with the awesome Go the Scenic Route collection!
There were two things I wanted to use on this layout, the patterned paper with all the super cool travel related icons and the foam alpha stickers. My idea was to have a longer title so I could use lots and lots of colorful alphas, but it didn't quite turn out the way I imagined it.
I started out by fussy cutting lots of icons - obviously you could do this with a PixScan mat, but I have no idea where mine is, so I thought instead of spending time on finding it, I'd just watch a movie and fussy cut them :). This was actually the most time-consuming part of the whole layout; the rest is super quick and simple. Well, except the adhering of these pieces, of course, that takes some time too.
What I wanted to do originally, is having the icons just like they are now, with a white circle in the middle, in which I was going to add my title. But I couldn't figure out a good place for my photos, so I scratched that. Also, my title didn't fit inside the circle. Oh dear. On to the next idea! This time I put my photos inside the circle, and I lined up my title with the circle - but the last word just wouldn't fit. Sheesh. I'm really stubborn though and I was not going to give up on that title! So eventually, instead of using the alphas for the last word, I just typed it up and added it between the first and last words of the title - I was thinking, this way one can actually tell where the title starts? I don't know, maybe it all makes no sense at all :D Before I glued down the typed-up word though, I stitched down the alphas using my sewing machine.
Then I arranged all my fussy cut icons and adhered them down with foam tape for dimension, texture, and interest. I splattered some white acrylic paint on the background. I then added my photos, which has some tissue paper layered behind them, as always. Since my page is already super busy, I didn't add many embellishments, just a few die cuts for a bit of color, a puffy sticker, and a paper clip. Once everything was in place, I wrote my journaling - which is super short, but I didn't need to say more.
That's it! Very simple, but I love the colorful result.
I have a process video for this layout as well if you're interested!
Thank you so much for stopping by today! I hope I could inspire you in one way or another. Have a wonderful day and see you next time!
It's that time again! The Spellbinders November Club Kits are here! This month, it's all about Christmas so that you can start your holiday projects in time! I hope you like what I have in store for you today!
As a reminder, Spellbinders have several monthly kits, which are really great! You can subscribe to:
You can find all necessary information about these kits here.
Let me start with the Large Die Kit. You'll get three stitching dies: a Christmas tree, a snowflake and a border, plus their outlines. This way you can create two different looks - I used the outline to create embellishments from the die cuts, but you could die cut these shapes directly into your card front and stitch there. I didn't even think of doing this, but I saw some cards with this technique and they were gorgeous!
I've actually made a process video for these 3 cards, so if you're interested in how I made them, please watch it. Just be gentle, I'm still learning the ropes hehe!
I don't have a video for the cards I've made with the Small Die Kit, so I'll explain how I've made them. First, I die cut every little piece from patterned papers and color card stock. I then put everything together so I could think about a card design.
I decided to go with slimline cards so I had enough space to put a snowman, a tree and the North Pole sign, all on one card. I made two different ones because the two snowmen wouldn't have fit onto one card, at least not in a way I would have liked.
As always, you'll find some inspiration in your Kit box, which is super helpful in figuring out which dies belong together - there's lots of small pieces!
Once I was done with die cutting and gluing pieces together, it went quite fast. I created two 8.5x3.5" card bases, then I added some patterned paper backgrounds (papers are from the Pinkfresh Studio Oh Joy collection).
I just hand cut my snow banks because I don't have any dies but if you do, by all means, use the dies. They create a nicer finish for sure. On the second card, I distressed the edges for added dimension and texture, then I glued everything else down.