Friday, October 22, 2021

This is Our Happy Place - DT Layout for Paige Evans

Hi there crafty friends,

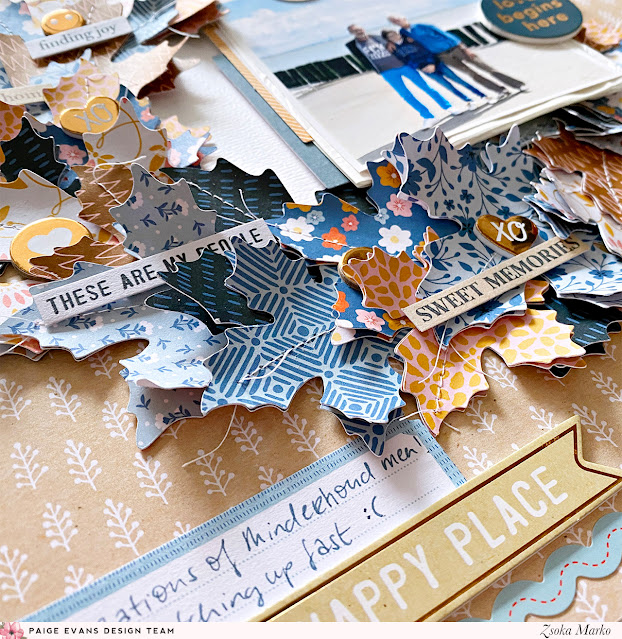
I'm stopping by today to share a new layout with you that I've created for the Paige Evans Design Team! I've used Paige's newest, gorgeous collection, Bungalow Lane. 

Since this is a fall themed collection, I wanted to make a layout with some kind of fall element to it, like leaves for instance. I haven't taken any photos yet this fall, so I went with a summer photo. Unfortunately we had pretty much fall weather on our summer holiday, so I thought this photo will work just fine!


Lucky for me, all colors that are in my picture, are also available in Bungalow Lane - so basically I just pulled out all patterned papers that matched my photo. I then resized the Large Leaf cut file (Design ID: D-306955) to have a variation of sizes (I believe I had 3 or 4 different sizes) and die cut a bunch of leaves from each patterned paper I selected. I cut two layers for each of my leaves.

I then glued the two layers together - adding only a tiny bit of liquid glue in the middle, since I wanted to stitch down the middle with my sewing machine. 


I bent up the sides of the leaves to give them a bit of dimension. Using one of our smaller plates as a template, I fussy cut out a circle from white, textured card stock. Obviously this would have been quicker with my Cameo, but I didn't think of it when I cut my leaves and then later I was too lazy to go upstairs again haha! Hence old school tools!

I adhered the white circle in the middle of my page, then I roughly arranged the leaves around it. Once I was happy with how it looked, I started gluing them down, to create a wreath. 


I layered some tissue paper behind my photo, as well as a few pieces of die cuts on both sides. I added some foam tape as well, because I adhered the picture on top of the leaves. By the way, I flattened out and glued down the leaves that were under my photo, just so I didn't have as much dimension. 

I then went through all embellishments and picked out some that went with my colors scheme: some card stock stickers, chipboard stickers, foam stickers and ephemera pieces. I stamped my date on a label sticker and partially tucked it in behind my photo.

I added a decorative border sticker at the bottom, as well as my journaling and my title. For my title I used one of the larger foam stickers. I placed some scallop chipboard stickers on the opposite side at the top, to create a more balanced overall design.


That's it for today! I hope I could inspire you in some small way!

Thank you for stopping by and have an awesome day!

X


Wednesday, October 20, 2021

In Focus: Spellbinders Be Bold Color Block Collection

Hi there friends,

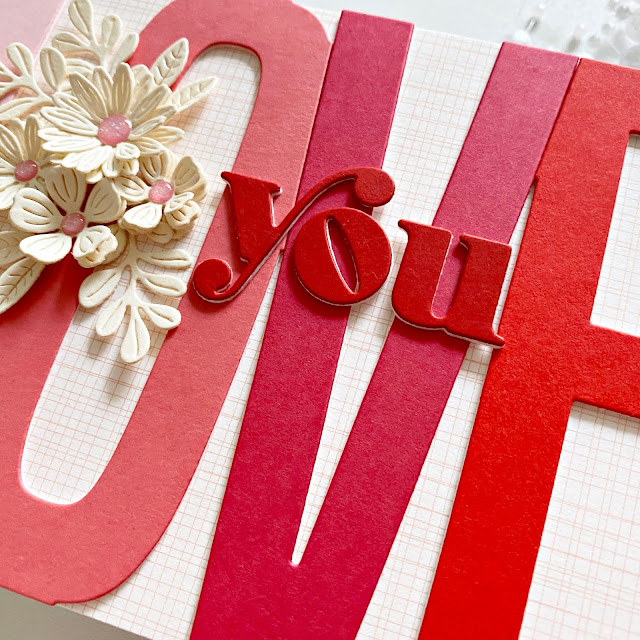
Today is release day at Spellbinders and I have two cards to share with one of the new collections, called Be Bold Color Block! There's two die sets in this collection:

I also used an additional two die sets to create the flower clusters on my projects:
I have a process video for you at the end of this post, so I'll just leave you with photos here. If you're interested in how these came together, what supplies I've used, please stop by my You Tube channel! All supplies are linked in the description box below the video. 


Here's the process video, if you'd like to see how these cards came together:


That's it for today guys!

Thank you so much for stopping by!
Have great day!

X

Friday, October 8, 2021

Beach Day - DT Layout for Paige Evans

Hi there friends,

I'm back with a new layout for the Paige Evans Design Team! Obviously I've used the beautiful new Bungalow Lane collection! I was so drawn to the scallop paper - it's a design that Paige had in previous collections as well, and I've always loved creating different layout designs with it. I have made a similar one to today's page before, I believe it was with the Whimsical collection!


I started out by cutting the scallop paper from the 12x12" pad into strips, then using a 1" circle punch, I punched out my semi-circles. I then sorted them by color and started building my scallops in a rainbow order. Or rather, from lightest to darkest colors, using the same color per line.


I adhered these to my white background, just lightly, because I knew I was going to add some machine stitching over them. I didn't use a ruler or anything, just eyeballed the placement. I don't mind if it's a bit crooked!


Next, I figured out how I want the rest of my layout to look: where to place my title and photos. Once I was settled on the design, I glued everything down. I layered some tissue papers and ephemera pieces behind my photos and added a chipboard frame on top of the photo on the right. 


Using a piece of twine, I hung the One Fine Day chipboard tag onto my frame before attaching it to my photo. Then I went through the embellishments and pulled out a few things I thought would work: a few stickers, phrase thickers, leaf embellishments. I glued these down, stamped my date onto a sticker label and added my journaling. Finally, I bent up the scallops a little bit, to give them a bit of dimension. Because dimension is everything!


Here's the process video, if you want to see how this layout came together:


Thanks so much for stopping by!
Have an awesome day!

X


Friday, October 1, 2021

In the spotlight: Spellbinders Small and Large Die of the Month kits - October 2021

Hi there friends,

It's that time again! The Spellbinders October Club Kits are here!

I will not go into step by step tutorials here, since I made process videos for all of today's projects - I'll just attach some photos! I'll link the videos down below, after each set of cards. You can also subscribe to my YouTube Channel and press the bell icon so you never miss a new video! You'll find all the supplies I've used linked in the description boxes of the videos.

As a reminder, Spellbinders have several monthly kits, which are really great! You can subscribe to:

You can find all necessary information about these kits here.  

First up some cards with the October Small Die Kit! I did use the sentiments from the Large Die Kit though!


You can find the process video here:


Next up, my projects with the Large Die Kit! 


The process video, if you want to see how these cards came together:


That's it for today guys! I hope I could inspire you in some small way!

Thank you so much for stopping by! Have a wonderful day!

X