Hello crafty friends,
I'm back today with my final cards for Feature Friday at Concord & 9th! I've had so much fun creating with the May release products, I'm actually really sad this is the last bundle I'm showcasing! But maybe now I will have time to catch up on earlier releases, I think I have about 4-5 products from Concord & 9th that I haven't used yet!
I love love love the Retro Petals Turnabout bundle we are featuring this week! I'm a sucker for this pattern! So much so that I pretty much did the same thing on all my cards today hehe. You should go check out the Concord & 9th product page for more inspiration though, because they always show the versatility of each set so well! You can find the Retro Petals Turnabout Bundle
here, but there's more sample cards on the single product pages:
Retro Petals Turnabout Stamp and
Retro Petals Turnabout Stencils. The stencils are a new addition to the turnabout family! One of them works just like the stamp, so you have to turn it around 4 times to get the full design. It's so awesome, I can only recommend it! It's so worth the money!
Anyway...First up this duo!
I challenged myself and picked out an embossing powder I've never used. I have so many and I mostly go with white. So I thought I'd start with that! I chose the gorgeous Mulberry Mist powder, stamped the image once with Versmark ink and embossed it. Then I placed it back into my stamp platform, and stamped the next 3 turns. If you are not familiar with how turnabout stamps work, head to the
Concord & 9th YouTube channel, I promise it is very easy to use them!
Once I was done with stamping, I decided to make two cards from the one panel I just stamped. I grabbed some purple card stock in the same size and cut them both at the same time at a diagonal. Then I paired them up, adhered them to an A2 size top folding card base, cut a thin strip of orange patterned paper to hide the cut lines. Here's where I made a mistake on the first card. I wanted to emboss my sentiment on the purple card stock but as I was working on it, I forgot about it and glued it on the card base already. Do the embossing first because otherwise your nice flat card will get warped...To straighten it out I ran it through my diecutting machine. The second one I embossed before attaching it to the card base. As a final touch, I added some flowers and leaves that are included in an earlier set, the
Blooms-Fill-in die set. A couple of enamel dots and done!
Next up, a trio of cards! For the one on the left I used the stamp, for the other two the stencils. I used Altenew inks because these come in 4 shades of one color so they are pretty handy. On the card on the left I just stamped the image four times in 4 different colors. Then I trimmed down the panel and glued it on an A2 size color card stock and adhered it to an A2 size top folding card base. I used one of the stencils and gold glitter modelling paste to create the Hugs sentiment. I added some gold tangled thread behind the sentiment and using foam adhesive I added it to my card. To finish this one off I added some enamel dots.
On the card on the right I used a stencil and created an ombre look with the inks. I then moved the stencil up and used it again to create extra rows of diamonds between the ones I already had there. I felt like I needed more pattern and color! I just added the Hugs sentiment (same as on my previous card), a strip of gold card stock and another one that I stamped a sentiment on. Enamel dots, done!
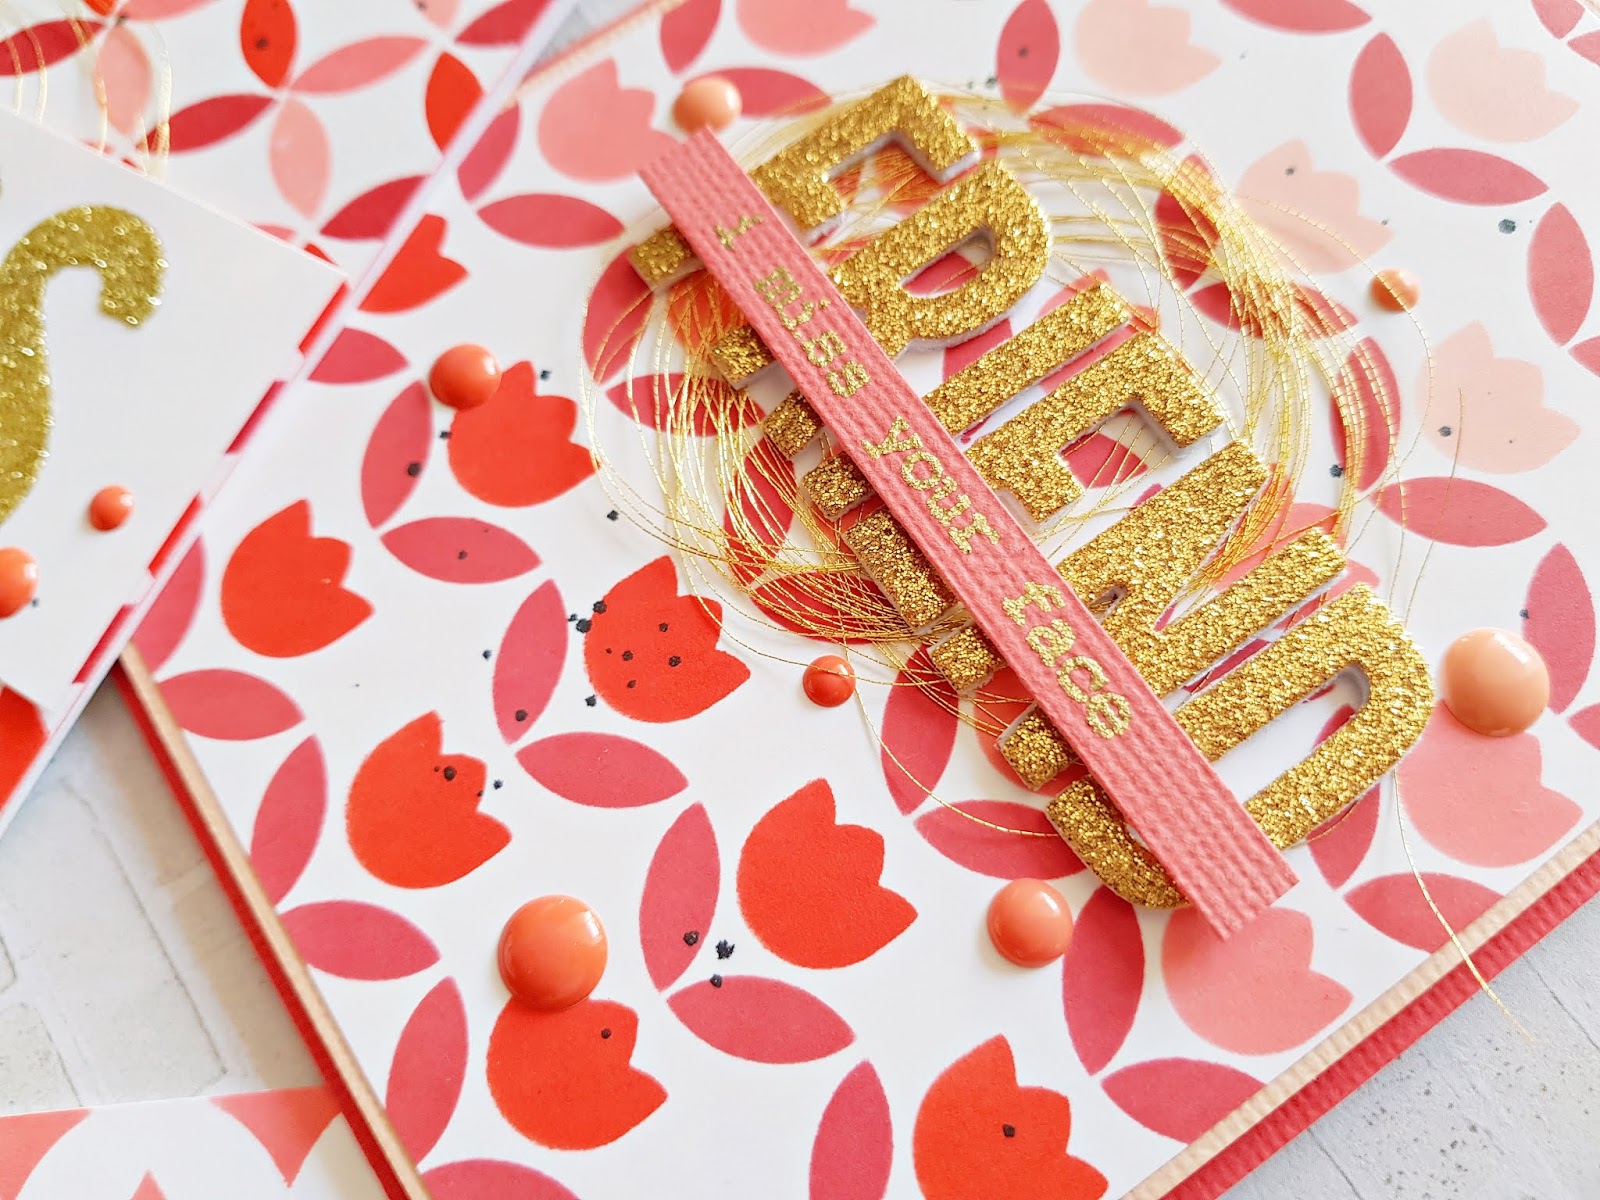
On the card in the middle I used the turnabout stencil to add the leaves and another stencil to add the tulips. I used the 3 lightest color Altenew inks for the tulips and the darkest for the leaves from one set - I believe it's called Tea Party. This time I die cut the Friend sentiment from gold glitter paper and foam adhesive, glued them together and then glued the letters down on top of some gold thread. I also cut a strip of card stock and stamped and embossed a sentiment on it. Again, enamel dots and done! I splattered some black ink on all three cards.

Next up a blue/kraft/white combo duo! For the card on the left I used the turnabout stamp and stamped all four turns using Versamark ink, then I embossed it all in white. I trimmed off a bit from the top and bottom and glued this panel onto my A2 size top folding card base. I added two thin strips of periwinkle patterned paper. From the same paper I created a flower, using the
Hooray Ribbon dies from an earlier release. The heart (also from this set) I embossed with my fave WOW Midnight Dream embossing powder. For the sentiment I went with the cute
Hooray die and cut it from gold paper. Last but not least, the most amazing blue crystals I ever did see!!!
For the card on the right I made a different panel from kraft card stock. I used the turnabout stencil this time and stencilled with two colors, white and bronze (2 turns each so it give the whole pattern). With the help of another stencil from the same set I added some dots, I used glimmer paste for this. I used the same paste to create the Hugs sentiment using one of the stencils. Once this dried I simply fussy cut the letters. I trimmed down the kraft panel and added it to a white A2 size top folding card base. I glued down a strip of patterned paper for accent and I wrapped some twine around the bottom. I adhered the sentiment with foam adhesive and added 3 crystals. Done!


And here we are, the last card, if you made it here kudos to you! I really appreciate it! I stamped a white panel with 3 colors this time. Well technically 2 colors and 1 gorgeous embossing powder. Again, I started with the embossed layer, I used the Florida Sunset embossing powder from WOW. Then I added 2 orange petals and a hot pink one. I trimmed this panel down a bit and added an A2 size orange mat behind it, then adhered these onto an A2 size top folding card base. I cut a piece of patterned paper and attached it to the top, then I added a sticker for my sentiment.
I stitched on a button and glued down two resin flowers plus a hot pink bow. That's it!
Hope you like these cards as much as I loved working on them!
Thank you for stopping by today! Should you have any questions, please just leave a message on this post!
Have a wonderful weekend!
X