Showing posts with label papercrafts. Show all posts

Wednesday, December 23, 2020

Rainbow Christmas - DT Project for Paige Evans

Hi guys,

I'm stopping by to share a few projects I've created for the Paige Evans Design Team! 

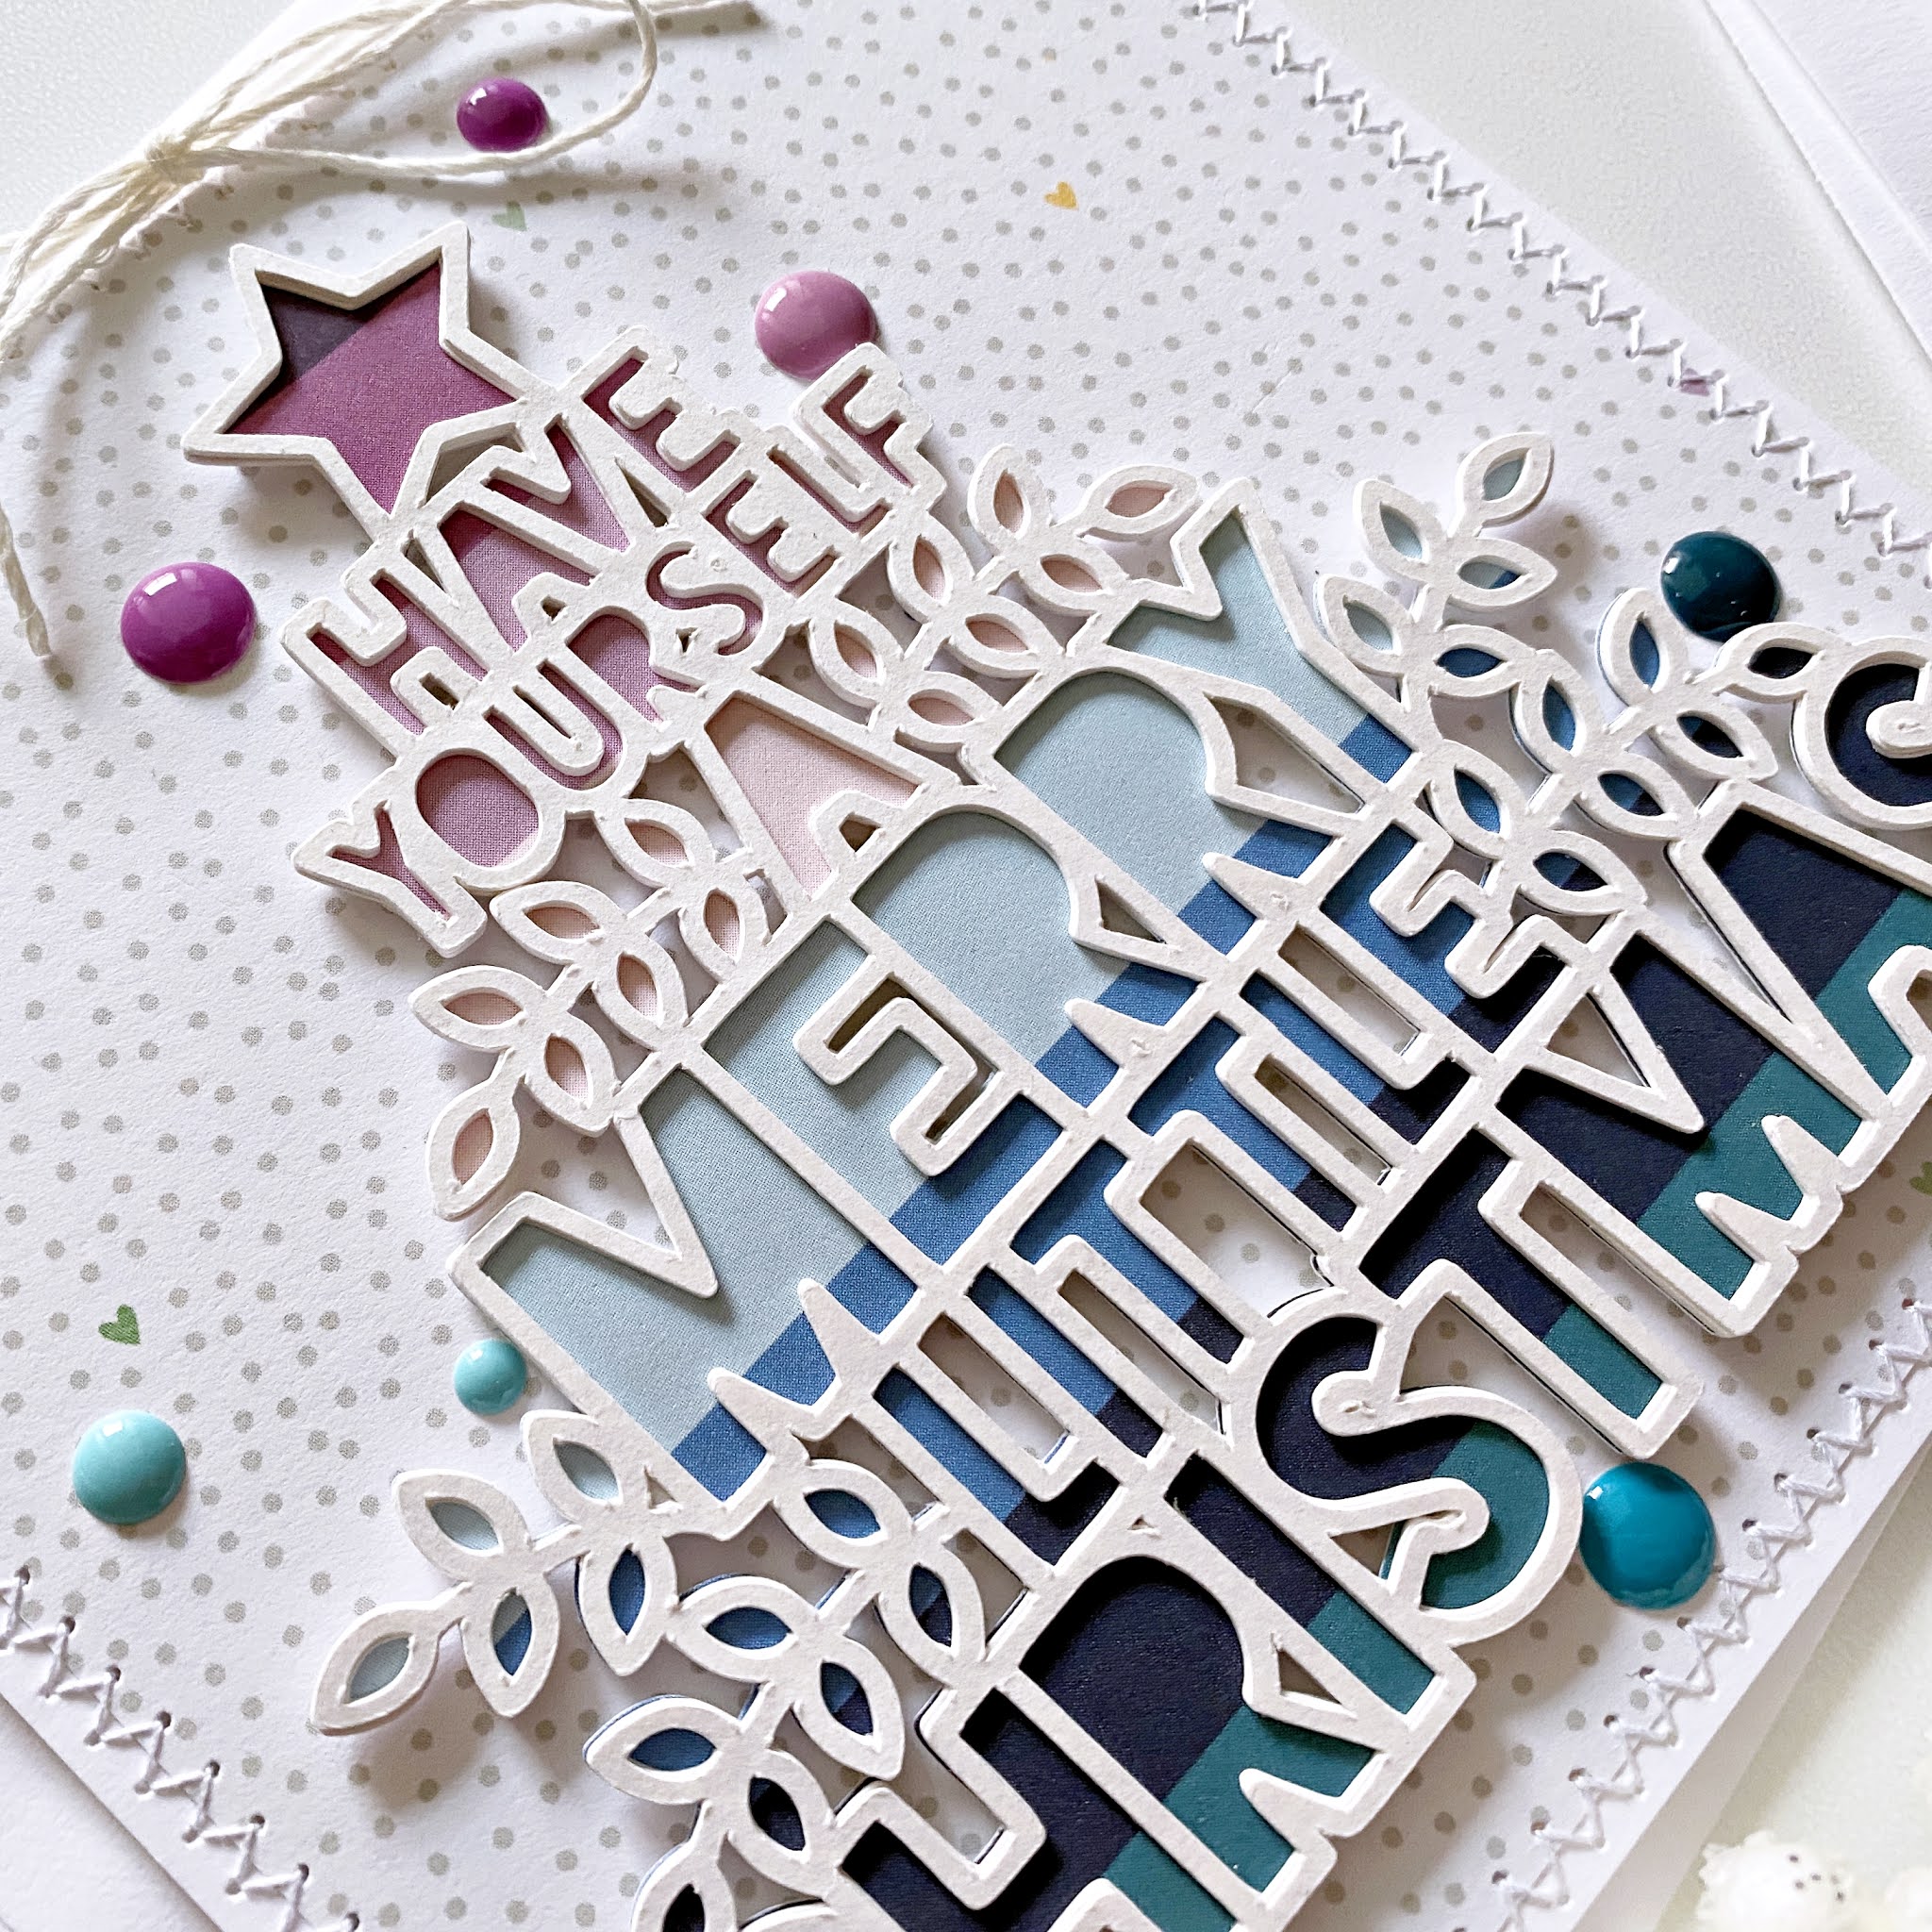
You probably know by now, that Paige is offering a bundle of cut files called "25 Days of Christmas Cut Files", where you get a Christmas themed cut file mailed to you every day until Dec 25th. Of course you can still purchase this bundle, should you have missed it! Today's cut file is this "Merry Little Christmas" tree, which I love so much, I had to use it on multiple things, cards, December Daily filler page and even a scrapbook layout!

I mostly used the Whimsical collection on these projects - it's my go to if I want to make rainbow projects! Of course, you can create rainbows with any of Paige's collections, but my most fave is Whimsical, it has the perfect shades of all the colors and the loveliest patterns!


I'll keep this post short because I'm in the middle of Christmas baking hehe, plus I have a process video for everything you see in this post, so no need to detail how I made them! I'll attach lots of photos though, in case you like to look at those.

You'll find the video at the end of this post!

Without further ado, the layout:


The December Daily page:


The cards:


You can watch the process video on my YouTube Channel:


I hope you like these projects which are in fact my last ones for 2020! I would like to thank you for your support throughout this harder-than-usual year and I wish you and your loved ones a very Merry Christmas and a wonderful, healthy and happy New Year!

I'll be back with lots of projects at the beginning of January!

Have a great day!

X

Friday, December 27, 2019

Right Now - DT layout for Paige Evans

Hello there crafty people,

I'm sharing my last layout with you for this year! WOW how fast this year went by again...I can't even believe it!

This layout was inspired by my uber talented DT peer, Steffi Ried! I actually was going to flat out copy hers because I loved it so much, but when I was working on it, the layout just kept changing lol. 

This tree paper is one of my favorites in Paige's Truly Grateful collection, it's such a sweet and colorful design. For a long time I had no idea what photo I could use with it, but then we went biking in the forest one weekend and it just all made sense.


I fussy cut all the trees, then layered them up, glued them together along the middle so I could bend up the sides to create some dimension. In retrospect, I could have added some colorful hand stitching to the branches but I didn't think of it at the time.


I chose a polka dot paper for my background and I added a wide strip of green paper as a reference to the forest, if that makes sense? I added a few layers of tissue paper behind my photo, then tucked it all in behind some trees. I didn't add a whole lot of embellishments: a date label, an epoxy sticker bird and a die cut banner around my photo as well as puffy dots in between the trees!


For my title I chose one of the epoxy sticker phrases because I love the font so much! It would have been a shame not to use it! I wrote my journaling next to the title, kind of filling up the empty space there.


That's it! Thank you so much for stopping by today as well as your continuous support over the year! 

I'm wishing a merry Christmas and a healthy, happy new year to you and yours!

X

SUPPLIES:
Truly Grateful collection: Paper 3, Paper 7, Paper 17, Epoxy Stickers, Ephemera Die Cuts

Friday, September 27, 2019

Make Your Own Magic - DT layout for Paige Evans

Hello there crafty peeps,

I'm back with a new layout for the Paige Evans Design Team! I haven't made a layout in like 2 months?! I've realised I can't focus on both cards and layouts at the same time, I have to be finished with all my cards before I can start working on my layouts. This is mainly because of lack of space - if I had a craft room, I could just set everything aside and work on other things. Now however, I have to clean up my tiny space in the kitchen ALL.THE.TIME before I can start on a new project uuuggghh. Anywho, I am just glad I finally managed to create some layouts! This is one of them:


I checked Paige's latest cut files and picked out the gorgeous Cut and Fold Butterflies Galore cut file (Design ID: 300213). I only kept one of the butterflies and deleted the rest. I then replicated it and lined them up the way I was planning to use them. 


To be honest I was going for something completely different but when I was checking the patterned papers and placed this floral one behind the cut file, I knew I had to use it. I just love all the colors peeking through - they remind me of paintball splatters for some reason! So I trimmed down the white card stock and adhered it to the left side of the floral patterned paper. I also added a thin strip of pink paper on the right side.


I layered some tissue paper, as well as a couple of journaling spots behind my photo, then glued it all down. I tucked some labels behind it too. Using foam tape I attached a small die cut banner with an epoxy sticker heart on top.

For my title I chose one from the Epoxy sticker pack -I love love love the font so much, I wish there were several packs like this in the collection haha! I adhered it to my layout, wrote a few words below it and stamped my date. Last but not least, I splattered some gold paint all over my page. Now that I have a couple of extra bottles of my favorite gold spray, I'm not stingy with it anymore hehe!


That's it lovelies! I hope you like how this page turned out!

Thanks for stopping by today! Have an awesome day!

X

SUPPLY LIST:
Truly Grateful collection: 12x12 Paper Pad, Epoxy Stickers, Journaling Spots


Thursday, September 19, 2019

Card inspirations - DT projects for Pinkfresh Studio

Hello there Pinkfresh fans,

Today I have a few new card ideas for you! 
First up this blue duo! To be honest, when the gorgeous Lovely Blossoms stamp set (there's also coordinating dies) was released, I just stamped a million of them in all kinds of colors without a plan in my head. It was obvious I would use them for today's post but I had no idea what colors to go with!


But then blue is one of my most favorite colors and that blue tile paper from the Just a little Lovely collection (6x6 paper pad, 12x12 paper pack both available!) is my absolute favorite, so I just opted for blue. I didn't want to do monochromatic blue or pair it with coral like before though, so I went with orange. It is not my favorite combo, I will be honest. Anyway...I die cut all those lovely mini florals and leaves and played around with different arrangements. I created an A2 size top folding card base and attached patterned paper to the card front. I die cut a smaller white and a larger blue circle and layered them up, adhered them down. I started gluing down the little flowers, some with liquid glue, others with foam adhesive, for a bit of dimension. I die cut my sentiment using the Essentials: Classic Words die set. I added some enamel dots and twine to finish off this card.


Recently I had to make some shaped cards for a company and I loved them so much I decided to make one today as well. For this I've used the Essentials: Braided Tag die set. I first created a card base from heavy weight card stock - for this I partially cut the shape, so the top part didn't cut, then turned around the die and repeated the process on the other side (for the back of the card base). Then I just folded the long oval shape in half and done! I die cut the tag with the braided insert from blue card stock and adhered it to the card base. For sentiment I used a die cut piece from the Just a Little Lovely ephemera pack. I tucked some stamped flowers under it as well as some gold enamel dots. To finish this off, I channelled my inner Ivana Camdzic and added a shabby ribbon at the top. :)


For my next duo I picked out coral and red papers from the Office Hours and the Everyday Musings collections. Both are mounted on A2 size top folding card bases. 


I've used the stunning Modern Bloom standalone die to create a simple floral background. I've cut this from white, light coral and red papers, so that I could add some color to the flowers. I wanted to keep this light and airy so I didn't fill the leaves. Using one of dies from the Basic Label Frames die set and some vellum, I created a spot for my sentiment to sit on. I wanted to use the same red paper for my letters, so I had to tone down that part of the background. However, I didn't want to cover up the beautiful flowers - hence my choice of using vellum. I then die cut the letters with the help of my favorite Kelly Alpha dies ("H" from the Upper Case set, "i" from the Lower Case set), then backed them with white card stock. I adhered the vellum to the card front, then using foam tape, I attached the letters too. A few enamel dots and done!


For my last card I die cut a few scalloped strips in different shades of coral, using the Simple Edgers die set and adhered them at the bottom. I fussy cut out one of the circles from the Dreams paper (Office Hours collection), added some foam tape to it and before gluing it in place, I tucked some stamped flowers behind it. I then die cut Hello (Essentials: Classic Words die set) from red patterned paper as well as from white card stock multiple times, layered them up to create a dimensional word. I glued this down on the circle and added some more flowers around it. Last but not least, I've added some enamel dots and twine.


That's it for today! I hope I could inspire you to get crafty! See you next month, possibly with holiday cards, who knows ;P

Thanks for stopping by, have a wonderful day!

X

Thursday, July 11, 2019

Altenew July 2019 Stamp/Die/Stencil/Stamping Mat Release Blog Hop + Giveaway


Hello crafty friends,

I'm so excited to be joining the Altenew July 2019 release blog hop today! This will also be my last Altenew blog hop for awhile, because I've been struggling to find the time. I hope you'll enjoy my last projects!

You should have arrived here from the talented Jaycee Gaspar's blog. You can also find the full blog hop list at the end of this post in case you're lost.

Well let me start with the card I mentioned in my June Standalone Die release blog hop post, that I had messed up because I also used dies from this release (banging head in the wall)! Anyway, these layered flower dies were already released last month, but in case you've missed them, here is your chance to buy them: Virginia Rose 3D die set.


The dies I should not have used last month are the cool Geometric Frame dies! The sentiment is from the cute Bright Blossoms stamp set.


Next up is this duo I've made using the Bright Blossoms stamp set (also available: coordinating dies and stamp&die bundle at a discounted price). 


I can't stay away from those stripes!


For those of you that prefer muted colors, I've made this gray and gold card! Same Bright Blossoms stamp set as before, and for sentiment I just used the Mega Hope die and gold glitter paper. Which look do you prefer? I personally am all for color!


That's it for today! Should you have any question on how I made something, just leave a comment below and I'll get back to you. I apologize for not thanking each and every one of you for your sweet comments - I haven't been able to from my PC for months and it takes ages from my phone. But I always appreciate them, they make my day, please know that!

Now for the GIVEAWAY!

Prizes: 
1. To celebrate this release, Altenew is giving away a $50 gift certificate to 6 lucky winners! Please leave a comment on the Altenew Card blog and/or Altenew Scrapbook blog by 07/16/2019 for a chance to win. 

2. Altenew will also draw a winner to receive a $20 gift certificate from comments on each designer's blog in the blog hop list.

All winners will be announced on the Altenew blogs on 07/16/2019!

Thanks so much for stopping by today! I hope I could inspire you in some small way!

Have an awesome day!

X

Blog Hop list:

Monday, July 1, 2019

Altenew Build-A-Flower: Camellia Japonica Release Blog Hop + Giveaway


Hello crafty peeps,

Welcome to the Altenew Build-A-Flower: Camellia Japonica release blog hop!

You should have arrived here from the lovely Isha's blog! I'll add the full blog hop list at the end of this post, for your convenience!

I've made two card duos for you today. First up is this colorful pair. On the card on the left I first started stamping and masking directly on my card front but later decided to add some dimension so I pretty much covered up my hard work lol!


I stamped and die cut several camellias in yellow, orange, pink, teal and purple. I stamped my sentiment in purple, then before adding the die cuts I used the Dotted Swirls Debossing cover die to add some texture and interest to my card. I'm obsessed with this cover die, I hope there will be more designs in the future! When there's a lot of white on my cards I feel like they are not finished (I'm not a CAS card maker) and adding a bit of debossing (or embossing for that matter!) helps me with that problem. Once done, I layered some die cuts over my stamping and cut off the access. To finish off my card I added a twine bow and a few crystals.


For my second card I debossed a white A2 size panel. Then I cut a wide strip of aqua card stock and heat embossed my sentiment. I added foam adhesive to the back of this, then checked where I want to have it on my card base. Before adhering it, I tucks some die cuts behind it. To finish it off I added a twine bow and some crystals again.


On my next two cards I went with a springy color theme which was inspired by white camellias that have a bit of a pink edge. Those are my favorite! But how to stamp a white flower? Hmmm. I experimented a little, but because this is a layering stamp, I didn't get the result I pictured in my head. With a single layer stamp I could have just inked up the edges and it would have looked OK, but here I would have needed to ink up the edge of every layer (with pink that is) and this was quite hard to do on the inner layers. Anyway, at least they look a bit different hehe!


Also, I've been loving paper strips for a while now, because they allow me to create ANY color scheme I just want and the result looks like patterned paper. Love them. I hope you are not tired of seeing them yet!


For my sentiments I've used the Folksy Florals stamp set. I finished off these cards with some hot pink twine and pearls.


And now the fun part...Giveaways, yay! Read on to find out how you can win! Good Luck!

Prizes: 
1. To celebrate this release, Altenew is giving away a $30 gift certificate to 6 lucky winners! Please leave a comment on the Altenew Card blog and/or Altenew Scrapbook blog for a chance to win. 

2. Altenew will also draw a winner to receive a $15 gift certificate from comments on each designer's blog in the blog hop list.

All winners will be announced on the Altenew blogs on 07/07/2019!

That's it for today guys! Your next stop is Seeka's blog!

Thanks so much for stopping by! I hope I could inspire you in some small way!

Have an awesome day!

X

Blog Hop list:


Tuesday, June 18, 2019

Altenew June 2019 Stand-alone Die Release Blog Hop + Giveaway


Hello crafty peeps,

Welcome to yet another Altenew release blog hop hehe! Today we are showcasing the June stand alone dies!

You should have arrived here from the wonderful Irina Fonina's blog! I'll add the full blog hop list at the end of this post, for your convenience!

I've only made 5 cards with this release (I know right?!) because there's so much going on in my life right now, deadline upon deadline...But I'm sure you see loads of inspiration along the hop! Oh, also, I had a 6th card but guess what...I messed it up since I mixed in some July release dies too, omgosh, where's my mind...So that one I will only be able to share in July!

Anyway, about my projects! First up is the Color Wheel die! This is a rather large die so I decided to only use parts of it. I don't like big cards! All cards but one in this post are A2 top folding cards. The one here on the right side is a bit taller because I absolutely wanted to use this beautiful sentiment in the middle (the sentiment is from the gorgeous Build-A-Flower: Ranunculus stamp set) and also didn't want to crop more off the wheels. 


I grabbed a few shades of pinks, aquas and blues and did a bit of paper piecing. This takes time but I always love the result! There's an extra big circle die in this set, so you can die cut the wheel two ways: directly in the panel like I did on the left card, or if you use the extra circle, you will have the color wheel completely cut out. Now I'm thinking I could have made circle cards too!


I stamped the sentiment in black Versafine ink so it's nice crisp. I just felt I was missing something. I went through my enamel dots stash and pulled out all colors I thought would fit. And then totally went overboard...I can't help it... I finished off both cards by adding some gold paint splatters.


On my next cards I used the the Dainty Blooms cover die. Honestly, I am always only planning to make one card...Here, that was the one in the middle. But then I hate throwing anything away! I'm sure a lot of you can relate to this. Especially with paper piecing, if I want to use more colors, I have to die cut the whole panel several times and I have a bunch of perfectly good die cut panels...However, since piecing back all pieces takes a long time, I tried to use the rest in different ways.


On the left card I just stacked up two die cut panels and attached them to a white card base. Easy peasy. I then gold heat embossed the sentiment (from the Folksy Florals stamp set) on vellum so I didn't cover up the die cut background so much. For a little something something I added some ribbon and a button.

Sentiment on the card in the middle is again from the Build-A-Flower: Ranunculus stamp set.

For my last card I trimmed off the top part of the die cut panel, adhered it to a white card base, did some paper piecing, stamped my sentiment (from the Folksy Florals stamp set) and added a twine bow at the top. Oh and some gold ink splatter on all 3 cards! Because after two years of searching I found 2 bottles of my fave gold ink (in Malaysia for all places!) and now I don't have to be so stingy with it anymore hehe!


And now the fun part...Giveaways, yay! Read on to find out how you can win! Good Luck!

Prizes: 
1. To celebrate this release, Altenew is giving away a $50 gift certificate to 6 lucky winners! Please leave a comment on the Altenew Card blog and/or Altenew Scrapbook blog by 06/24/2019 for a chance to win. 

2. Altenew will also draw a winner to receive a $15 gift certificate from comments on each designer's blog in the blog hop list.

All winners will be announced on the Altenew blogs on 06/27/2019!

That's it for today guys! I apologize if this post is full of mistakes, I'm writing it after just 2 hours of sleep... You know the feeling when you wake up in horror to remember that today is blog hop day and you haven't written your post. No? Me neither, it's a first lol! Alright, back to bed!

Thanks so much for stopping by today! I hope I could inspire you in some small way!

Have an awesome day!

X

Blog Hop list: