Showing posts with label Take me Away. Show all posts

Thursday, January 30, 2020

Love - DT layout for Paige Evans

Hello there crafty peeps,

I'm stopping by to share a new layout I've created for the Paige Evans Design Team. 

I've used the wonderful Take me Away collection again. As far as I remember, I've never made a layout with this gorgeous, steel blue, floral paper before, so I wanted this to be my focal point. Unfortunately I didn't have a full 12x12 sheet so I had to come up with some solution to fill up my page!


Eventually I decided to adhere the blue paper onto this cross stitch patterned paper. To play off that design, I added a few cross stitches using white embroidery floss.


I modified Paige's Cross Stitch Heart cut file (Design ID: 242188) in that I moved the single crosses closer together and welded them. I then cut it from textured white card stock. I glued it down in the middle of my page.


For my title I decided to use a stunning die from Spellbinders (it's actually the January 2020 Small die of the month kit). I cut the base from white card stock, then the letters and flowers from a bunch of patterned papers in 4 colors. I used foam tape to attach the letters to the base, to create a dimensional piece.


I layered white tissue paper behind my photo and tucked in some die cut from the ephemera pack as well. I barely have any embellies left from this collection unfortunately :(. But I managed to add a few chipboard hearts, a couple of chipboard leaves and a suede bow. Last but not least I added my journaling and date using a white gel pen.


That's it for today! I hope I could inspire you in one way or another!

Thanks so much for stopping by! Have an awesome day!

X


Friday, January 10, 2020

Happy Embrace - DT layout for Paige Evans

Hello there crafty friends,

Happy New Year! I hope you had a wonderful, relaxing holiday season with your loved ones!

I'm back with my first layout of 2020 :). For today's post, I went back to Paige's second, breathtaking collection, Take Me Away . If you are lucky enough to have it in your stash, go get it out now and start creating! I promise you'll love the process. While I love new collections, I notice that rediscovering old favorites fills me up with inspiration and so much joy.


While this collection is actually quite pastel as a whole, I managed to make a pretty bold layout with it haha! These colors make me smile during this dreadful, gray winter time!

I started out by die cutting the Folk Art Floral Background cut file (Design ID: 303006) from white card stock. I love folk art! Random fact: I used to do folk dance as a kid! I even danced with a decanter (filled with wine) on my head. I didn't drop it either, ha! Good old times!


I chose a few patterned papers to back my cut file. Once done, I decided on a background paper - I usually try several options, take a photo of them and then select something I like the most in that moment.


I actually wanted to scrap this photo in color but all that greenery in the background and my brown leather jacket just didn't go with my bold paper choices. I layered some tissue papers and a couple of die cut frames behind my photo, then glued it all down. Some of the embellishments are from other collections. My title for instance is from Paige's very first collection, Fancy Free! I had 2 of the chipboard sheets back then, most of which I already used up long ago. But I still had 2 of this red title, so it was time to use it. I was so happy that Embrace actually fits my photo perfectly!


Then I have a puffy sticker and a chipboard piece from Whimsical, a tag sticker from Pick Me Up, I believe. The suede bow, 3 of the buttons and the two small die cut frames behind my photo are from Take Me Away. The rest of the buttons are from my stash. Using a needle and twine, I stitched them on the layout.


I added my journaling with a white gel pen and splattered some white paint all over my background. Done!

I hope I could inspire you in one way or another! I'll be back with a new layout soon, which I also made with Take Me Away - but it will have a totally different vibe. I think, anyway!

Thank you for stopping by today!
Have an awesome day!

X

Friday, June 14, 2019

Take Me Away - DT layout for Paige Evans

Hello there crafty friends,

I'm back today with a new layout I've made for the Paige Evans Design Team!

A while back I was working on some cards for Spellbinders (you can check the blog post here) for some of which I used Paige's older collections and all of a sudden I felt the urge to use one of those for my new layout. I chose Take Me Away because it's what I used least in the past. At the time it came out I still refused to use flowers and feminine colors on my boy layouts so I didn't buy a whole lot of the collection. It's a shame really because it is gorgeous!

Now that I use whatever I want/like on my layouts, I totally could have gone with flowers, right?! Then what do I do? I pick a cut file that is not all that feminine nor does it have anything to do with flowers hahaha! The most photos we have are from our travels and now that I don't make a lot of layouts I wanted to make sure I scrap those photos first. So I guess give me all the travel themed collections, ha! 

Anywhooo...The cut file I chose is called Signage Post (Design ID: 293593), I thought it would be perfect for a travel layout. I totally love road signs, no idea why, is that weird?!


I backed the cut file with different patterned papers: I started with yellow tones at the top then pinks and purples going down. For the pole itself I chose a stunning deep blue floral paper.


I added some tissue paper, tags and die cut frames behind my photo and glued it all down around the middle of my page. I placed the cut file on foam adhesive and attached it to my background, slightly overlapping my photo. I selected some embellies which I added on top of the signs: chipboard and wood veneer arrows. I also glued a wood veneer geo tag on my photo! These pieces are so cute!


Lastly, I added my title, journaling and date. The title is from the Foam Phrase Thickers pack. I think now I only have 2 words left (and I had 2 packs) which is so sad because it's one of my favorite! The font is perfection, the words/phrases are versatile and there is a sheet of gold words as well as the most amazing pearl white I ever did see! I truly don't have anything else in that color and it literally fits everything. So sad :(.


That's it for today! I hope I could inspire you to dig into some of your older stash and create something lovely! I for one love working with older collections!

Thank you so much for stopping by today!

Have a wonderful day!

X


Wednesday, September 26, 2018

Take Me Away cards - DT project for Paige Evans + Silhouette

Hey there crafty peeps,

I'm stopping by to share my latest cards I've made for the Paige Evans + Silhouette Design Team! 

The collection I chose for today's projects is the super gorgeous Take Me Away from a couple of years ago. Unfortunately I don't have a whole lot of this line left, mainly because back when it came out I didn't make a lot of feminine pages, no cards at all either. So I didn't buy all of it, which of course I regret now terribly! So I was ecstatic when I found a 6x6 paper pad in my stash! I didn't even remember I had it! 


I was drawn to the navy floral paper, I haven't used it before. I have no idea why I didn't buy the 12x12 paper considering navy has always been one of my favorite colors!

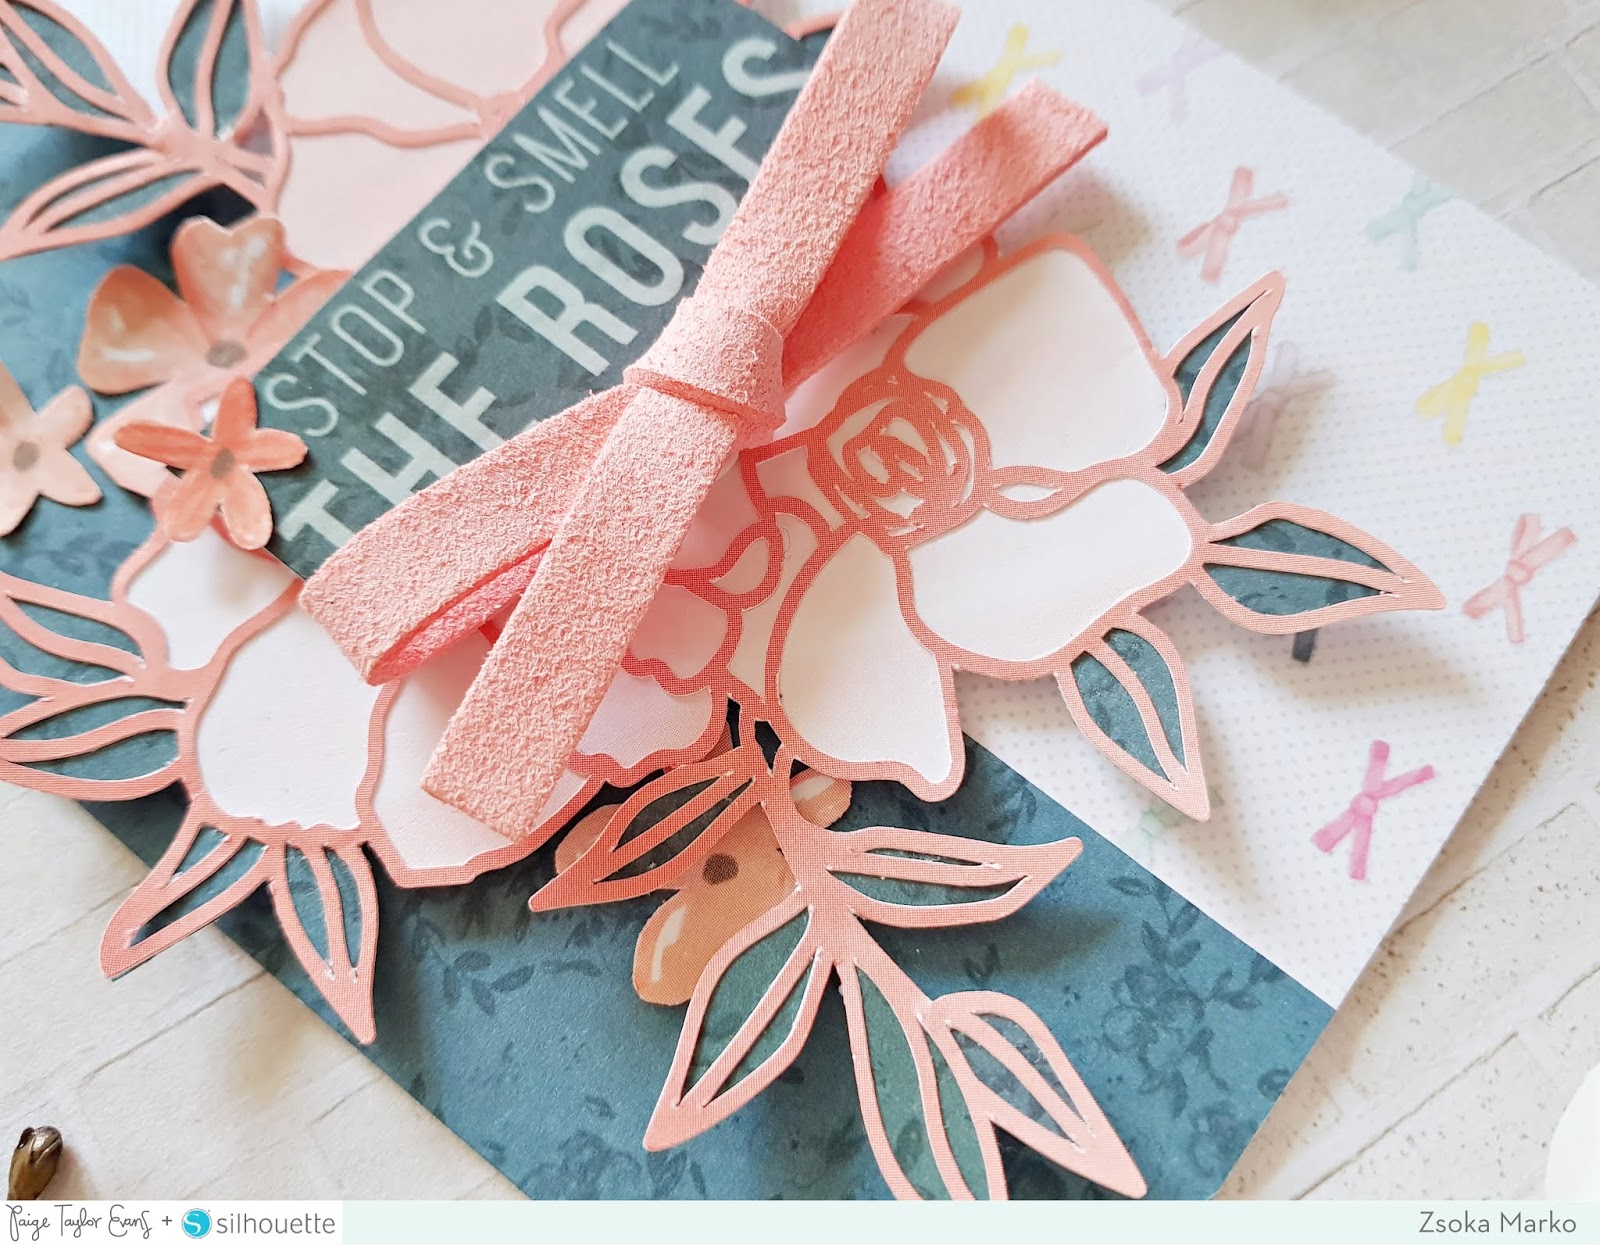
Both my cards are mounted on an A2 size top folding card base. For the first one I cut a strip of the navy paper and another one with tiny bows, the two together measure 4.25x5.5". I cut the Poppies (Design ID #271996) cut file from a coral patterned paper. 


I then backed the flowers with a lighter shade of coral patterned paper. For the leaves I used the same navy paper as before. I adhered the flowers to the card front using foam adhesive. I added a cute suede bow, a couple of small fussy cut flowers and a sentiment that also came from the 6x6 pad. 


On my next card I used this adorable floral paper as background. It's very busy so I wanted to keep the rest of the design fairly simple. I cut the Flower Picture Frame (Design ID #267057) cut file from another piece of coral patterned paper and I backed the flowers with a darker shade this time and the leaves with a lighter shade. Using liquid glue, I adhered the frame to my card front. 


I added some tangled gold thread and a chipboard flower to the bottom left and an embroidery hoop with a bow to the top right. This hoop serves as my sentiment. To finish off this card I added some gold ink splatters.


That's it! I hope you like today's projects!

Thanks for stopping by! I wish you a wonderful day!

X

SUPPLIES: Take Me Away collection: 6x6 paper pad, Die Cut Ephemera Pack, Chipboards, Suede Bow


Wednesday, August 22, 2018

Lemonade - DT layout for Paige Evans + Silhouette

Hey guys,

I'm back with a new layout today that I've created for the Paige Evans + Silhouette Design Team.

Now that I've been working with Paige's Pick-Me-Up collection for a long time, I am getting to those papers that I've just been hoarding because they were too pretty! Like this lemon paper! I especially love the distressed look to it. Finally I remembered I actually have photos I could use with it, ha!

Sooo I asked Paige to make a Lemon Slice cut file for me (Design ID: 273600)!
Here's what I've come up with:


I multiplied the lemon slice in a variety of sizes, then arranged them on my mat in Studio and once happy with the result, I welded them together and sent the cut file to my Cameo. I used textured white card stock for this.                                    


I then pulled out whatever yellow patterned papers I found in Paige's various collections and backed the lemons with them. I placed the cut file on the lemon paper to see where I want to cut, since I didn't want to use the paper for a full background. Once I cut the shape I wanted, I glued it down on a textured white card stock. I added foam adhesive to my cut file and adhered it down too. 


I layered some tissue paper, tags and bits and pieces of paper behind my photos and adhered them to the background. I went through the embellies from the Pick-Me-Up collection and added those too, some chipboards, puffy stickers and die cuts.  


I added my title and journaling last. For the journaling I used a small die cut that I glued on another die cut so it stands out more. I stamped my date on a label and tucked it behind my photo. 

That's it! I hope I could inspire you to use up all those gorgeous lemons in this collection!

Thanks so much for stopping by today!
Have a wonderful day!

X

SUPPLIES: 
Take Me Away collection: Paper 5, Paper 11, Paper 12

Saturday, August 4, 2018

Card inspiration - DT project for Paige Evans + Silhouette

Hey there crafty friends,

I'm stopping by to share a card duo I've created for the Paige Evans + Silhouette Design Team!

I had a vague memory of having a 6x6 paper pad from the Take Me Away collection, but really wasn't sure if I just dreamt it...This is the collection I have the least supplies left of, especially paper, so I was literally jumping around with joy when I in fact did find it!

So for today's cards I'm using this collection!


First up is this card, for which I've picked out the Organic Flowers Background cut file (Design ID: #249892). 


First I scaled down the cut file a bit so the design was smaller, then cropped it to an A2 size (4.25x5.50") and cut it from a mint patterned paper. I backed it with a darker shade of mint paper and glued this panel onto an A2 size top folding card base. I then went through my embellies and tried about a hundred different options before I settled on this design. 


I added a floral chipboard frame in the middle, then layered some chipboard flowers in one corner and die cut flowers in the opposite corner. Before adding the die cut flowers from the ephemera pack, I glued down some tangled gold thread onto the frame too for additional texture. Last but not least I added a yellow suede bow and a chipboard sentiment. Oh, I almost forgot, I also splattered some gold paint on the card front!


For my second card I've chosen the Geometric Background Stitching Pattern cut file (Design ID: #271163). I chose this yellow striped paper that I used on a layout too once, in 12x12, and I actually stitched the title on that too in yellow! So I thought I'd add stitching to this as well, and to make my life easier, I went ahead and tried this stitching template cut file. It surely saved me some time not having to poke all the holes myself! I scaled down this design too and then cropped it in a way that it was symmetrical in A2 size. I then sent it through my Cameo.


While I was watching The Originals on Netflix, I hand stitched the panel. Once ready, I attached it to an A2 size top folding card base, using foam adhesive. Mostly because when you stitch, you have a bulk of thread on the backside and the card front wouldn't be smooth if you just glued it on with normal glue. Hence, foam tape. 


I made it my purpose to finally use this heart wood veneer ha! I made 3 cards before this one which I was planning to use this heart for but I never liked the way it looked. Now I finally do! I didn't want to cover up much of the stitched design since I spent so much time on it, so I kept embellishing to a minimum. I glued some tangled thread under the wood veneer, then added some flowers on top that I fussy cut from a gorgeous patterned paper. 


To finish off this card, I added a chipboard sentiment using foam tape and splattered gold ink here and there. Done!

I hope you like today's inspiration! 

Thanks for stopping by and have a lovely day!

X

SUPPLIES:  Take Me Away collection - 6x6 Paper Pad, Wood Veneer Shapes, Suede Bows, Chipboard Stickers, Ephemera Die Cuts


Tuesday, July 3, 2018

Smile, It's Your Birthday - DT layout for Paige Evans + Silhouette

Hi crafty friends,

I'm back today with a new layout I've created for the Paige Evans + Silhouette cut file Design Team. Once in a while I feel like making a big photo layout, often when I come across a photo that I especially love. Such as the one here, of my sweet 4-year-old, almost 6 years ago, staring suspiciously at all the yummy sweets I made for his party...We had a Lego themed party and I decorated everything in orange and teal, which were the colors of his custom invites and other paper decor like cupcake toppers, favor boxes and more. I made orange and teal cupcake frosting, Lego people cookies and I filled a huuuge candy jar with only orange and teal colored sweets. Which is why I went with the Apothecary Candy Jars Border cut file! It reminded me of that candy jar!


I designed the layout in Studio more or less, placed the photo on my mat to see what size of cut file I would need. I wanted the jars to be as big as possible and since this is a rather wide cut file, I had to crop off some jars on the left to be able to do this (enlarge the cut file that is). Once I was happy with the size, I cut it from textured white card stock.

My original idea was to fill the jars with small embellies to resemble sweets but I couldn't make it work, something was just not right. So instead I simply backed the jars with several patterned papers from the Turn the Page collection. I found some that kind of looked like candies - maybe that's just me though!


Next, I adhered the photo to the background paper. I added pop dots to my cut file and glued that down too. The thing about big photo layouts is that they really don't need much. And for some reason this confuses me haha! I love adding a lot of things and layers to my projects so making something this simple is a struggle and I kid you not, it usually takes longer than a more complex layout!


I knew I wanted to add a white title directly on the photo but with a pop of color. I found that this piece of brush stroke paper from the mini foam alpha set was just perfect, so I cut it out of the packaging! I also added this amazing pearl white thicker word from the Take Me Away collection. Another product I wish I had 10 packs of! I've added a bunch of stars, chip boards, die cuts etc on the top left part of my photo.


That's it!
I hope you like this layout as much as I do!

Thanks so much for stopping by today!

Have an awesome day!

X

SUPPLIES: 
Take Me Away collection: Foam Phrase Thickers
Pick-Me-Up collection: Mini Thickers


Monday, June 11, 2018

You Are 4 - DT layout for Paige Evans + Silhouette

Hi there lovelies,

I'm back today to share a new layout I created for the Paige Evans + Silhouette Design Team!

Paige has sooo many cut files that I get overwhelmed when it comes to picking out one for my next layout haha! There's so many I want to use, but I never find the time! I just can't seem to be able to catch up! Anyway... I love balloons so the Balloons cut file (Design ID: 257768) stood out for me, of course. I decided to go with the gorgeous Fancy Free collection to mix things up a little!


I enlarged the cut file so that it covered most of the page, then cropped it and cut it from textured white card stock. I backed the balloons with various patterned papers, making sure they are all colorful and happy! I then added hand stitching to them, mainly because at the time I was working on it, I was lacking mojo. When I don't feel like creating, I either fussy cut or hand stitch, because it's mindless work but at least I'm doing something!


Once done, I added foam adhesive to the balloons and adhered the cut file to the background paper. To make it a bit more interesting, I placed some buttons, layered stickers, die cuts and chipboards here and there. 


Next, I layered some tissue paper and tags behind my photo and glued it all down. I tucked in a few embellies as well and attached a chipboard piece and a sticker to the photo. 


Here's the thing. I had (and still have) so much of the Fancy Free collection, multiples of everything, like 6 packs of embellies etc. Serious FOMO! BUT, I've never been able to put my hands on the alpha thickers. This was the time when AC moved warehouses and there were huge delays in delivery and many items never made it to Europe. So long story short, I had to go with other thickers. :) I found the alphas from the Take Me Away collection quite fitting! I made sure I picked a mix of colors so the layout is more fun! I added my journaling and date, done!


I hope these happy colors bring a smile on your faces today!

Thanks for stopping by!

Till next time X

SUPPLIES: 
Fancy Free collection: Patterned papers, buttons, chipboards, die cuts, tags, layered stickers 
Take Me Away collection: alpha thickers


Monday, May 7, 2018

The Good Life - DT layout for Paige Evans + Silhouette

Hey there friends,

Today I have not one, but two posts for you! In this one I'm sharing a layout I've created for the Paige Evans + Silhouette Design Team.

I didn't really have a plan for this one, I only knew I wanted to use the gorgeous Large Flower cut file (Design ID: 262729) and the Oh My Heart collection. I still love this collection so much, I actually ended up using it for all my May projects!

I didn't want to go with the obvious and blow up the cut file, I do this too often! So I went with the second most obvious haha! This design I do very often too but I can't get tired of it. I guess we all have our favorites! I usually do this with circles - but these flowers are pretty much that, too, right? So I cut a few of them in different sizes from textured white card stock, then partially backed them with patterned papers. 


I was going to go with a rainbow of colors but I changed my mind half way and went with yellows and greens. I wish I checked my supplies before taking decisions like these because I almost always end up struggling with embellishments. I don't have much left from Oh My Heart, especially not in these colors, so I had to go through all collections. I added chipboards, stickers, charms, die cuts, puffy stickers from Turn the Page; a button and the puffy sticker title from Fancy Free and a chipboard bow from Take Me Away. 


I played around with the flowers and the photo until I liked the arrangement, then adhered them down. For a couple of them I used foam adhesive for additional dimension. I also layered some tissue paper behind my photo as well as a journaling spot. 


This clear sentiment sticker was the perfect color and length for my photo, so I added this too. Those heart charms are still my favorite embellishments of all time! 

I stitched on 3 buttons - the big yellow-green is from Fancy Free (I've been hoarding it because this is one of my favorite colors), the other 2 are from my stash.


Last but not least, date (which I now realize is a year off, since it should be 2018 haha!), enamel dots and a puffy sticker title finish off my layout!


I hope you like this layout as much as I do! Those flowers are just so pretty, they make me happy!

Thank you for stopping by today! I will be back soon with another Oh My Heart layout! I hope you'll join me then too!

Have a wonderful day!

X

SUPPLIES: 
Fancy Free collection: puffy stickers, button 
Take Me Away collection: chipboard sticker 
Oh My Heart collection: Paper 01, Paper 10, Paper 22, charms


Saturday, April 14, 2018

Keepin' it real - DT layout for Paige Evans + Silhouette

Hey there crafty friends,

I'm back today with a new layout I've created for the Paige Evans + Silhouette Design Team. I've picked the Diamond Background cut file (Design ID: 219435) and a mixture of Paige's five collections: Pick-Me-Up, Take Me Away, Fancy Free, Turn the Page and Oh My Heart.


First I modified the cut file in Silhouette Studio, I made it smaller, duplicated it and welded the two together to get this vertical design. I cut the cut file out of white textured card stock which I then adhered to the patterned paper I chose for my background. 


I went through Paige's different collections and searched for yellow, green and blue patterned papers to create an ombre look. Well, technically not ombre because it's several colors, but you know what I mean. 


My laziness got the best of me and instead of cutting the small diamond shapes with my Cameo, I hand cut them. I figured it would be quicker because I had many different papers and it's always so time consuming to place several scarps in the right spot on the Silhouette mat. But if that's easier for you, by all means, do it that way!


I used foam adhesive to pop up each small diamond to create dimension. Then I added a bunch of things behind my photo: tags, die cuts, journaling spots - just to add some color. I kept to the color scheme though, and went from yellow to blue from top to bottom. I glued down this cluster and started adding embellishments.


I attached some chipboard, puffy and card stock stickers to the photo plus a cute little clip. I then pulled out small embellies that matched in color and glued them down in various spots on the diamonds. 


I scattered coordinating color enamel dots around the page. For title I used a thicker phrase from the Take Me Away collection. I really love the pearl finish on it as well as the font - Paige, do you want to add more of these in future collections?! Pretty please? 


To finish off my page, I added some navy shimmer spray and wrote up my journaling. Done!


I hope you like this page and I could inspire you in one way or the other!

Thanks so much for stopping by today!

Have an awesome day!

X

SUPPLIES: