I'm stopping by to share a new layout with you today! Have you guys seen Paige's gorgeous new collection, Bungalow Lane?! I can't wait to receive it! What's your favorite product from this collection? Mine are the heart charms, they are sooo cute! I don't make mini albums often, but I guess I'll have to now haha!
While I'm waiting for the new collection to arrive, I'm working with the current Wonders collection, which is just as beautiful!
I have a process video for this layout, you can find it at the end of this post, if you're interested!
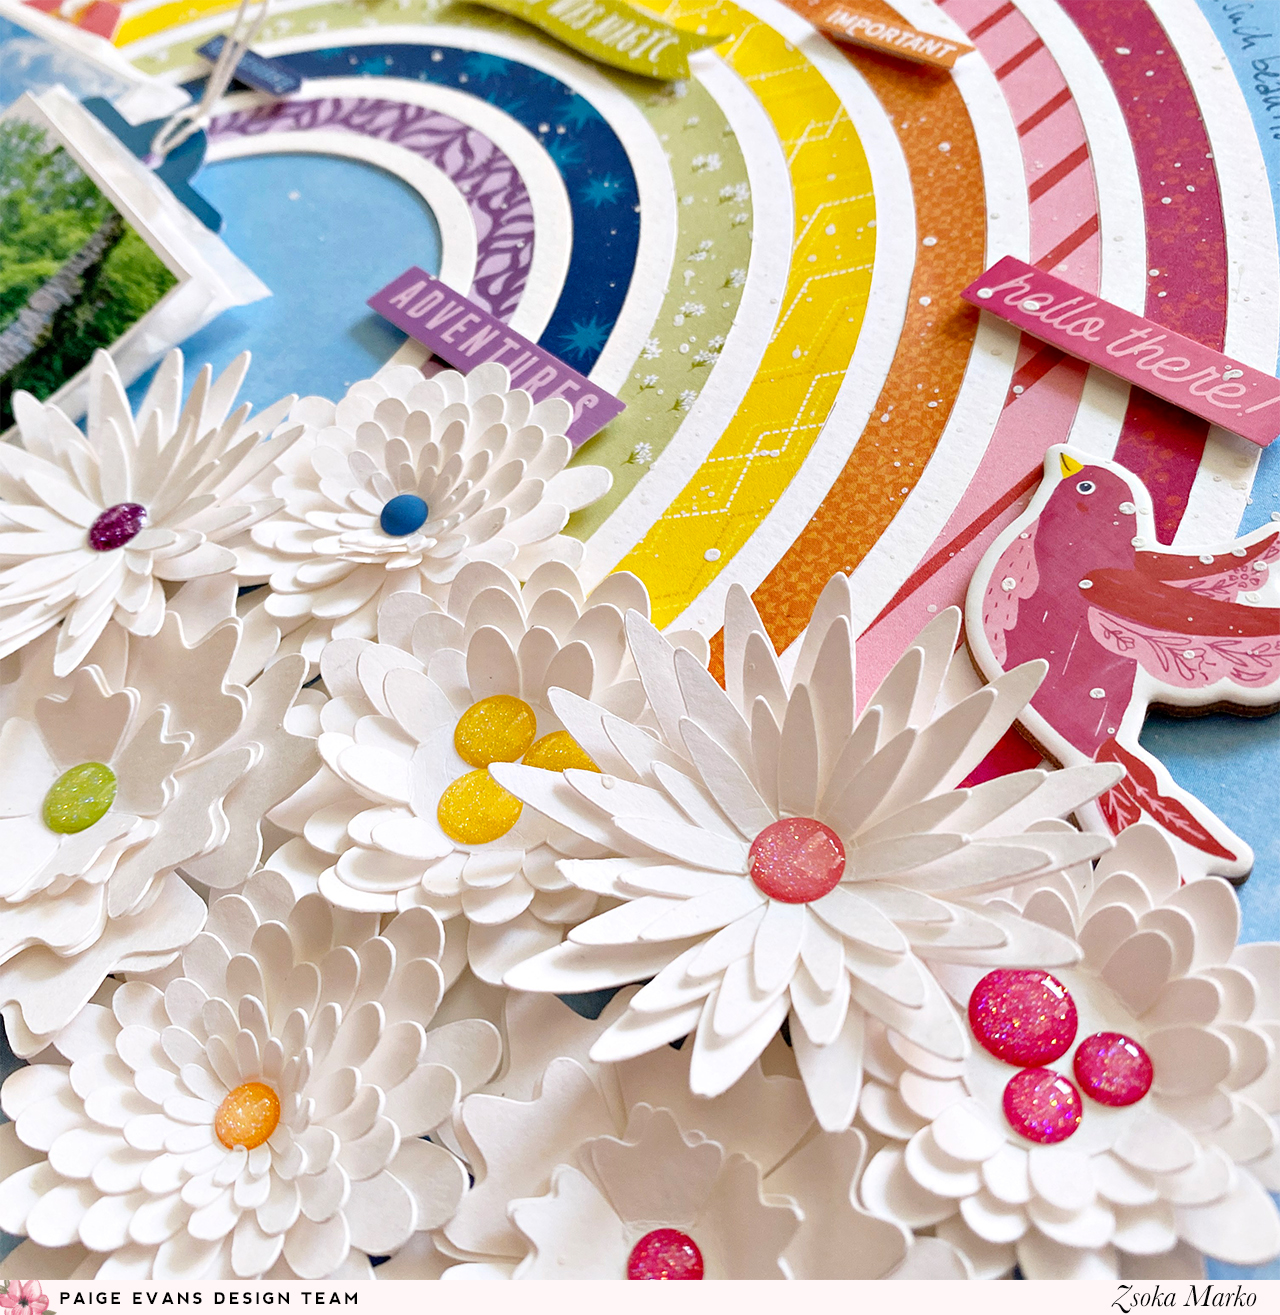
I don't know about you guys, but I think I will never get tired of rainbows. Rainbow colors, rainbow cut files, rainbow everything. I keep repeating myself I know, but Paige's collections just make it so easy to create rainbow layouts because all the colors are always there in every single one of them!
I started out by die cutting everything - I used several cut files:
I die cut everything from white card stock. I Each flower I die cut twice but then I didn't use all of them. I can never estimate what I'll need hehe!
I was considering making colorful flowers and lining them up with their respective colors on the rainbow but then I thought white would pop more. They are very easy to assemble and create such a lovely dimension and texture on any project!
I then put the rainbow together - this cut file actually comes with a solid piece for easy backing! It just takes a few minutes to put it all together.
I laid out everything on my chosen background paper (I realize I use this light blue paper a lot, but it just fits everything! I think this should come in every color in every collection haha). I added a few sentiment stickers, in a tone-on-tone design, like I always seem to do. Can't help it!
I haven't used many embellishments - a chipboard bird, two tags behind my photos, an ephemera piece and another chipboard layered behind one of my photos. Oh, and enamel dots of course! My title is a chipboard too.
Once I was happy with the placement, I glued down everything. Finally, I added my journaling as well as some white acrylic paint splatters! That's it!
Here's the promised process video if you're more of a visual type:
I hope I could inspire you in some small way with today's page!
I'm back today with a new layout for the Paige Evans Design Team. As I was looking for some old project of mine a while back, I also found some layouts I thought I'd scrap lift at some point, and this is one of those pages. The original is from a few years ago and I actually also made it with one of Paige's collections, Pick Me Up. I'd link it in, but I don't have a blog post for it. It's only there on my old Instagram feed that I only kept so I see all my old projects in one place. Because finding photos on my computer is next to impossible really...
Anyway, here's the updated version! As I'm (not so) patiently waiting for Paige's beautiful new collection, Wonders, to arrive on my doorstep, I'm revisiting her old ones. This time, Whimsical.
My idea was, that this time I would go with rainbow colors, as in, I would die cut each layer of the flower from a different color, from purple to yellow. I wanted to use this gorgeous purple ombre paper for my background, so the largest layer of the flower had to be purple.
The cut file I've used is the Layered Flower (Design ID: 268549). I blew up the cut file to the size I liked, and die cut each piece.
I shaped the petals with my fingers (I am showing this in the process video) and glued down each layer. I used liquid glue for this - I didn't need foam tape because the petals created so much dimension already. I attached a yellow button with twine in the middle of my flower.
I arranged my photos and embellishments (lots of word/sentiment banners from one of the patterned papers, a die cut butterfly, a chipboard butterfly, some stickers). I stitched a butterfly charm onto one of my photos. Once I was happy with the arrangement, I glued everything down.
I also used some of the rub on stickers - I added these to my background.
As for my title...Well I wanted something along the lines of Sunday Walk, or something to do with walking and friends, but then I also wanted to use purple letters. And I obviously didn't have the right letters in purple. So, I did something I have never done before: I wrote down each letter I had in purple and tried to form a meaningful word, you know, Scrabble style haha! That reminds me, I haven't played Scrabble in over 15 years for sure. I'm going to make a note right now, so I introduce my kid to this fun game! I'm not even sure where my Scrabble is. I probably didn't take it with me when I moved to Germany 16 years ago!
Anyway, to my surprise, I found my title within seconds! My Heart - good enough LOL!
I glued down the alpha thickers, then I added my journaling and date with a white gel pen. Last but not least, I splattered some white acrylic paint all over my background.
Done, done, and done! Super simple and it came together really fast too. Having said that, I'm sure it was fast because I literally copied my previous page. Normally I spend so much time on my layouts because I figure out the design as I go.
You can watch the process video on my YouTube channel if you're interested:
That's it for today! I hope I could inspire you in some small way!
WOW! Embossing Powder and Whimsy Stamps have come together for a collaborative blog hop and today I'm excited to share the projects I've made with all the awesome goodies!
You should have arrived here from Jennifer Dove's blog, but you can find the complete blog hop list as well at the end of this post, in case you're lost.
I chose the Mother Love stamp set for my sentiments because I didn't have anything for mother's day which is coming up soon. I love the mixed font in these sentiments! I used the Rose Glintz embossing powder on both of these cards.
I love dies, especially ones that you can add dimension to your projects with. I used a couple of die sets on these two cards, for the backgrounds the Hand Stitched Nested Rectangles and for the pretty flowers the Peony Flower dies.
The gorgeous papers are from the beautiful Jen Allyson/My Mind's Eye Splendor collection. I cut several rectangles and layered them up. I used foam adhesive to adhere the one on the top so it pops up and I could tuck some leaves behind it.
I die cut a few flowers and leaves and played around with the arrangement until I was happy with how they looked. I added a few dots of Rose Glintz embossing powder to some of the leaves too. I glued everything in place and done!
My third card is the exact same idea with less layers and a different flower die, the Lily Flower die set. The papers are from the above mentioned Splendor collection as well as another beautiful My Mind's Eye collection, Gingham Farms.
I made this card right after I had worked on one where I used an opaque yellow embossing powder and it didn't register with me that not all powders will act the same way haha! As in, they are translucent rather than opaque. Hence the Soft Mango powder in this photo but a clear looking sentiment on the card :D. I actually prefer it this way - just wanted to explain why you see Soft Mango in the picture. You can totally go with the clear powder though haha!
Now for the fun! No Blog Hop is complete without a prize!
WOW! Embossing Powders is giving away 6 powders of your choosing along with a WOW carry case to store your powders safely in.
Whimsy Stamps is giving away a $25 gift certificate to their store.
Winners will be chosen at random in the week of the 22nd April from the comments left on all the posts. To join this Giveaway you must leave a comment on each blog post until April 18, 2019. Open internationally!
I hope you've found some inspiration in today's post!