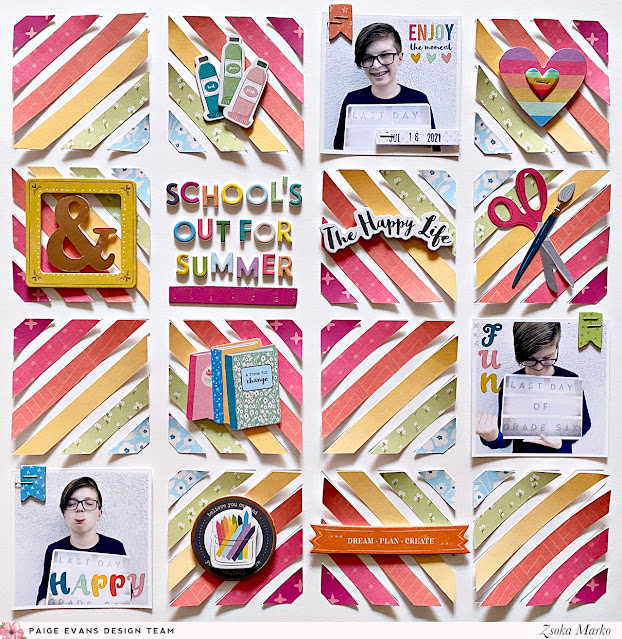
I'm stopping by to share a new layout with you today, that I made for the Paige Evans Design Team, using the older Whimsical collection.
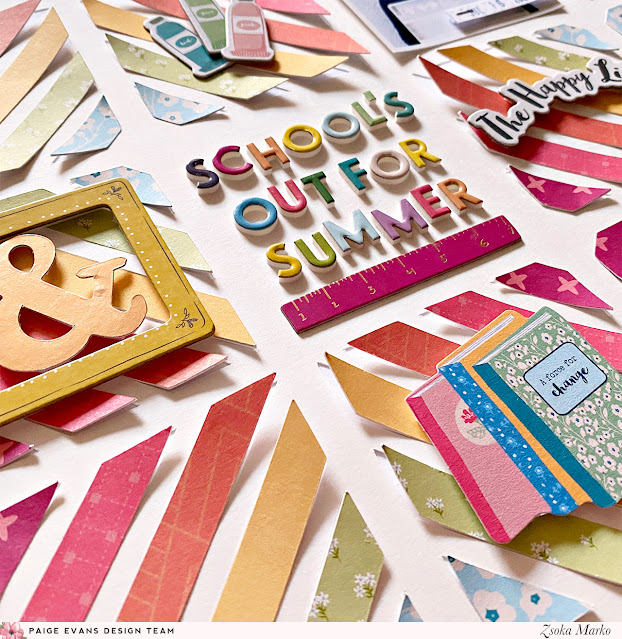
I chose the Diagonal Stripes Background cut file (Design ID: 219450). In Silhouette Studio I deleted some parts of the cut file, where I was planning to add my 3 photos and title, then I sent the design through my Cameo. Also in Studio, I colored all the pieces to see how the pattern I imagined would look like and once I was happy with the design, I grouped the colors together and cut them out of various patterned papers, to create a rainbow color scheme.
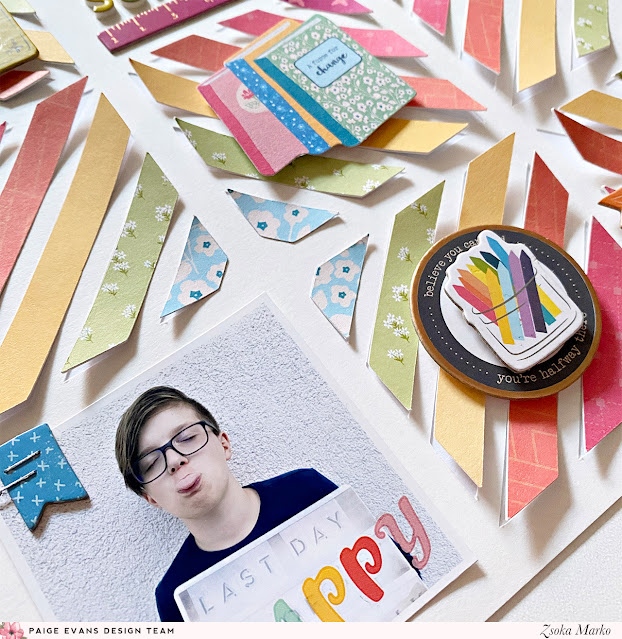
I then backed each colorful paper with the white fall out pieces that I had left from the cut file. I originally wanted to add foam tape to all these shapes, but then I liked the way it looked without. I added a dab of glue in the middle of the shapes and bent up their ends to create dimension.
I went through all the embellishments in the Whimsical collection and pulled out all, that had some kind of relation to school or happiness. I adhered these down in the middle of some of the squares, using foam tape.
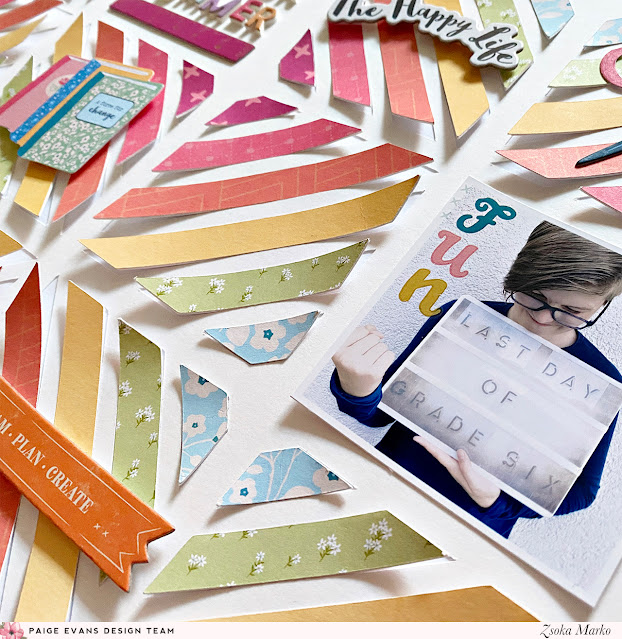
I glued down my title in one of the empty spots. I added some colorful rub-ons to all of my photos. I love the rub-ons in the collection, they are just so perfect after all these years too! I'd love rub-ons in every collection, ha!
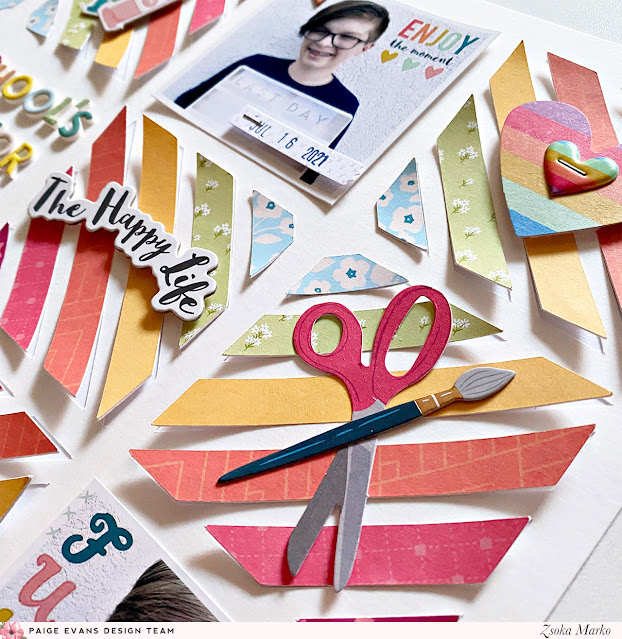
I stamped my date onto a card stock sticker strip and attached it to one of the photos. I didn't write journaling because I think the pictures speak for themselves :)
That's it for today guys! I hope I could inspire you in one way or another.
Thank you so much for stopping by! Have an amazing day!
I'm back today with a new layout for the Paige Evans Design Team. As I was looking for some old project of mine a while back, I also found some layouts I thought I'd scrap lift at some point, and this is one of those pages. The original is from a few years ago and I actually also made it with one of Paige's collections, Pick Me Up. I'd link it in, but I don't have a blog post for it. It's only there on my old Instagram feed that I only kept so I see all my old projects in one place. Because finding photos on my computer is next to impossible really...
Anyway, here's the updated version! As I'm (not so) patiently waiting for Paige's beautiful new collection, Wonders, to arrive on my doorstep, I'm revisiting her old ones. This time, Whimsical.
My idea was, that this time I would go with rainbow colors, as in, I would die cut each layer of the flower from a different color, from purple to yellow. I wanted to use this gorgeous purple ombre paper for my background, so the largest layer of the flower had to be purple.
The cut file I've used is the Layered Flower (Design ID: 268549). I blew up the cut file to the size I liked, and die cut each piece.
I shaped the petals with my fingers (I am showing this in the process video) and glued down each layer. I used liquid glue for this - I didn't need foam tape because the petals created so much dimension already. I attached a yellow button with twine in the middle of my flower.
I arranged my photos and embellishments (lots of word/sentiment banners from one of the patterned papers, a die cut butterfly, a chipboard butterfly, some stickers). I stitched a butterfly charm onto one of my photos. Once I was happy with the arrangement, I glued everything down.
I also used some of the rub on stickers - I added these to my background.
As for my title...Well I wanted something along the lines of Sunday Walk, or something to do with walking and friends, but then I also wanted to use purple letters. And I obviously didn't have the right letters in purple. So, I did something I have never done before: I wrote down each letter I had in purple and tried to form a meaningful word, you know, Scrabble style haha! That reminds me, I haven't played Scrabble in over 15 years for sure. I'm going to make a note right now, so I introduce my kid to this fun game! I'm not even sure where my Scrabble is. I probably didn't take it with me when I moved to Germany 16 years ago!
Anyway, to my surprise, I found my title within seconds! My Heart - good enough LOL!
I glued down the alpha thickers, then I added my journaling and date with a white gel pen. Last but not least, I splattered some white acrylic paint all over my background.
Done, done, and done! Super simple and it came together really fast too. Having said that, I'm sure it was fast because I literally copied my previous page. Normally I spend so much time on my layouts because I figure out the design as I go.
You can watch the process video on my YouTube channel if you're interested:
That's it for today! I hope I could inspire you in some small way!
I'm stopping by to share a few projects I've created for the Paige Evans Design Team!
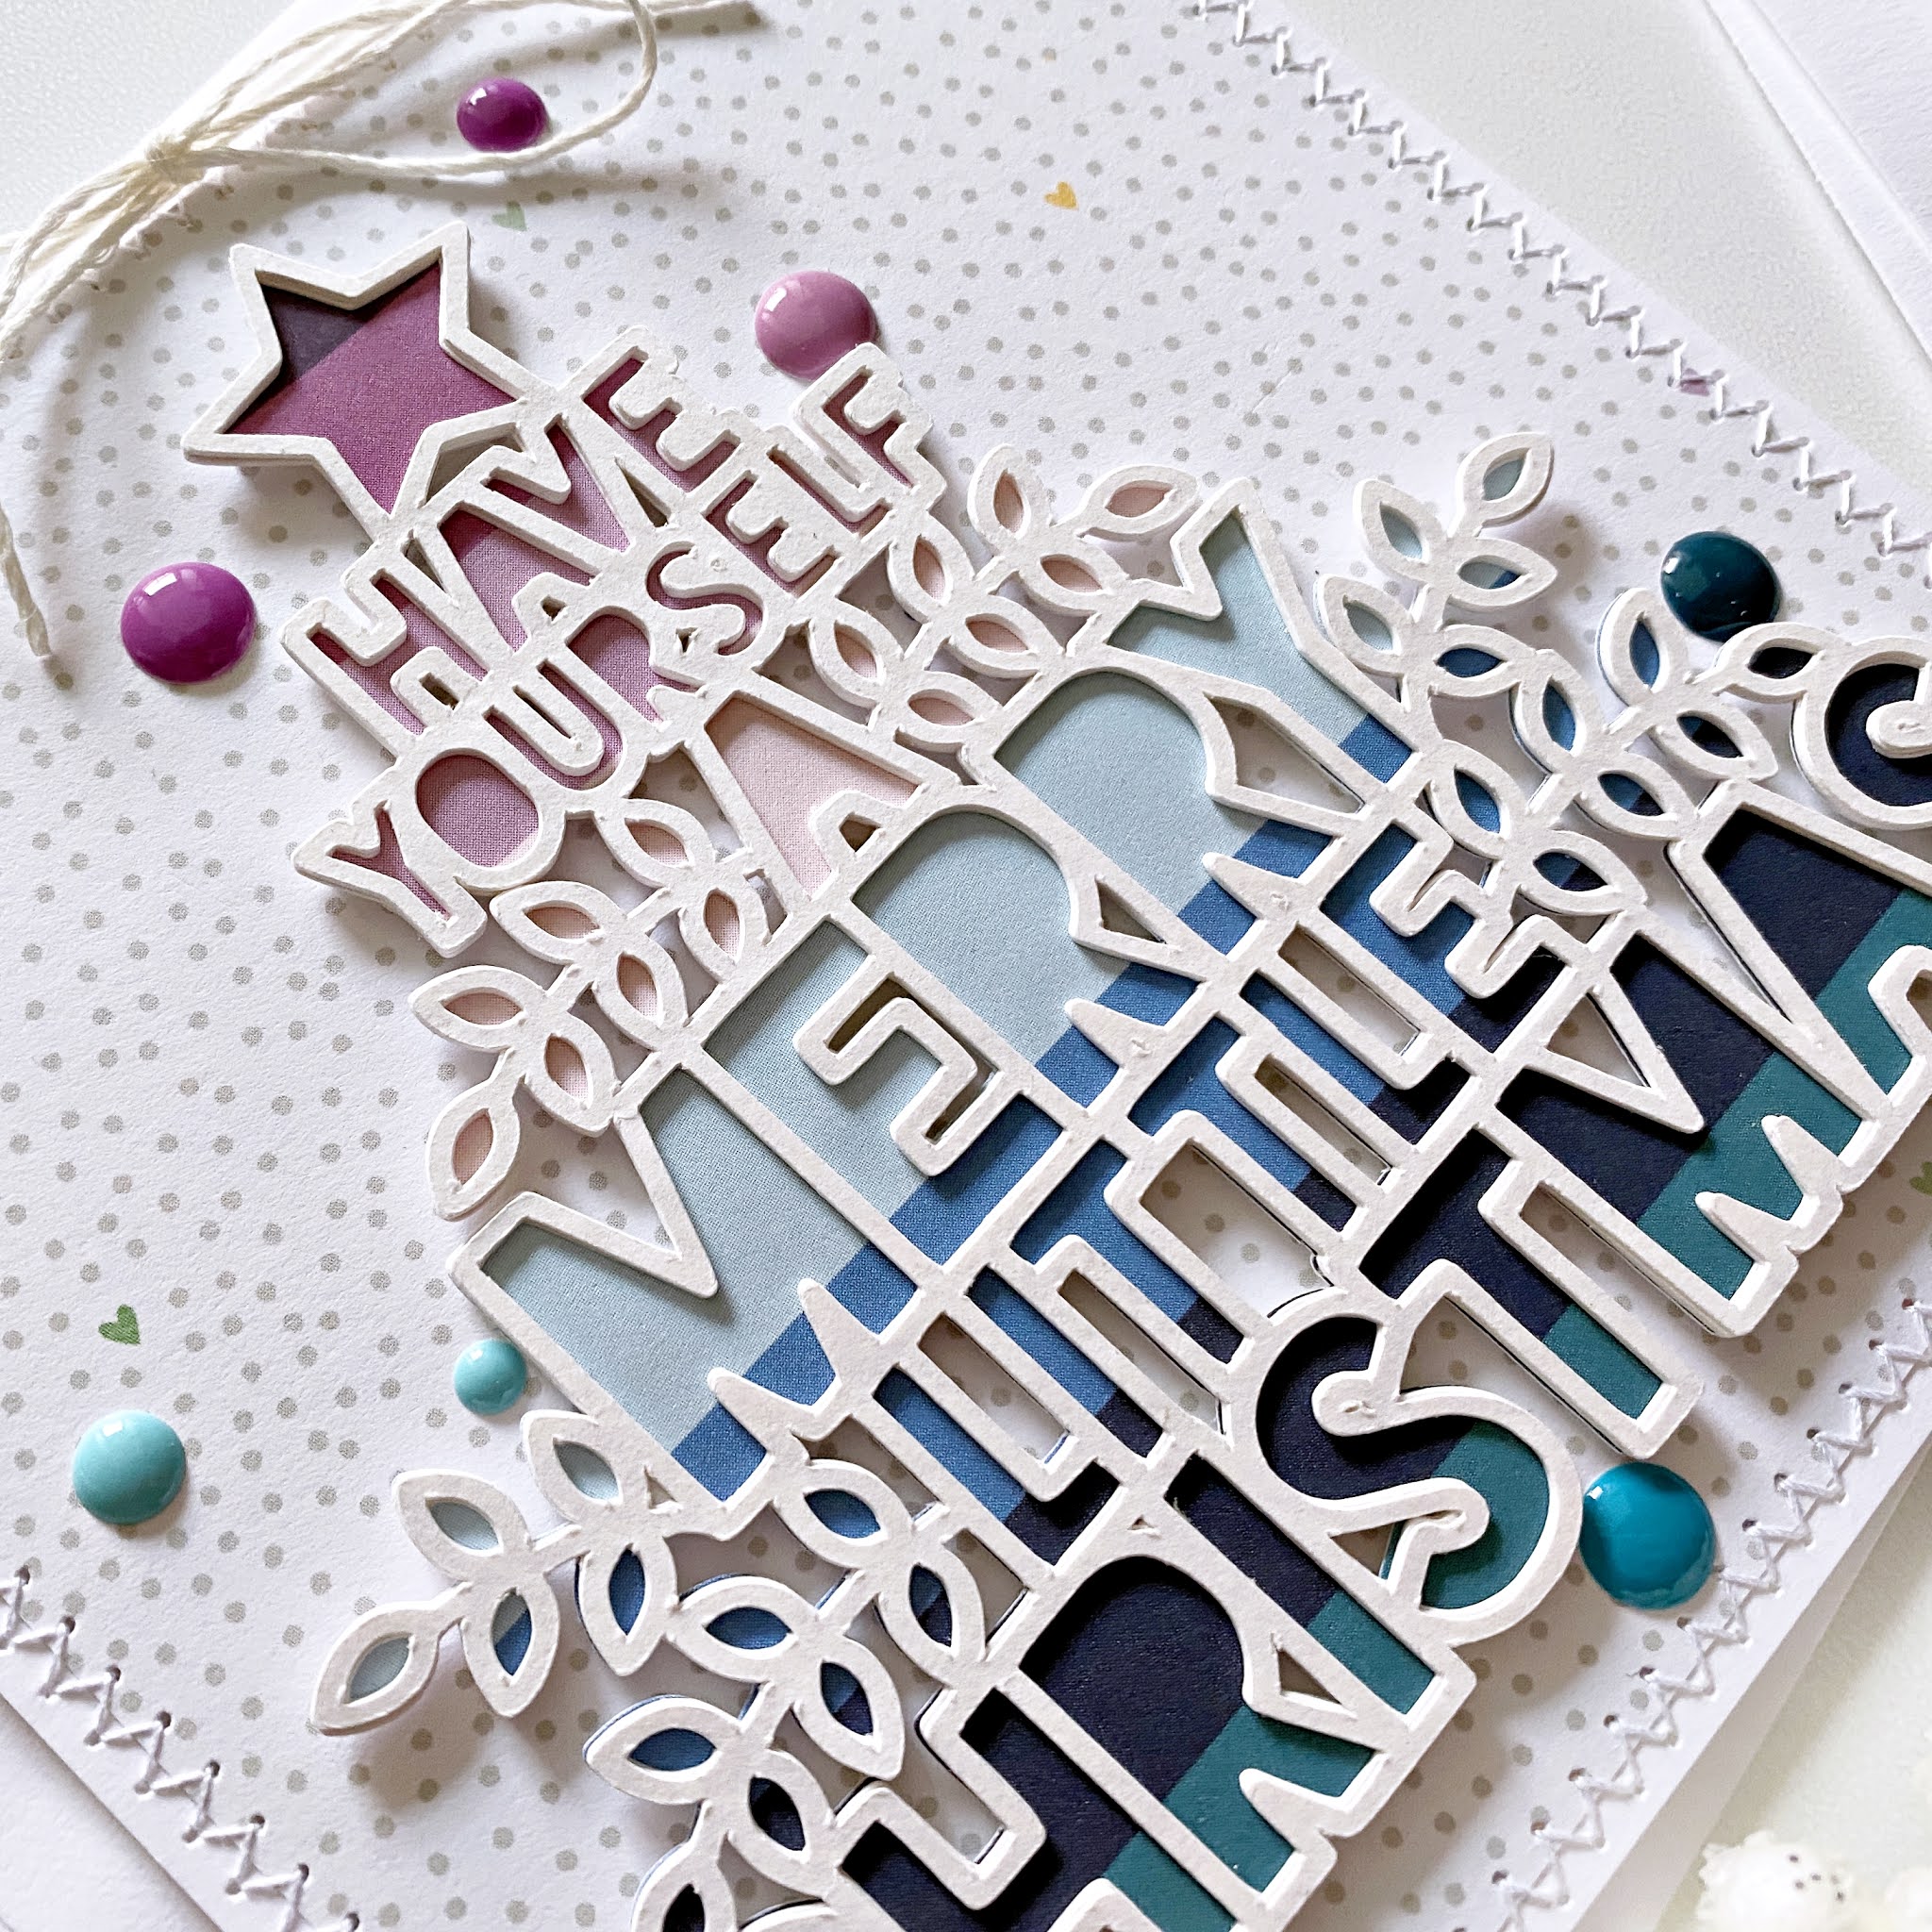
You probably know by now, that Paige is offering a bundle of cut files called "25 Days of Christmas Cut Files", where you get a Christmas themed cut file mailed to you every day until Dec 25th. Of course you can still purchase this bundle, should you have missed it! Today's cut file is this "Merry Little Christmas" tree, which I love so much, I had to use it on multiple things, cards, December Daily filler page and even a scrapbook layout!
I mostly used the Whimsical collection on these projects - it's my go to if I want to make rainbow projects! Of course, you can create rainbows with any of Paige's collections, but my most fave is Whimsical, it has the perfect shades of all the colors and the loveliest patterns!
I'll keep this post short because I'm in the middle of Christmas baking hehe, plus I have a process video for everything you see in this post, so no need to detail how I made them! I'll attach lots of photos though, in case you like to look at those.
You'll find the video at the end of this post!
Without further ado, the layout:
The December Daily page:
The cards:
You can watch the process video on my YouTube Channel:
I hope you like these projects which are in fact my last ones for 2020! I would like to thank you for your support throughout this harder-than-usual year and I wish you and your loved ones a very Merry Christmas and a wonderful, healthy and happy New Year!
I'll be back with lots of projects at the beginning of January!
Today I have some more Christmas cards to share with you! I was thinking, since this post is going up beginning of December, there's still time to create some last minute Christmas cards to send out to loved ones. These ones are really simple and don't take very long to create either. I mean, compared to most cards I make anyway.
I noticed that Paige has a bunch of cross stitch cut files for Christmas, and I was really in the mood to stitch, so that got me thinking, why not make cards instead of a layout for today's post? First, I selected the following cut files:
I then sized them to fit onto a 4x5.25" panel and die cut them out of white, heavy weight cardstock. I used these as templates to poke holes in the patterned papers. I recorded the process, so you can check how I did this, in the video at the bottom of this post. Basically, these cut files are not stitching cut files, but it's super easy to use them as templates to achieve the same result. Eventually, I didn't use the Snowflake because in the size I wanted it, it seemed a bit too small, with the holes being too close to each other.
I searched for some patterned papers, that I thought would work. I found the three I used in the Whimsical collection. I cut them down to 4x5.25" and started poking holes. Once done, I stitched them all with white/light blue/red/beige/brown embroidery floss.
Something I only noticed while editing the video (not even when I was editing these photos), is that I missed a stitch on this red poinsettia. I have no idea how I didn't notice earlier?! At this point I can't add it anymore, so I'll have to embrace imperfection once again :D
I added some adhesive foam sheet to each of the stitched panels and glued them onto 4.25x5.5" top folding card bases. The blue panels on white card bases, the beige ones onto kraft bases (well technically only the card front was kraft, the card base was still white - see video).
I was struggling with the sentiments because I'm not quite used to use Alpha Thickers for this purpose and also, I just couldn't find the right letters in the right colors in Paige's collections. There are actually 2 packs (Truly Grateful and Pick Me Up) that have the right color (red), but I didn't have the right letters anymore. Only the white foam mini alphas are Paige's, from the Pick Me Up collection. Otherwise, I had to resort to my stash of AC Thickers...Of course you could stamp your sentiments, but I only wanted to use scrapbooking supplies on these cards, if that makes sense? Anyway, since most of these are quite large, I opted for shorter sentiments. I would have loved to have Peace on Earth instead of Peace, but there just wasn't enough space.
Last but not least, I added enamel dots and some twine to my cards to finish them off.
As you see, you really don't need a lot of supplies or expensive supplies to make these cards. You can just use whatever you already have in your stash!
Here's the process video:
I hope I could give you some ideas with my projects today!
Thank you so much for stopping by! Have a wonderful day!
Happy Valentine's Day all! We don't celebrate it, however I do usually buy something small for my boys, their favorite chocolate or something along those lines! What do you do for Valentines Day?
I'm sharing a new layout I've created for the Paige Evans Design Team today. Gosh, I am so creative with my titles that I just had to copy paste my previous blog post title OMG :D. I made the previous layout so long ago, I totally forgot about it. Oh well, both layouts will be in different albums eventually, when I can finally afford buying some! Random fact, last time we went to the US, I had to buy the biggest baddest suitcase ever in New Orleans just to fit the 12 albums and the huge amount of tools and supplies I bought there, including my first manual die cutting machine haha! I'm not sure when we go back, I can only hope soon, because there's hundreds of layouts all over our apartment and I'm not crazy enough to spend 40 eur on an album when you can get them at like 10 usd overseas...
Anyway, back to topic! I've used another older collection, Whimsical on this one. I feel like I haven't used Truly Grateful in so long, I need to do that before the new stunner, Bloom Street, is in the house!
The Love in Flowers cut file (Design ID: 313361) is just so pretty, I had to use it right away! Originally I wanted to make a colorful layout but then changed my mind while I was backing the cut file and ended up using a pretty limited color palette. I do like the softness of it though.
After backing the cut file, I pulled out all embellishments and selected a few that fit my colors. I will say, again, that rub-on stickers are one of my favorite products, this is my 4th pack in that collection! While I generally prefer dimensional embellies, these stickers are so versatile and perfect for little accents and finishing touches. I especially love the colorful faux stitching stickers - sure you could use your sewing machine, but changing threads all the time takes ages. So Paige, pls consider having full sheets of these rub on stitches in the future hehe!
Once I figured out where I wanted everything to go, I glued down everything, starting with the cut files. I then added some foam adhesive to my photo and added it to my page. I wrote my short journaling in between some border stickers, then stamped my date and splattered some ink all over my layout.
That's it! I hope I could inspire you in one way or another today!
Thanks so much for stopping by! Have an awesome day!
Happy New Year! I hope you had a wonderful, relaxing holiday season with your loved ones!
I'm back with my first layout of 2020 :). For today's post, I went back to Paige's second, breathtaking collection, Take Me Away . If you are lucky enough to have it in your stash, go get it out now and start creating! I promise you'll love the process. While I love new collections, I notice that rediscovering old favorites fills me up with inspiration and so much joy.
While this collection is actually quite pastel as a whole, I managed to make a pretty bold layout with it haha! These colors make me smile during this dreadful, gray winter time!
I started out by die cutting the Folk Art Floral Background cut file (Design ID: 303006) from white card stock. I love folk art! Random fact: I used to do folk dance as a kid! I even danced with a decanter (filled with wine) on my head. I didn't drop it either, ha! Good old times!
I chose a few patterned papers to back my cut file. Once done, I decided on a background paper - I usually try several options, take a photo of them and then select something I like the most in that moment.
I actually wanted to scrap this photo in color but all that greenery in the background and my brown leather jacket just didn't go with my bold paper choices. I layered some tissue papers and a couple of die cut frames behind my photo, then glued it all down. Some of the embellishments are from other collections. My title for instance is from Paige's very first collection, Fancy Free! I had 2 of the chipboard sheets back then, most of which I already used up long ago. But I still had 2 of this red title, so it was time to use it. I was so happy that Embrace actually fits my photo perfectly!
Then I have a puffy sticker and a chipboard piece from Whimsical, a tag sticker from Pick Me Up, I believe. The suede bow, 3 of the buttons and the two small die cut frames behind my photo are from Take Me Away. The rest of the buttons are from my stash. Using a needle and twine, I stitched them on the layout.
I added my journaling with a white gel pen and splattered some white paint all over my background. Done!
I hope I could inspire you in one way or another! I'll be back with a new layout soon, which I also made with Take Me Away - but it will have a totally different vibe. I think, anyway!
I'm stopping by today to share a new layout I've created for the Paige Evans Design Team, using the awesome Truly Grateful collection!
My Cameo is not working at the moment (ever since the latest software update, go figure) so I had to come up with a layout without a cut file. The obvious choice was using the flower die cut pack, quick and easy! And I haven't used them yet so win win!
I arranged the flowers at the top and the bottom of my page. I used the ones with the white edge for the bottom layer and added a bunch of single blooms with foam tape. Some of these are part of the die cut pack, others are fussy cut from one of the patterned papers. I had these left from a previous project. I'm always happy when I have fussy cut elements ready to go! By the way, should you be interested, I used almost 2 pack of die cuts.
I layered some tissue paper behind my photo and glued it all in place. I tucked some labels behind it too, for some color. Using foam tape, I also added a bunch of word stickers off to the right.
I wanted to add a long title, so I didn't use the alphas from Truly Grateful, since those are big. Instead I went with the foam mini alphas from the Whimsical collection. I love that they are so colorful, the font is simple so it fits everything and the size is perfect! I glued down my title off to the left and wrote my journaling next to it.
I added a few wooden buttons on top of some of the flowers, for texture, dimension and interest. Last but not least, I splattered some white paint on the floral borders.
That's it! Quick and easy, like I said! I hope I could inspire you to use your flower die cut packs, I know I've been hoarding them!
Happy Halloween to all of you who celebrate it! It's funny, I seem to have a blog post scheduled every year on Halloween! I don't mind though, I love working on Halloween projects even if we don't actually celebrate it.
Some months ago I bought a few different gold hoops at my favorite store here in Germany, thinking I could create wreaths for all kinds of occasions. Well, this is the first haha!
Paige has soooo many awesome Halloween themed cut files, it was really hard to choose. I was looking for a spider web in the shape of a heart I remembered seeing but didn't find it, so I went with an older cut file, Spiderweb (Design ID: 216765) - once I cut it, I found the other one I was looking for hahaha: Spiderweb Heart with Spider (Design ID: 304677), plus a second one, Spiderweb Heart (Design ID: 278648)!
My ring is just a bit smaller than 12" so I cut the spiderweb as big as I could from a 12" black card stock so that it has some overhang. Not all ends are long enough but there's a few I could attach to the ring.
I die cut some bats too in various sizes from the same card stock - for these I used the Bat Background (Design ID: 221100) cut file.
I then went through Paige's collections to find some purple, orange and green papers for my flowers. There's actually quite a few of these, and, in retrospect, I probably should have used more to add different hues of these 3 colors. :( I also regret using my Oh My Heart orange paper when I only had one while I have several orange papers from other collections. Ugh!
Now, I don't quite remember which cut files I used exactly but I'll try to be as precise as possible! Honestly, you can use any of Paige's layered and rolled flower cut files, they are all amazing!
I used my hot glue gun to assemble all the flowers. I then covered about half of the ring with a lime green elastic band I bought for my traveler's notebooks years ago. You could use ribbon too, whatever you have in your stash!
Oh, one more thing I die cut, the BOO sentiment - I just used the Impact font for these.
Once everything was die cut and assembled, I could start putting my wreath together! I attached parts of the spider web to the elastic band, others to the ring, using hot glue. I arranged my flowers and glued them in place. The big letters followed, finally the bats. I added a few enamel dots to the middle of the layered flowers. Last but not least I attached some ribbon in coordinating colors, so I could hang the wreath on our door.
That's pretty much it! I already forgot how much I love working on rolled flowers!
I hope you'll give this idea a try!
Thanks for stopping by today and have a fang-tastic day!