Showing posts with label cut file. Show all posts

Saturday, July 4, 2020

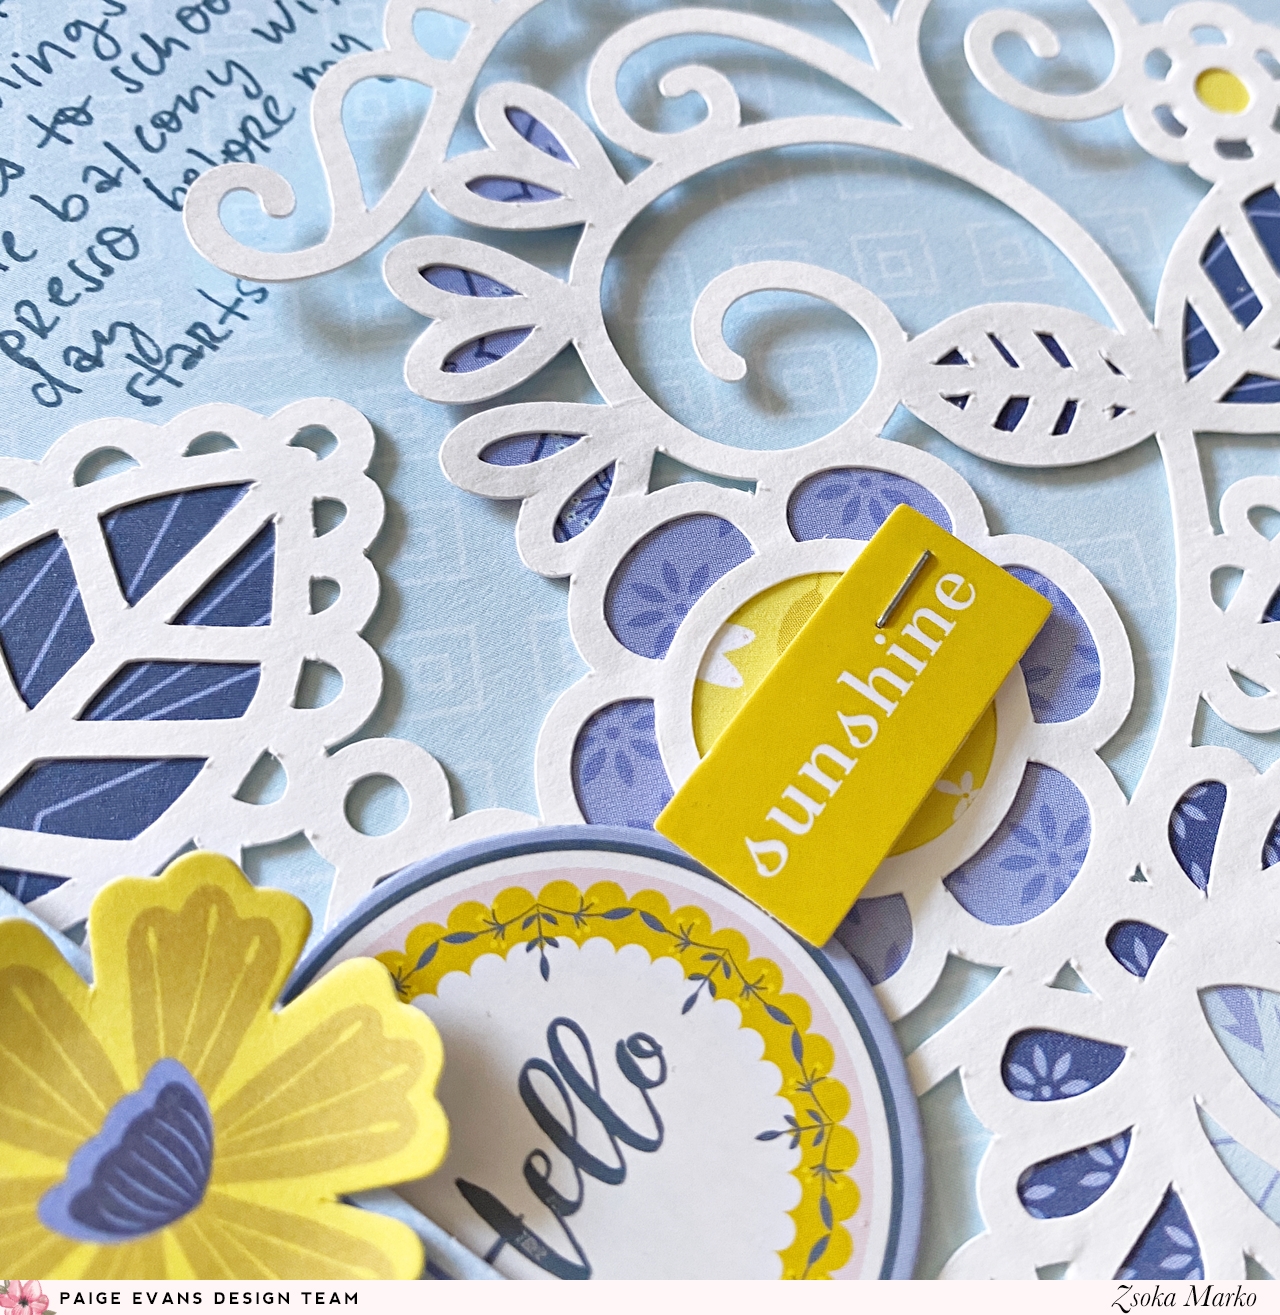
Hello Spring - DT layout for Paige Evans

Hey there crafty friends,

I'm back with a new layout for the Paige Evans Design Team today!

I know I've already used this paper as background, but I can't help it, I love stripes! The colors are so gorgeous too, it's one of my most favorite papers in the Bloom Street collection!


Now, I don't usually scrap color photos because I find it hard to work with them, especially when there's blue sky or greenery on them. However, I really wanted to use this beautiful Hello Spring cut file (Design ID: 321572) and I do have many photos from our quarantine walks, of the nature awaking, everything in full bloom!


I also don't use two different size photos on a layout, but my printer is often playing tricks on me and doesn't recognize the photo on the SD card in which case I can only send the photo directly from my PC and that way I am not able to print the same smaller size as you see on the right. But I wasn't going to throw either of them away, so...they both ended up on the same layout, ha!


I backed the flowers in the cut file with a few different patterned papers that matched the colors of the background, purples and pinks. I then glued the wreath on the background, making sure I left space for the photos to be tucked under. I added foam dots to the white letters and added them back in place.


For embellishments I used a few butterflies, diecut flowers and foliage as well as some phrase stickers. Some of them I glued down with liquid glue, others with foam adhesive, so I have a bit of variation and texture.


Last but not least, I added a teeny tag behind my photo, wrote up my journaling and stamped my date. That's it!

I hope I could inspire you with today's layout in one way or another!

Thank you so much for stopping by today!

Have an awesome day!

X

SUPPLIES:


Thursday, June 18, 2020

But first coffee - DT layout for Paige Evans

Hello crafty peeps,

I'm stopping by to share a new layout for the Paige Evans Design Team! 

While I had the Horizon collection out last time, I decided to create another layout with it! I had had this photo on my desk since last summer but never really found a collection that worked with the colors. Enter all the blues and yellows in Horizon and we have a perfect match ha!


I can't drink coffee anymore but last summer I could still enjoy a couple of espressos a day! I loved sitting on the balcony with a cup of foamy goodness after Maxim left for school in the morning! Over the years I got used to craft at night so I often sleep very little and espresso helped me wake up and make myself useful :D.

I picked out my cut file first, totally random, nothing to do with the layout, but I really don't mind using flowers on everything...This one is one of the newer ones, Flowers (Design ID: 321569) and it's so pretty!


I then selected all the blue and yellow papers and went through the embellishments too. Luckily there were plenty of things to choose from! I backed the cut file then glued it down on my background paper. 

I added my photo then started embellishing my page. I tucked some tags and labels behind my photo. I created the date label from patterned paper and white card stock. I like when my labels match the rest of the papers! I added sentiment stickers, die cut flowers and chipboard stickers. 


For my title (very original, isn't it?! But so true, so too bad :D) I used the navy mini alpha thickers from the Pick Me Up collection. To finish off my page I added my journaling and a few enamel dots.


That's all! Do you guys prefer limited color palettes like I used here or are more into colorful layouts? I love them all the same! I also love monochromatic!

Thank you for stopping by today! Have a wonderful day!

X

SUPPLIES:
Pick Me up collection: Mini foam alpha thickers

Friday, May 29, 2020

Chocolate Nation - DT layout for Paige Evans

Hello there crafty friends,

I'm back today with a new layout for the Paige Evans Design Team! It feels like I rarely scrapbook anymore so I'm always excited and happy when I actually have something to share ha!


I started out with the Bloom Street collection but ended up mixing it with lots of Horizon papers! I haven't used Horizon in ages so this makes me super happy! 

This gorgeous floral paper from Bloom Street is one of my favorites from the collection and I haven't used it yet, so I was determined to do so on this layout! I picked out this super cool cut file, Heart Swirls (Design ID: 321567) which kind of reminded me of rainbows, so I backed it in that manner! 


It turned out to be a bit too busy for the floral paper so I only used a wider strip at the top and a thin strip at the bottom. I thought it paired well with the pink/yellow watercolor paper from Bloom Street. I added foam to the cut file and adhered it to the background. 

I layered some tissue paper behind my photo as well as a tag, then glued it down. I documented a photo from our summer holiday last year, we took the kids (my best friend's twins and Maxim) to Chocolate Nation in Antwerp. This is the coolest and most fun museum we've been to! Well to be fair we don't go to museums all that often, but all of us loved this one so much! It's interactive, the way you're guided through each room is awesome. Super entertaining, the kids were glued to their headphones. And of course, there were several stops where you can try all kinds of chocolates. My goodness, heaven! Belgian chocolate is my favorite, so yeah, I didn't mind going hehe! They also showed us how to make pralines and we could try them too. There were photo booths with props, for instance there was this one where you could "fake" lift a huge jute bag filled with cocoa beans (it was hanging from an invisible thread and you just moved it to the height you wanted) in a tropical kind of setting - the kids loved posing for photos! At the very end there was a room filled with all kinds of melted chocolate from white to dark and everything in between! And you could eat as much as you wanted! I will say though, even taking a tea spoon full from each (and I haven't tried the super dark ones) you felt full. And there was ruby chocolate OMG! Have you ever tried it?! It's super hard to find it still but it's so worth it. It's pink, fruity, reminds me of raspberry. It's all natural though, so no artificial fruit flavor. God it's so good! Then of course there's a shop as you exit the museum and you can buy so many things, we spent ages there. The kids picked up some S'mores kit to try and they were so happy they were allowed to barbecue alone. If you're ever in Antwerp, definitely check it out!

Phew that was a long story, sorry for getting off track! Back to the layout now :)


I used the white mini alpha stickers from the Pick Me Up collection to create my title following the curve of the cut file. I wrote my journaling on the opposite side.

For embellishments I mostly used floral die cuts which I layered next to the photo, alternating between liquid and foam adhesive to create some dimension. I then cut out some colorful sentiments from one of the patterned papers and adhered these down too. Last but not least, some white glitter enamel dots, they are sooo pretty!


That's it! I hope I could inspire you in one way or another with my layout today!

Thank you for stopping by! Happy scrapping!

X

SUPPLIES:
Bloom Street collection: Paper 13, Paper 22, Paper 23, Enamel DotsFloral Die Cuts
Truly Grateful collection: Paper 16
Pick Me up collection: Mini foam alpha thickers


Thursday, May 14, 2020

Fresh Air - DT layout for Paige Evans

Hello there crafty friends,

I'm stopping by to share a new layout I've made for the Paige Evans Design Team. I've used the beautiful Bloom Street collection on this page.


I started out by looking for a cut file that resonated with me in that moment. We just went out for our first family walk under quarantine the day before and everything was in full bloom, absolutely gorgeous. So I definitely wanted to use a floral cut file! I ended up choosing the Flower Hill cut file (Design ID: 300592). I cut it from white card stock then backed it with various patterned papers I had scraps of. This is really the perfect way to use up those small scraps!


Apropos scraps. Another thing I find myself doing a lot when I don't have a full sheet of paper to use for background: go with 2 (or occasionally more) bigger pieces to create my background. If I'm honest, it's not my favorite thing to do, but I find it practical so I go with it. Especially when I only have one paper left of a certain design - I hate using up my last full 12x12!


Anyway, once I was done with the cut file, I adhered it to the background. I layered some tissue papers behind my photo, tucked this stack behind the cut file and glued it all down. I added a few embellishments, though not many: some butterflies and phrases. For my title I used the gorgeous alpha stickers from the collection. Aren't they so pretty?! To finish off my page, I added my journaling and stamped my date onto a label which I tucked behind my photo. That's it!


How are you guys coping with the quarantine? Do you craft more or less than normal? I find I am not very creative these days. I'm not super sad about it though, there's so many other things I find to do at home! Honestly, I never get bored. Actually by the time this is published, we may not have quarantine anymore, who knows. We are just taking it day by day! I hope you all are well!

Thank you so much for stopping by today! Have a wonderful day!

X

SUPPLIES:


Friday, April 24, 2020

Fun - DT layout for Paige Evans

Hi there friends,

I'm stopping by to share a new layout with you today that I've created for the Paige Evans Design Team with the Bloom Street collection!

Everybody has go to layouts, right? This is one of mine. I've been making these circle layouts for like 5 years and I never seem to get tired of them. I probably make one with every scrapbook collection I work with. I find it to be a great and easy way to add lots of colors and patterns to a page, much like the big title layouts which I also used to do a lot of but not as keen on lately.


This time I decided to add all the different papers a bit differently. Instead of cutting circles from various patterned papers, I now have multiple designs on each circle. To avoid a big mess though, I kept all the circles uniform.


I started out by cutting paper strips from different patterned papers. I glued these on a heavy weight card stock, then die cut circles from it. You could totally use your Cameo (or any other electric die cutting machine for that matter) for this but for me this was quicker since my manual die cutting machine and dies are right where I craft (my Cameo is not). Plus this way I had more control over which colors I had in my circles. 


I added some decorative stitching for more texture and interest (and also because I really don't trust any glue to keep things in place for good haha). I then decided on a background paper and adhered my circles to it as well as some photos, which I also cropped into circles. I kept embellishing to a minimum, only added a few puffy sticker hearts and words, plus a few sentiment stickers/die cuts. I used a stapler and some stitching to keep the puffy stickers in place (again, I don't trust glue LOL). To finish off my page, I wrote my journaling and stamped my date. 


That's it! Simple but fun. I think, anyway, ha! What is your go to design on your scrapbook pages? I'd love to hear it!

Thank you so much for stopping by today!
Have a wonderful day!

X

SUPPLIES:


Thursday, April 9, 2020

I love you more than you'll ever know - DT layout for Paige Evans

Hello dear friends,

I'm back today with a new layout for the Paige Evans Design Team!
I have a simple layout for you today. Paige has so many of these big title cut files, so I thought I'll just  pick one instead of flowers this time :). I love the font on the "I Love You More Than" cut file (Design ID: 315997)!


Originally I wanted to back each letter with different papers as I normally would but when I went through the papers and saw this rainbow heart paper, I decided I would just go with white letters partially filled in so I could use the hearts for background. Of course I could have used the heart paper to back the letters and still get a rainbow of colors but there's quite some white in between the hearts and when I go with a white cut file (which is 100% of the time these days), I typically don't like to use papers with a lot of white for backing.


Anyway, I started out by figuring out what design I want and once I settled on this arrangement, I started gluing things down. I added some tissue paper behind my photo and adhered it to the background. Using liquid glue, I then glued down the cut file - mostly only in the middle, so I have some dimension to it. I added foam tape to some of the fall out pieces and pieced them back in the letters.


I cut out several sentiments from one of the patterned papers to use them as my main embellishment on this page. I added foam tape to them so that they stand out more. Tone on tone enamel dots, journaling, black ink splatters finish off my page.


I hope I could inspire you today in some small way!

Thank you so much for stopping by!

Have a great day and stay safe!

X

SUPPLIES: 


Friday, March 20, 2020

Bloom - DT layout for Paige Evans

Hi lovelies,

I'm stopping by to share a new layout I've created for the Paige Evans Design Team with the gorgeous new Bloom Street collection!

Another photo I've had lying around my desk since last summer finally found its page ha! I often use black and white photos on my layouts so I don't have to worry about matching colors, but I won't turn a photo into black and white if the colors are important, for instance, it's a photo of flowers, like here! I'm super happy that I could finally scrap this picture!


I chose this lovely Doily Corner cut file (Design ID: 301137) and cut it from white card stock. I then backed it with various patterned papers in the middle, then some parts of the outer petals I left as is because I liked the rainbow striped background peeking through. I glued down the cut file, except for the big petals - I like a bit of dimension!


Since the background is pretty busy, I kept everything else simple. I cropped my photo and printed it in a circle shape. I added my title on top and stitched it down so it will stay put! I then added foam adhesive to the back and adhered it to the middle of the doily. 


I tucked some floral die cuts behind the photo and added a flower charm too. I poked two holes in the layout to attach this charm, because it's heavy and I don't trust any glue to keep it in place, ha! I layered a few die cuts and stickers on the right side too. Oh, almost forgot about the sweet bird die cut on one of the petals! I used foam stickers on some of these so they stand out more.


Last but not least, I wrote my journaling along the petals - if that makes sense?! Anyway, you see what I mean hehe!

That's it for today! I hope I could inspire you in one way or another!

Thanks for stopping by! Have a great day!

X

SUPPLIES:

Thursday, March 5, 2020

Favorite - DT layout for Paige Evans

Hi there crafty friends,

I'm back today with a new layout for the Paige Evans Design Team! The wonderful new collection, Bloom Street is finally in the house yay! The colors and patterns have me yearning for spring!

I don't know about you guys, but every time I work with a new collection, I'm completely overwhelmed. I want to use EVERYTHING, all at once, haha! It's very hard for me to decide on what papers to use, especially. I mean there are 48 beautiful designs to choose from, oh my gosh!

I do have a few favorite papers though. Like this one with the pastel stripes - I call them PJ stripes, not sure why, but this paper gives me retro PJ vibes hehe!

Anyway, so I chose this one for background, then looked for a few more papers that worked well with it.


I cut a few of the Leaf Wreath (Design ID: 274322) cut file from white card stock, in a small size. I backed all but one with patterned papers, the last one with my photo. I'd had this photo on my desk for years, I'm not even kidding. I generally don't scrap photos of things, just people, which is probably why I never scrapped this. But it's so full of color (it's a fruit/vegetable/flower stand in Taormina, Sicily), I really wanted to put it on a page and the photo I was going to use on this layout didn't work with these colors, so why not this one then?

Since, in my experience anyway, no glue will ever stick to a photo, I also stitched the cut file down with my sewing machine. The cut files are tiny, so I just stitched down the inner leaves, instead of the circle, if you know what I mean. 


I then figured out how I want to arrange the wreaths on my page. I added foam adhesive to all of them, then glued them down. I used a scrap piece of floral paper for my corner. I also used a border bunch on a pink paper strip, then tucked this behind the floral paper - as well as a small scalloped border that I cut off an ephemera piece. 


I added a few embellishments to the circles: ephemera, stickers, puffy stickers and enamel dots. For my title I chose a puffy sticker sentiment which I slightly tucked behind the punched border. Last but not least, I wrote my journaling next to it.


That's it, easy peasy! I hope I could inspire you today in some small way! I'll be back with another page soon.

Have a wonderful, sunny day!

X

SUPPLIES:

Friday, February 14, 2020

Love (again?!) - DT layout for Paige Evans

Hello there crafty friends,

Happy Valentine's Day all! We don't celebrate it, however I do usually buy something small for my boys, their favorite chocolate or something along those lines! What do you do for Valentines Day?

I'm sharing a new layout I've created for the Paige Evans Design Team today. Gosh, I am so creative with my titles that I just had to copy paste my previous blog post title OMG :D. I made the previous layout so long ago, I totally forgot about it. Oh well, both layouts will be in different albums eventually, when I can finally afford buying some! Random fact, last time we went to the US, I had to buy the biggest baddest suitcase ever in New Orleans just to fit the 12 albums and the huge amount of tools and supplies I bought there, including my first manual die cutting machine haha! I'm not sure when we go back, I can only hope soon, because there's hundreds of layouts all over our apartment and I'm not crazy enough to spend 40 eur on an album when you can get them at like 10 usd overseas...

Anyway, back to topic! I've used another older collection, Whimsical on this one. I feel like I haven't used Truly Grateful in so long, I need to do that before the new stunner, Bloom Street, is in the house!


The Love in Flowers cut file (Design ID: 313361) is just so pretty, I had to use it right away! Originally I wanted to make a colorful layout but then changed my mind while I was backing the cut file and ended up using a pretty limited color palette. I do like the softness of it though.


After backing the cut file, I pulled out all embellishments and selected a few that fit my colors. I will say, again, that rub-on stickers are one of my favorite products, this is my 4th pack in that collection! While I generally prefer dimensional embellies, these stickers are so versatile and perfect for little accents and finishing touches. I especially love the colorful faux stitching stickers - sure you could use your sewing machine, but changing threads all the time takes ages. So Paige, pls consider having full sheets of these rub on stitches in the future hehe!


Once I figured out where I wanted everything to go, I glued down everything, starting with the cut files. I then added some foam adhesive to my photo and added it to my page. I wrote my short journaling in between some border stickers, then stamped my date and splattered some ink all over my layout.


That's it! I hope I could inspire you in one way or another today!

Thanks so much for stopping by! Have an awesome day!

X

SUPPLIES:
Whimsical collection: Paper 19, Paper 18, Paper 14, Paper 10, Paper 6, Paper 3, Paper 1, Stickers, Rub-Ons, Chipboard stickers