Showing posts with label stars. Show all posts

Friday, March 25, 2022

My Boy - DT Layout for Paige Evans

Hi there crafters,

Today I'm back with a scrapbook layout, as promised!

As (almost) always, my starting point was the cut file. Actually, in this case, two. I knew I wanted to use the My Boy cut file (Design ID: 401445), because I figured it would go with any collections, any designs. But then I saw the Stripes Background (Design ID: 401436) cut file and I just had to use that too! 
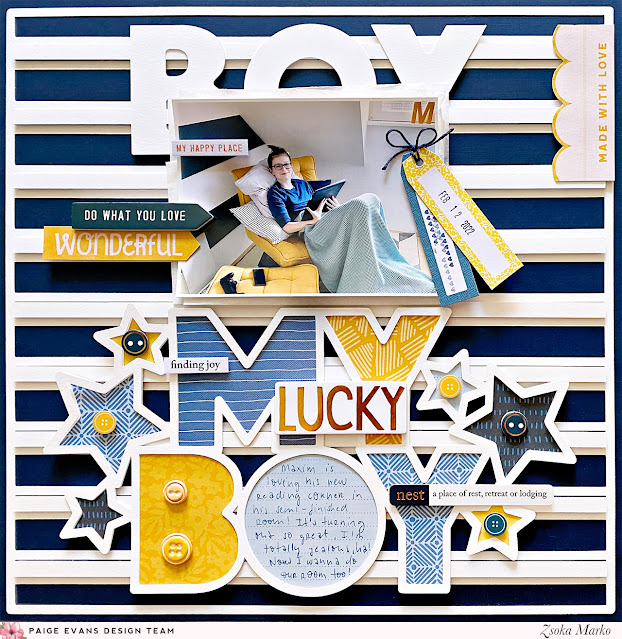

We recently redecorated Maxim's room and we painted one of his walls in navy-white stripes. So, I thought the cut file would be perfect for a photo of him in his room (back then it was just semi-finished, ha!). Now, apparently, I have already used up all dark blue patterned papers from Paige's collections, I only have some scraps left - so I had to go with a navy card stock. I was actually pretty lucky, because I had just one full sheet! I die cut the cut file from heavy weight white card stock and glued it in the middle of the navy card stock. I added the thinner strips back in, using foam tape, to create a bit of interest, texture, and dimension.
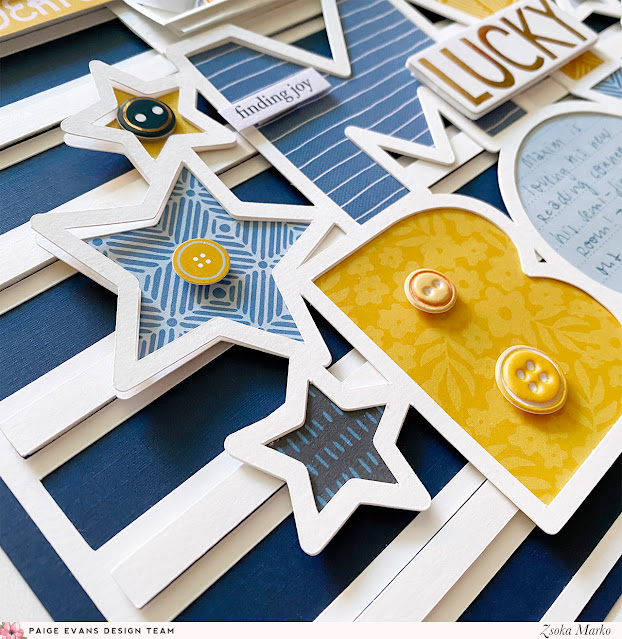

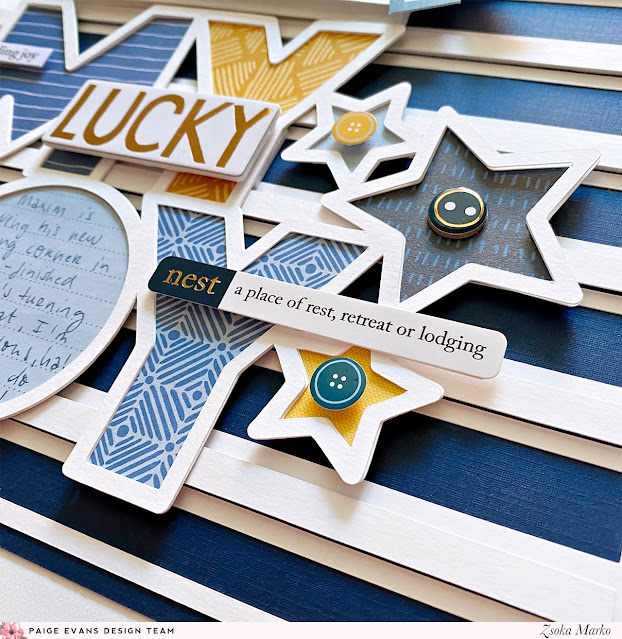
I die cut the My Boy cut file twice from white card stock. This is not something that needs to be done, I just like the dimensional look this creates. I do this on cards all the time but obviously I didn't use to do this on layouts until a year or so ago. Sometimes my cut file doesn't look very nice by the time I finish backing it, it's full of creases etc. This second layer hides those too. Anyway, I pulled out patterned papers from Bungalow Lane that are present in my photo, blues and mustard. I backed the letters and the stars in the cut file, with various papers. I then attached this to the background with foam tape.

I layered some tissue paper behind my photo and adhered it down, above the cut file, also using foam tape. I didn't want to throw away the white fall out pieces from the cut file, at least not all of them - so I glued together the two B's, O's and Y's and tucked them behind my photo. Maybe it makes no sense from a design point of view, but I like the way that looks haha!
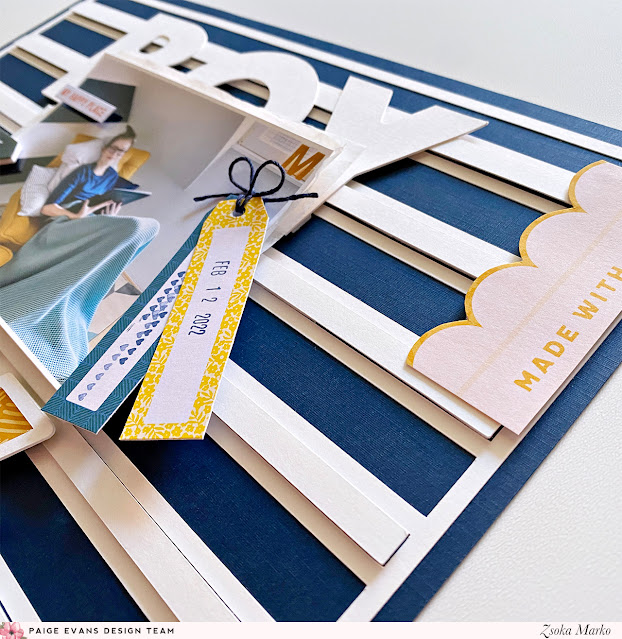

I fussy cut out some labels/tags from one of the patterned papers and used them as embellishments. I also added some sentiment stickers, foam stickers, various button stickers. I stamped my date on one of the tags and I stamped some hearts on the other tag, using Paige's roller stamp from her Take Me Away collection. I added navy twine and glued these down with foam tape. I added foam tape to most of the embellishments actually. I like all that dimension!


I wrote my journaling in the letter O - I specifically chose a lined blue paper to back this letter for this reason. 

That's it! I hope you like how this page turned out!
Thank you very much for stopping by! Have a wonderful day!

X

Tuesday, February 22, 2022

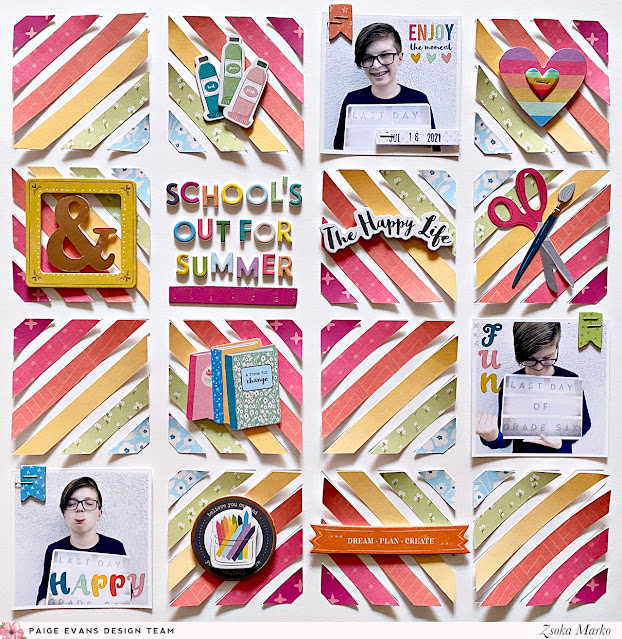
School's Out For Summer - DT Layout for Paige Evans

Hello crafty peeps,

I'm stopping by to share a new layout with you today, that I made for the Paige Evans Design Team, using the older Whimsical collection. 

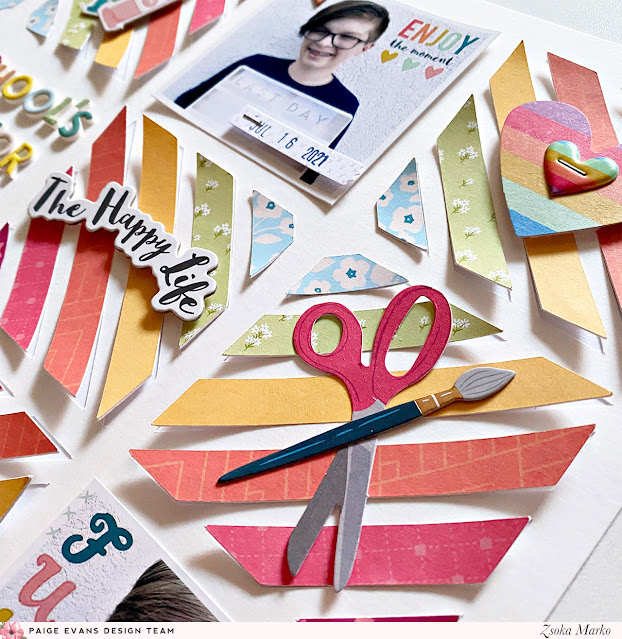
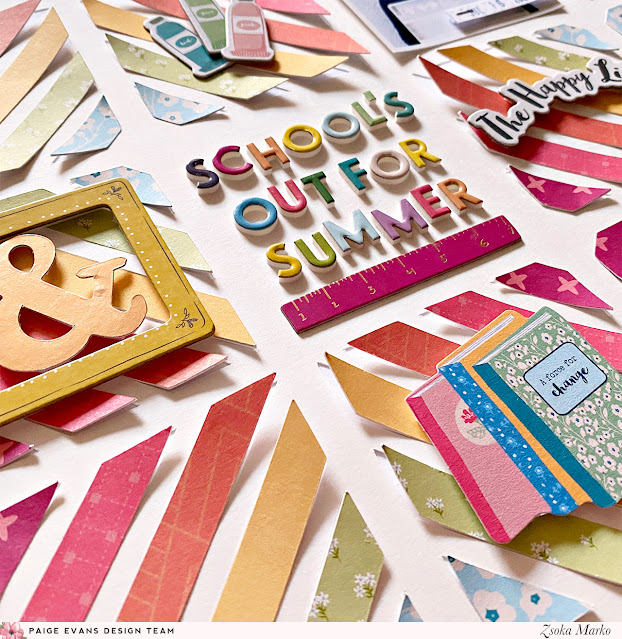
I chose the Diagonal Stripes Background cut file (Design ID: 219450). In Silhouette Studio I deleted some parts of the cut file, where I was planning to add my 3 photos and title, then I sent the design through my Cameo. Also in Studio, I colored all the pieces to see how the pattern I imagined would look like and once I was happy with the design, I grouped the colors together and cut them out of various patterned papers, to create a rainbow color scheme. 


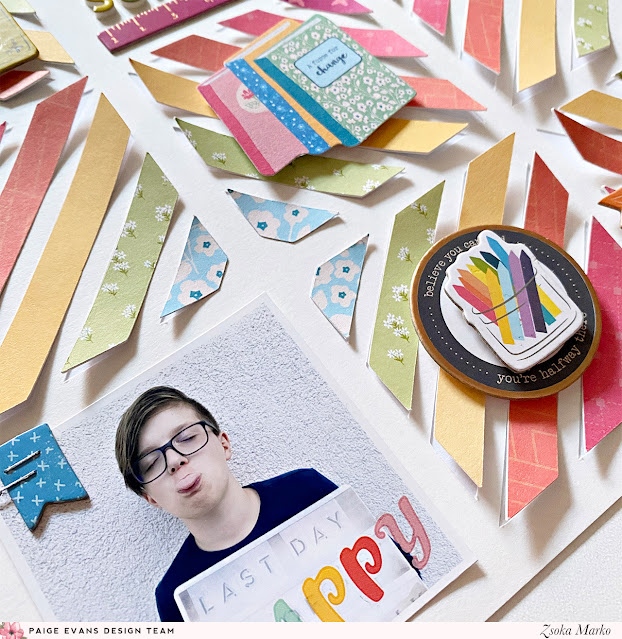
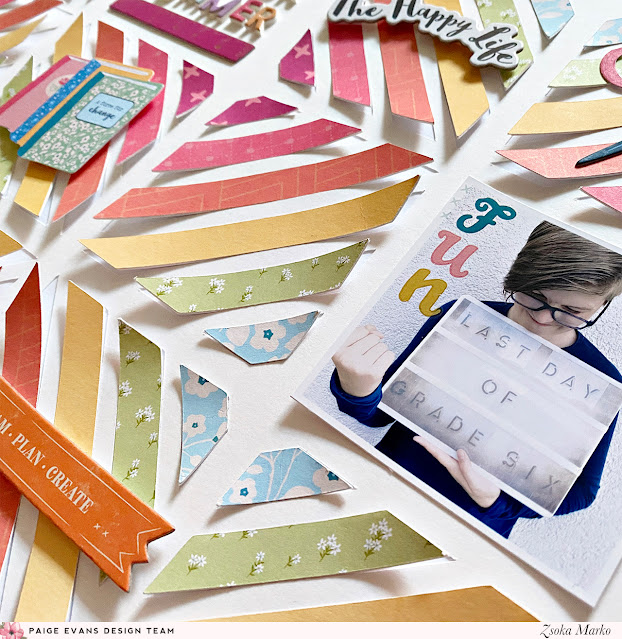
I then backed each colorful paper with the white fall out pieces that I had left from the cut file. I originally wanted to add foam tape to all these shapes, but then I liked the way it looked without. I added a dab of glue in the middle of the shapes and bent up their ends to create dimension.


I went through all the embellishments in the Whimsical collection and pulled out all, that had some kind of relation to school or happiness. I adhered these down in the middle of some of the squares, using foam tape.


I glued down my title in one of the empty spots. I added some colorful rub-ons to all of my photos. I love the rub-ons in the collection, they are just so perfect after all these years too! I'd love rub-ons in every collection, ha!


I stamped my date onto a card stock sticker strip and attached it to one of the photos. I didn't write journaling because I think the pictures speak for themselves :)


That's it for today guys! I hope I could inspire you in one way or another.
Thank you so much for stopping by! Have an amazing day!

X

Wednesday, February 2, 2022

Dec 1 - DT Layout for Paige Evans

Hello crafty peeps,

I'm sharing a new layout with you today, that I made for the Paige Evans Design Team, using the Bungalow Lane collection. As I was browsing through Paige's cut files, I was drawn to the Star Layers cut file (Design ID: 375233). Stars are always good for boys, right? Then I remembered that there's a fun star patterned paper in the collection, so it was decided; I needed to make some kind of star layout!


I resized the cut file and die cut a few different sizes. Originally I planned to only use the outlines and add some layered patterned paper stars in the middle but I changed my mind along the way. I liked the look of the white stars, so I cut the patterned paper stars in a smaller size. Eventually I didn't create layered stars either - you know, the ones that are stitched down the middle and then both sides bent up? I just glued together all 3 layers and adhered these stars using foam tape, to the middle of each white star.


I added some tissue paper to my photo and glued it all in place. My title is just Dec 1, because I prefer short titles and this photo was about my son showing off his advent calendar on December 1.

I went through all the embellishments and tried to find some things that fit either my topic or my design. Well, I guess you could say I also used some random embellies that don't go with either, but they are great anyway, for dimension and interest! That's how I ended up using chipboard buttons in the middle of my stars, for instance! 

I also added a bunch of puffy sticker stars, sentiment stickers and chipboard stickers. 


Oh, and before adhering down the big red star, I wrapped some twine around it, like it was a present. I actually did this with several stars but it felt too much and too messy with the already busy background. So I only left the red star like that. 

I wrote my story on a journaling spot and tucked it behind my photo. I stamped my date on a label sticker and attached it as well. Not that I really needed this since my title is the same hehe! Well, maybe the year is good to remember too!


Okay, that's all there is to this page! I hope I could inspire you in some small way!

Thanks for stopping by! Have a great day!

X


Tuesday, December 4, 2018

Oh My Stars! - Layout inspiration for Pinkfresh Studio

Hi there crafty friends,

I'm back today with some new Christmas layout ideas that I've created for Pinkfresh Studio. I've used the latest Christmas collection, Holiday Vibes, on both of these layouts.

The night before I started working on these pages, an idea came to me, what if I draw a pie chart on my background, then cut it open and fold it back. Would it look like a star? I imagined it would but I wasn't sure. With a heavy heart I cut into the Merry Christmas patterned paper, not knowing what to expect, and this particular paper being the last one I had. 


Gosh, I almost cried. I backed the opening with gold glitter paper and put the page aside. I had no idea what to do with it. I wasn't planning on putting my photo inside the star, but I didn't place it well and when I tried photos anywhere else on the page, they just didn't look right. I don't have many winter photos left that I didn't scrap and none of them worked in a pentagon shape. So ugggh. I started working on my second layout instead and came back to this the next day.


I was determined to make it work, I have never once before thrown away a layout. I found a photo I had already printed out, it's totally blurry but I loved this moment and I still remember it so clearly! So I decided to use it anyway. I cut it into a pentagon shape and cut a slightly bigger pentagon from white card stock so it looks like my photo has a white border. I glued these down. 


I then took all the snowflakes/stars I found and placed them on the layout. I also fussy cut the Let It Snow paper in both 12x12 and 6x6 sizes to have more snowflakes in different sizes. I arranged them on my page and glued them down. I used liquid glue for some and pop dots for others to add interest. I embellished the layout with some puffy stickers, a tag and enamel dots. I glued down my title and added my journaling and date. To finish off this page I splattered some gold ink here and there. I'm still not in love with this page but I think I managed to save it, phew.


I've been wanting to do layered stars on a page for a million years but never got around to it - so I was determined to do it now! I die cut a bunch of stars from various patterned papers (Magical Forest, A Christmas Cheer, Very Merry, Home for the Holidays, Merry Christmas and Seasons Greetings) in different sizes and layered them up. Then I stitched them down in the middle and folded up their sides.


Now I had the same problem as before, finding a photo that I can actually cut into a star shape...This is the part I don't enjoy, I think this is why I've been making more cards lately - going through photos.  It often takes hours...So when I finally did find a photo, I cropped it in Photoshop and printed it out.


I played around with arrangements and settled on this one. I glued down the stars and added some red twine to each of them so that they look like they are hanging. I also made some bows from the same twine. 


I scattered some wooden buttons around the page, added some chipboards, my title and journaling, and last but not least, some gold ink splatters. Done!


That's it for today! I hope I could inspire you in one way or another!

Thanks for stopping by and have a wonderful day!

X