Showing posts with label butterflies. Show all posts

Monday, April 12, 2021

Hello there - DT Layout for Paige Evans

Hey there lovelies,

I'm stopping by to share my newest layout with you that I've created for the Paige Evans Design Team. Most important news, Wonders is in the house yay!!! I'm so excited! I couldn't wait to create with this gorgeous new collection!

I don't know about you, but I like to sit with a new collection for a few days. Like literally, I put it next to me on the couch and go through it many times over the course of a few days. I like to soak it all in and see what speaks to me. While I wait, I usually take the papers that are good for fussy cutting, start Netflix and just start cutting away! One of those papers was the butterfly paper. I was planning to use something else first, but then these beauties were calling my name!


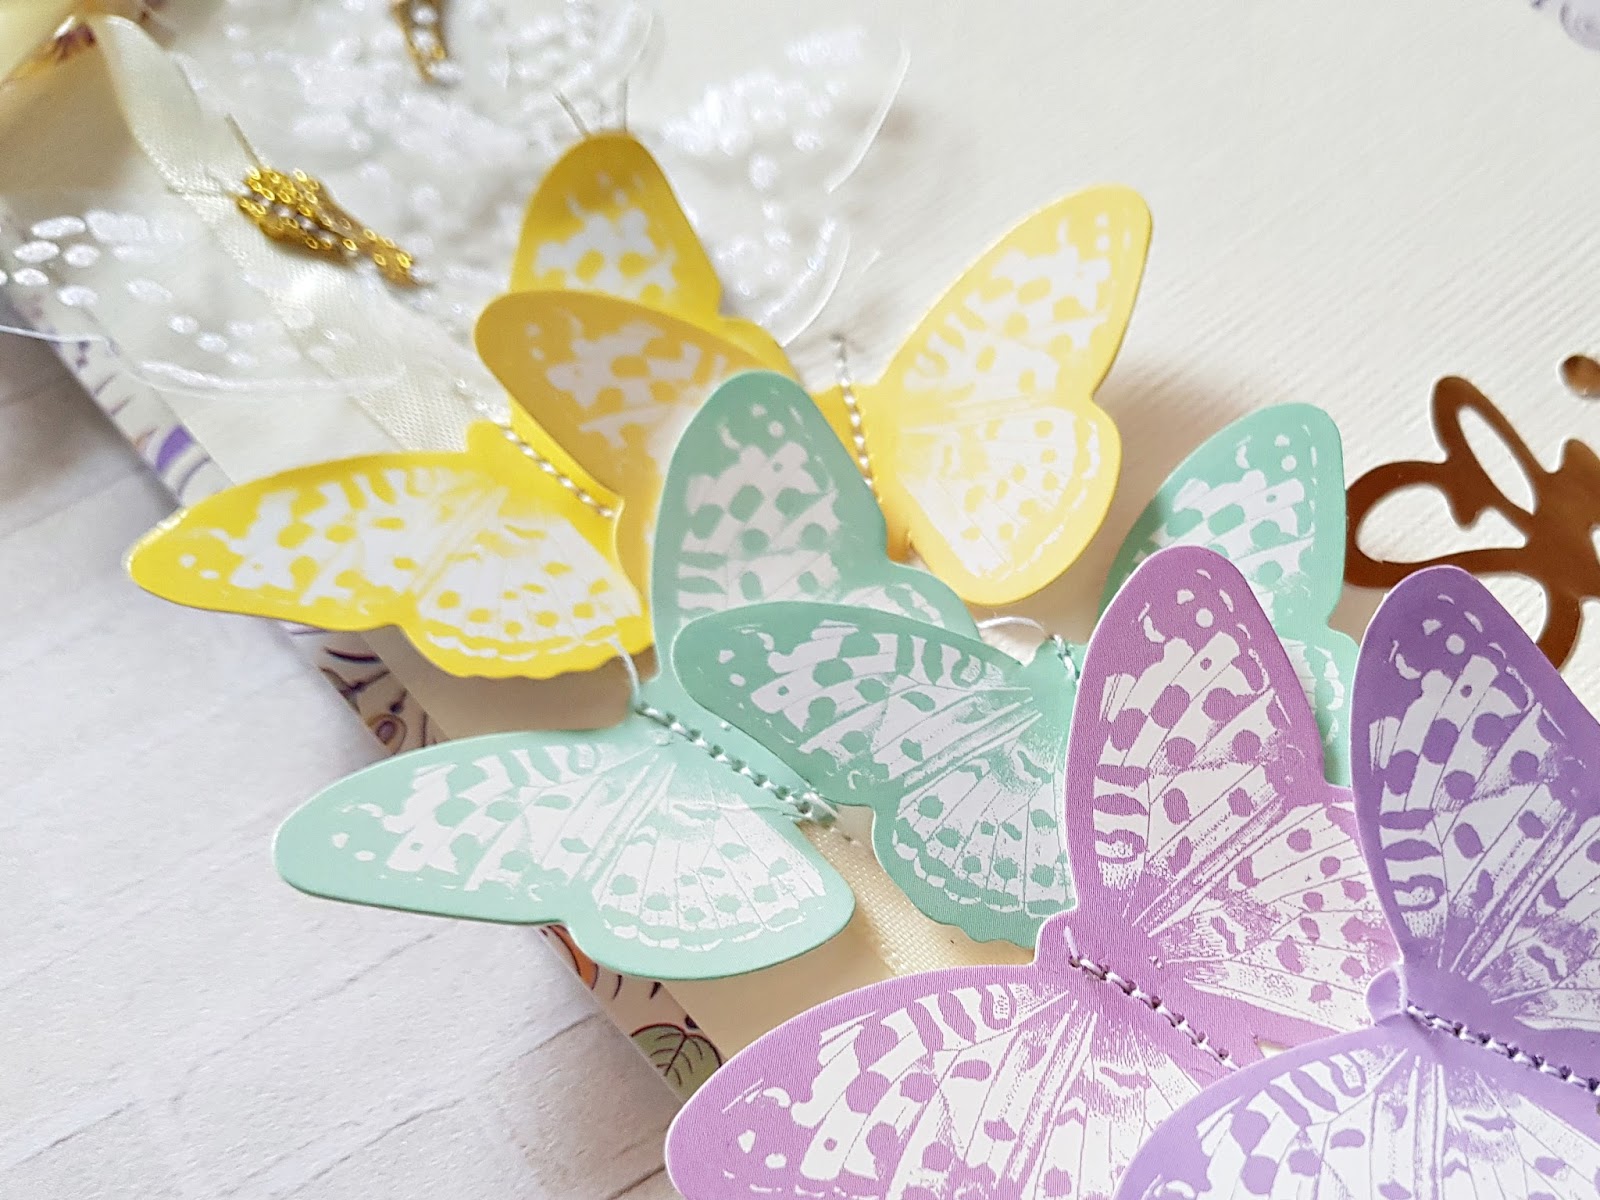
Once you fussy cut all butterflies (I've used them all on this page), the layout comes together super quick. I arranged them into a spiral around my photo (which I die cut using a basic stitched circle die then added a cardstock circle behind it and some foam tape for dimension). Some of them have two layers, because I had more than I needed but I didn't want to save them for another project. 


I then glued them all in place - adding just a little bit of liquid glue in the middle. Next, I stitched them down, then I bent up their wings.


I went through all the embellishments and picked out a few that went with my photo and also the colors of the butterflies. I added foam tape to all, then adhered them to the background. For my title I chose one of the chipboards. I looove chipboards!


Last but not least, I added my journaling and some white paint splatters. If you look closely, you'll see that the paint wasn't even dry when I took these photos hahaha!

You can watch the process video on my YouTube channel if you're interested:


That's it! I hope I could inspire you in some small way!

Thanks so much for stopping by! Have a beautiful day!

X

SUPPLY LIST:

Tuesday, February 25, 2020

Braunfels day trip - Mini album with the gorgeous new Paige Evans Bloom Street collection

Hey crafty friends,

I don't remember when I made a mini album last time! Oh wait, I think I do, it must have been the exploding box mini I made years ago. I also used Paige's collection for that one ha! Holy moly, that was end of 2017, I just checked. OMG, where does time go?! Here's a link to that post, if you're interested!

I love looking at minis, but making them is a whole different story! I'm not big on planning and I feel like minis require quite a lot of planning, if I want to add nice or clever details. Anyway, when I saw the tassels in Paige's new, Bloom Street collection, all I could think of: I NEED to make a mini haha! As luck would have it, we went on a day trip last Saturday, to a nearby castle we've never been to, so I had a million photos for a mini, yay!


I was planning to make all kinds of different shapes for the pages, but somewhere along the way I got lazy so I just kept a simple (mostly) tag format. But hey, at least I made a mini AND that also means I scrapped a lot of photos yay!


For the tag base I've used the Jumbo Tag die from The Stamp Market. It's the perfect size and it comes with the hole reinforcer die too, so you really get a nice, clean finish! You can see that in the detail shots down below. So, what I always do when I make this type of mini album: I use patterned papers on both side AND I also cut the same shape from a heavy weight card stock, which I then layer between the two patterned papers. This way my pages, in this case tags, are sturdy and I don't have to worry they get damaged from flipping through them. I also stitched them together so I can be sure everything stays in place :D.


For the butterflies on the front I've used the Schmetterling ohne Fühler dies from Alexandra Renke. I love that they cut an outline too, so many possibilities!


As you see, I kept most pages really simple, photo plus a couple of stickers or other embellies. Mostly I was worried I'd run out of embellishments on my very first Bloom Street project haha!


The tiny puffy alpha stickers are from Freckled Fawn, from several years ago. I have a love/hate relationship with them! I absolutely love the mixed handwritten font, the color, the texture, so basically everything about the way it looks. However...they don't stick...and there's no glue that would keep puffy stickers in place either (not that I've found and god knows I've tried many). Also, they are way too skinny to apply any glue and achieve a clean finish. So my only option is to stitch them down and hope they won't fall apart! You can see how they curl up, they just don't stick. It's a pity because they look absolutely amazing!


I used some tags and die cuts for my journaling throughout the album.


I've created several pockets for loose photos, because I printed something like 60 and I wasn't going to create 30+ pages...haha! One is a see through pocket I've made from the acetate sheet and patterned paper (I just stitched together two rectangles, leaving an opening on the side, big enough for the photos to go in but small enough so they don't fall out). Do you see the iridescent foil polka dots? So fun! 

Then there is this patterned paper tag with literally a pocket on it, that I stitched down on the sides and bottom for reinforcement.


Here's the back of the above pages:


The stitching is clearly not as nice as on the right side but I really don't mind.


A few more pages and pockets:


This wreath I had left from an upcoming project and didn't have the heart to throw it away! I actually had two, so I added some heavy weight card stock in between the two and stitched them together. The Sakura Blossoms die is from Spellbinders and will soon be available! I had the honor of creating cards for the packaging of the Destination Japan collection last summer, which is why I already have the dies :). This is my most favorite Spellbinders collection to date, be sure to check it out! I'll post my cards with these dies in a few weeks, watch this space!


The little heart die is part of the Büttenrand Herzen die set from Alexandra Renke.


Another pocket I've made, this one is made of 4 layers of paper: 2 heavy weight card stock tags on the inside, 1 patterned paper tag on the front and for the pack I engineered a longer tag from patterned paper, so I could fold it back on the front. So what I did was, using the tag die and a longer strip of paper, I partially die cut the sides and the top - you need to leave the bottom part of the die off your cutting plates. Then I used a circle die to partially die cut the other end of this strip. I hope that makes sense? 


I then just glued and stitched everything together, and added two brads and thread so I can close the pocket.


The back side of these pages:


Lots of iridescent foil details! Really hard to photograph :)


Once done with all my tags, I put them on a pink ring and added the tassel that is solely responsible for me making this whole album haha! Oh and a cute flower charm! Super love that new embellishment in this collection!

That's it guys! I hope you'll be inspired to get crafty now!

Thanks for stopping by! Should you have questions, just comment below and I'll get back to you!
Have a wonderful day!

X

Friday, October 26, 2018

Shimmering "three for one" cards - DT project for WOW! Embossing Powder

Hi there crafty friends,

Long time no hear! And then I have two posts for you today haha! Timing is everything :).

This month at WOW! Embossing Powder our theme is shimmer. So we are using anything that shimmers basically!

I always start out with one card to be honest, but then I hate throwing away anything so often I end up with more cards. This was the case with these cards too!


Do you know the Glintz powders? They are super pretty! They feature subtle shades of mixed golds and silvers. I selected three of them for my cards today:
I've covered 3 sheets of white card stock that were slightly bigger than A2 size with embossing ink. I then added a different color powder to each and heat set them. I repeated the process to get a smooth finish. Unfortunately these pictures don't do these powders justice! They are so shimmery and gorgeous!!!

I then used the Birch Press Design Butterfly Garden layering dies and die cut a different layer from each of these embossed sheets. I adhered them on a white, top folding A2 size card base. I embossed a sentiment with Bright White Regular embossing powder on black card stock and attached it to my card front. Done!


I was left with a lot of butterfly and leaf cut outs and had no heart to throw them away...So for my next card I layered up 3 big and 2 small ones and added some machine stitching to them. I should have used longer stitches because with these small ones some butterflies were torn (I glued them back together). 


I used a stencil to add some embossed stripes. For this I used the Metallic Copper Embossing Glitter. I then glued down the butterflies and splattered some copper ink here and there.  Finally, I added some clear crystals and another thin strip of black card stock with white embossed sentiment.


For my third background I used the same stencil as before but this time I added Clear Hologram Embossing Glitter. It's sooo pretty! But boy is it hard to photograph haha! Well, with my skills anyway. I just didn't get an angle where my camera picked up the different colors very well. But believe me, in person it is so stunning and special!

I then glued down the remaining scraps: leaves and two butterflies. I added copper ink splatters, a bunch of clear crystals and my sentiment and done!


Maybe you can see some of the hologram in the next two photos but they are bad quality:


I hope you enjoyed today's inspiration and will give some of these powders a go! I promise you'll love them!

Oh, before I forget! Have you heard that there is a brand new, dual speed heat tool in the WOW house?! I'm a proud owner of this beauty and I can tell you, it's a game changer! I didn't have the previous tool from WOW so I can only compare it to my old heat tool and there is a world of difference! I generally stay away from heat embossing on acetate and even vellum because I hate warping. But I quickly tested them with this new heat tool and there's hardly any warping! I'm so impressed! If you're looking for a great heat tool, look no further! Check this out:


GORGEOUSNESS am I right?! I'm super excited about it if you can't tell haha!

Anyhow, thanks so much for stopping by! Don't miss my post in the afternoon, I'll be back with some Christmas cards!

See ya X


Friday, May 25, 2018

Let's celebrate - DT layout for Fancy Pants Designs

Hi lovelies,

I'm back today with a new layout I've created for Fancy Pants. I've used the gorgeous The Bright Side collection on this one!


I picked a butterfly cut file I liked (one of the butterflies in the Butterfly Cluster cut file by Paige Taylor Evans) and cut it from different patterned papers and in different sizes. I then stitched 3-4 together, using my sewing machine. 


I also cut another cut file from textured white card stock (The Chicken Wire by The Cut Shoppe), then I started putting my layout together. I picked a blue striped paper from the Family&Co collection for my background. I love this paper!


I then adhered the Chicken Wire cut file to my background paper. I didn't put glue everyone on the cut file because I wanted to create a dimensional look. I arranged the butterflies the way I liked them, then glued them down. 


I layered some tissue paper, tags and die cuts behind both photos and placed them on the layout. For my journaling I used a journaling spot. To finish off my layout I added a chipboard title and a few chipboard hearts.


I hope you like how it turned out! I love dimension and layered hearts/butterflies/etc give so much texture to the layout too! I realise this style is not for everyone, but it is certainly my style!

Thanks for stopping by! Have a wonderful day!

X

Friday, April 6, 2018

Card inspirations with the Spellbinders April card kit

Hey there,

Did you guys know that Spellbinders offers different kinds of subscriptions? One of them is the monthly card kit. You can find out more about it here

Today I'm sharing 7 cards I've created with the April 2018 kit! The kit is jam packed with goodies, patterned papers, die cuts, dies, stickers, ribbons, jewels, charms, envelopes and card bases, you name it. And my most favourite: gold metallic paper. It's so pretty! And so thick! And fingerprints don't show on it! Is it weird I get excited about the smallest things haha?!

It's always interesting to work with kits because often they are different from what I would choose for myself. It's pretty much always a challenge, but I like a good challenge! This month the kit has a very nice spring feel to it!  So I absolutely had to use lots of flowers and butterflies of course!


Without further ado, here are my cards up close!


I hope you like! I actually added these to my mom's gift basket for mothers' day, the colors reminded me of her! 

Any questions about how I made something just leave a comment down below!

Thanks for stopping by today!

See you soon,

X