Showing posts with label Simple and Sweet. Show all posts

Monday, January 14, 2019

Pinkfresh Studio January Release Blog Hop


Hello and welcome to the Pinkfresh Studio January 2019 Release Blog Hop!

You should have arrived here from the amazing Yoonsun's blog. I'm sure she's shared some gorgeous inspirations with you!

Today I'm sharing quite a few cards, so hang in there :D. This probably happened because we were on holiday and for like 11 days I could not craft at all, so when we got home and my package was there, I couldn't stop creating! That and the fact that this release is jam packed with gorgeous products!

First up is the wonderful Heart and Soul stamp and coordinating die set. I'm not much of a colorer but I had to give it a try!

All my cards are mounted on A2 size (4.25x5.5") top folding card bases (portrait or landscape format). Here I added a piece of teal card stock on top, on which I white embossed the title. I probably shouldn't have done this because the letters are tiny and the embossing didn't work out so well. Especially because I used textured card stock. Just so you know what it says: "So fill your heart with what's important and be done with all the rest." In person it's easier to read!


I then stamped the image in gray ink and colored in everything I could. I die cut the image using the coordinating die. I added some foam adhesive to the back and pressed it down on the metallic teal thread I placed in that corner. To finish this off I drew white faux stitches and added a few gems.


I created two more cards with the same stamp and die set. This time I did not want to color, instead I took some aqua striped vellum, matching embossing powder and embossed the image on the vellum. I die cut them and then decided to die cut the shapes from white card stock too because I didn't like the different colors peaking through the vellum.


I added a few strips of color card stock to each card base, then stamped the sentiments in navy. I popped up the die cuts and used some tangled thread and some twine to add a bit of texture and interest. Last but not least a few gems were placed here and there.


Next up is one of my favorites from this release: the Embroidered Blossoms stamps and coordinating dies. On the back of the packaging of each set you'll always find a couple of examples what you can use the products for. Just to give you an idea if you don't know where to start. Which is what I did this time because the 3 samples are the most gorgeous arrangements and the color combos are fabulous! I picked one and started stamping the images just like on the sample.


But then I couldn't stop there and kept adding more blooms towards the top. Gosh isn't this color combo just fab?! I never would have come up with it on my own!

I glued a couple of strips of cornflower colored card stock at the bottom. I white embossed my sentiment on one of them. This sentiment is from the Scripted Bold Sentiments 2 stamp set. Some twine and Nuvo drops finish off this card.


For my next card I used the Oval Foliage die to create my focal point. Isn't this die so clever?! Using the coordinating Oval Foliage stamp set I stamped a pink oval and a light blue sentiment. I then realized I simply can't handle that much white surface hehe, so I stamped blooms in the same color combo as above, using the same Embroidered Blossoms stamps. I cut this panel slightly smaller than A2 so I could back it with an A2 size colored card stock. I also tuck a piece of pink card stock between the layers, for which I used a border punch.


I made another card with the Embroidered Blossoms stamps and coordinating dies. Here I stamped a bunch of blossoms in pinks, purples and yellows, a few leaves in black and some more leaves I embossed in chartreuse color. I die cut everything and created two flower clusters in opposite corners. Before gluing them down, I used a corner chomper in the bottom right corner. I generally prefer straight corners but I thought I'd try something different. I didn't dare to chomp off the bottom left corner as well because I don't think I would have liked that look. I like this asymmetrical look though. 


I glued down the flowers and leaves, stamped my sentiment (from the Heart and Soul stamp set) and added some black ink splatters. Done!


Next up is another favorite that took me by surprise, the Adore Alpha stamp and coordinating die set! I do love alpha stamps and dies in general but when I first saw this one, I didn't notice the teeny tiny detail stamps that make all the difference! Check out this awesomeness:


With the dies you get 2 for 1 cuts, because it cuts the letter AND a thin outline so you can make two cards right away. Which was my plan too but then I decided to add back the outlines (card on the left); so I just die cut Valentine two times from white card stock. On my first card I used the stamp set too, to add color to the letters. Then I white embossed those little decorative elements. Isn't that super cute? I'm so in love! I glued an A2 size piece of patterned paper (Simple & Sweet collection) on the card base and layered a pink heart on it. I popped up the letters using foam adhesive. I stamped my sentiment in black, on white card stock (this sentiment is from the Word Series: Happy stamp set from last year). 

For my second card I backed the white outlines with different colored card stock. I glued them down on the card base, stamped my sentiment (from the Word Series: Dream stamp set from last year), added some twine and black ink splatters. Done!


On my next card I didn't use the outline. I stamped and die cut the letters, then embossed the little florals on them. I layered some colored card stock and patterned paper on the card base, with foam adhesive between two layers. I also popped up the letters. I added some twine and stamped my sentiment, It's your day, from the Scripted Bold Sentiments 1 set.  


Almost there guys, almost there! :) On my last 3 cards I used the super sweet Make a Wish stamp set and coordinating dies. Each design is similar, with different color combos.

First one here will be for my little niece if I don't forget I have this card by August haha! I stamped and die cut loads of flowers and leaves in a few different colors. As well as cakes, cakes stands, the whole nine yard! I glued a purple heart on my card front and added the little images. For some of the flowers I used foam dots but mostly I just adhered everything down using liquid glue.


I stamped a sentiment in purple and created a lilac ribbon bow at the bottom. A few purple enamel dots and you're good to go!


Next card is pretty much the same, except I used a scrap piece of patterned paper (Simple & Sweet collection) and I put everything off center. Here I added a third cluster of flowers too.


These two cards will be for my best friend's twins in May, again, if I don't forget! :D


Next is a boy card, yay! Well, I'm not very sure about the flowers but hey, boys could love them too right? Same concept as before, except here I'm using a rectangle instead of a heart.


You've made it, yay!!!
Now for the fun part....Giveaways!

 GIVEAWAYS:

Pinkfresh Studio will be giving away the entire January release on the PFS blog and Instagram. But that's not all! At each stop in the hop you can also win a $25 gift card yay! So comment away! The winners will be picked randomly from the comments and they will be announced on Sunday, January 20th on the Pinkfresh Studio Giveaway page. Please remember to check that page and claim your prize within 2 weeks!

SHOPPING PROMO:
There are TWO fabulous promotions during this release! 
1. A free Dainty Love Balloon die with your purchase of $25+. You don't need a code, it will be added automatically to any order that hits the $25 threshold. I'm jealous. I don't have this one.


2. Free/discounted shipping from Jan 14-17, 2019 on orders $50+. You need to use the code JANFREESHIPWITH50. Shipping is free in the USA and $5.50 off for international friends.

I hope you enjoyed the hop and love the new stamps and dies!

I'm the last stop in this blog hop, so from here you'll go back to the Pinkfresh Studio blog. I'm attaching the full blog hop list below for your convenience.

Thanks for stopping by today! Have a great day!

X


Blog Hop list:

Friday, August 17, 2018

Card inspiration - DT project for Pinkfresh Studio

Hi there crafty friends,

I'm back today with some new card inspiration for Pinkfresh Studio!
I only have two cards for you today that I've created with some of the new release stamps and dies as well as the Simple and Sweet scrapbook collection.

Let's start with the simpler one! I went with the Leafy Backdrop stamp set which I haven't had a chance to use before. I find it super versatile! Imagine all the possibilities for backgrounds, whether stamping, embossing, watercoloring! I love this set!

I matched the colors of my inks to the colors of the Simple and Sweet collection. I cut a 4.25x5.5" piece of white card stock.


I did make a practice card, just so I could figure out how many stamps I'd need in every color, but other than that this goes very quickly! I used my stamping tool so that I could stamp each leaf twice to get a crisper image. Once done, I trimmed off a little bit on each side. I made an A2 size top folding card base, then attached a pink plaid patterned paper from the Simple and Sweet collection in the same size. I layered my stamped card front on top.


I love enamel dots! I could put them on everything really. Which is what I decided to do here - I didn't want to cover up much of the design, so I only added a chipboard sentiment on top. All the enamel dots however just cascade down from the bottom of the leaves. That's it!


As for the second card...Well this one took me much longer than I care to admit, but most of that time is really spent on figuring out what should go where, what I like and what looked better in my head. But once done and you just need to recreate the design, I'm sure it won't take all that long! My inspiration for this card came from my amazing DT peer Natalia Valkovskaya, check out her card here. I thought it was genius to use the Merry and Bright Toy Shop die and stamp sets to create a candy shop! So here's my take on it!


Before I started scrapbooking, I used to bake. Mostly cookies and cake pops but also some cakes (even a wedding cake!). I didn't do it for the baking part, but for decorating. And obviously I have loads of supplies still, so you won't be surprised when I tell you I have cake stands in both the blue and the pink color I used on this card haha! So I just had to take a picture with one of them! The cake stand hasn't been used in 4 years so I thought I might as well...

Anyway. I cut the shop front from white card stock and using a dabber I added some pink ink. I wanted to achieve a distressed kind of wall look so I grabbed an inkpad in a darker shade of pink and just rubbed it on lightly. It looked perfect. But then it dried. And the color totally blended in the background. So I tried an even darker shade but by the next day I couldn't see that well either and by then my card was already done. Well too bad! I purposefully left the top white and rubbed on the ink in an imperfect way, like on old houses.


Then I die cut just the top part of the shop from patterned paper from the Simple and Sweet collection. I turned it around, so it has the scalloped edge at the bottom. I then folded this behind the card front and glued it down. Originally I die cut the shop from my favorite blue paper from the Case of the Blahs collection but it didn't look the way I imagined, so I just used parts of it to decorate my new pink house. I do realize the door should go all the way down to the bottom but for some reason I liked this better, even though it doesn't look right hahaha! I embossed the handle in white and used a white gel pen to add in more white details.


I fussy cut some images from one of the paterned papers from the Simple and Sweet collection; some sweets, lemons, a bike and some frames that I cut up and used for shelves. I named my shop Every Nice Thing ha! I used some foam adhesive here and there to create dimension. Last but not least I put some flowers on my store front, because I need flowers on everything.


I did want to make a second card, a flower shop, but then I had no time. Maybe soon!

That's it! Hope you like today's cards!

Thanks so much for stopping by and I wish you an awesome day!

X


Monday, August 6, 2018

Scrapbook inspiration - DT project for Pinkfresh Studio

Hi there lovelies,

I'm stopping by to share some new layouts with you that I've created for the Pinkfresh Studio design team!

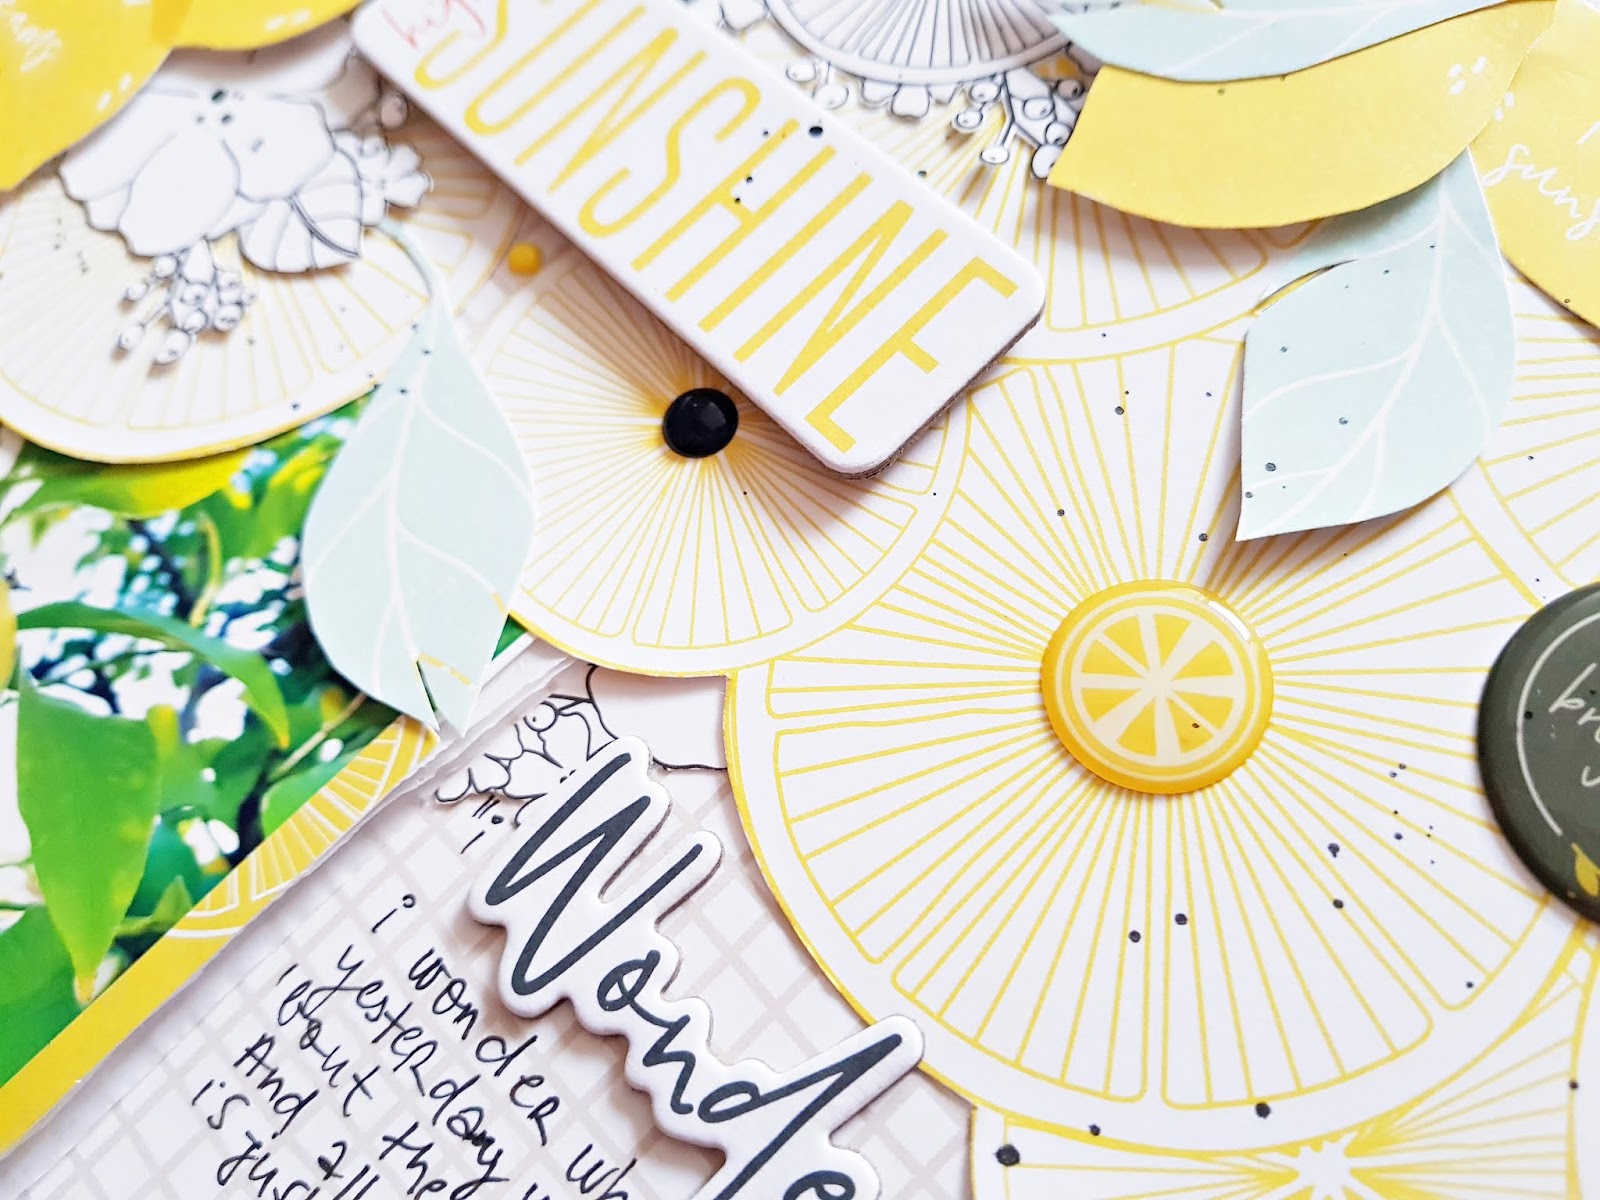
I love the fresh summery lemon theme in the Simple and Sweet collection and as luck would have it I actually have a bunch of photos of a lemon tree. While on holiday, we had our own lemon tree in the garden, it was so lovely!

I chose the Lemon Lush, the Sweet Life and the Good Things patterned papers for my first layout. I often go for this design where I have a bunch of things in two opposite corners, so I cut apart the Good Things paper and started building two clusters.


I added a stitched frame to my photo and tucked it under the lemons at the top. I fussy cut out some lemons and leaves from one side of the Lemon Lush paper and some black and white flowers and lemon slices from the other side of it. I like black and white for accent on such pastel layouts.


Varying liquid and foam adhesive, I added my fussy cut elements at the top and bottom. I also placed some chipboard and epoxy stickers as well as some enamel dots on my clusters.


Do you remember that song, Lemon tree from Fool's Garden?! It was a huge hit when I was at high school and it still often comes to my mind. And then what happens?! I find a "Wonder" chipboard in this collection, haha! So it had to be! Wonder became my title and I wrote a part of the lyrics around it, as well as my journaling. Added some black ink splatters and stamped my date, done!


My second layout looked better in my head to be honest but it's what it is. I'm sure we don't like every single layout we make the same way right?

I chose a cut file by Paige Evans and cut it from white textured card stock. I then backed it with scraps I had left of the Simplicity, Happy Life and Good Company patterned papers and two different pink card stocks too. One of the pink card stocks I used to back the middle of the wreath too.


For my background I chose the Happy Life patterned paper and adhered my floral wreath in the middle using foam tape. I cut one of the stitched frames to the size of my photo and lay it over it. I tucked this behind some of the flowers. 


For my title I went with Full of Joy from the gold foiled puffy stickers. 


I started adding embellishments, although not too many. I felt like this page didn't need more. I chose some chipboard and epoxy stickers. I used one of the tabs in the ephemera pack for my date, I just covered up the words in the middle with a piece of white paper.


I wrote my journaling all around the page because I didn't like it anywhere else. I was going to write it in a circle around the cut file but then my friend Enza suggested this and I liked the idea. 


I splattered some gold paint all over the page and done!

I also have a third page for you today, this one was created for the Pinkfresh Studio August challenge:


Here's my take on the summer theme and the pastel colors! I think this is my favorite of the three layouts even though I wasn't even sure I want to make it. I love big titles but I'm also kind of tired of them.


I used the Simplicity patterned paper for background because I haven't used this one before. I cut the title from pink card stock and backed it with the other side of the Simplicity paper. So that the title doesn't get lost on that busy floral background, I layered some white card stock behind it as well. I glued the white card stock on the background, then I added foam tape to the title and glued it down too. This way there's a bit of depth to it and it stands out even more. I layered some scraps and ephemera pieces behind the photo and tucked it all in behind the letters.


I went through all the embellishments I had and selected the ones that fit my page. I arranged them the way I liked them and adhered them all down. I ended up using puffy stickers, chipboard stickers, ephemera, epoxy stickers and enamel dots as well.


I stamped the date, added my journaling and some black paint splatters to finish off my page.


That's it for today guys! I hope you like the pages and are inspired in one way or another!

Thanks so much for stopping by today!

Have a fabulous start to your week!

X


Thursday, July 5, 2018

Scrapbook inspiration - DT project for Pinkfresh Studio

Hey there crafty friends,

I'm checking in with my very first monthly blog post for the Pinkfresh Studio Scrapbook Team! I'm so excited and honored to be here! I've been a fan of PFS products for a long time (well, ever since I first laid eye on them really!) and because patterned papers are my most favorite scrapbooking products, I'm ecstatic I will be able to use them more on the scrapbook team! Thanks so much Pinkfresh Studio for this opportunity!

I have two layouts for you today that I've created with the new and super gorgeous Simple & Sweet collection! I always love PFS color palettes, they are always so unique! This time the colors are so fresh and pretty, perfect for summer!

On my first layout I used my favorite paper from the collection, Good Things, as my main focus. I cut off the part where the stripes go another direction. I did this with two papers, and the second one I cut apart even more: I cut it into strips and added those strips on my other paper. I stitched them down in the middle and bent up the sides to add dimension.


I then assembled my background on a heavy weight card stock: I added a strip of the Happy Life paper at the top and a strip of the Simplicity paper at the bottom. For contrast I placed a couple of thin strips of coral card stock on the background too.


Next, I die cut 3 flowers from the Good Things paper. I then created two clusters around my photo, for which I used die cuts from the ephemera pack, epoxy stickers, puffy stickers, enamel dots and these die cut flowers.


I added my puffy sticker title, some black ink splatters, wrote my journaling and stamped my date. That's it!


For my second layout I went with the Happy Life paper for background and decided to cut the cut files (the Dream Catcher cut file is from Paige Evans) from blue and yellow card stock. I then backed the cut files with various patterned papers from the Simple & Sweet collection, some from the 6x6 pad, but I used some of the 12x12 papers too.


Once done, I glued down the cut files onto my background and started embellishing. First I added my photo which I trimmed into a circle. I used foam adhesive for this so I could tuck other embellies behind my photo. 


I created two clusters, using die cuts, epoxy stickers, puffy stickers, enamel dots as well as some flowers I fussy cut from one of the patterned papers.


For my title I went with the beautiful mint puffy alpha stickers. I added a die cut banner below it, as well as my journaling.


That's it for today! I hope I could inspire you in some small way!

Thanks for stopping by today! Have an amazing day!

X