Hey guys,
I'm checking in with some new Pinkfresh Studio cards! On today's cards I've combined the super adorable Holiday Vibes collection with some of the stamps from the Pinkfresh Studio July release.
All my cards have an A2 size top folding card base, although one of them is in landscape orientation.
Often when I'm bored I fussy cut (or hand stitch) just to do something! One of these times I fussy cut one of the 12x12 patterned papers, Christmas Cheer. It's such a cute paper, I can't even!
I added some patterned paper to my card fronts (Very Merry and Merry Christmas), then started creating my scene.
I adhered the little animals and leaves, then I took a bunch of Christmas stamps sets and added some simple black images. The presents and snowflakes are from the Train Ride and the Magical Christmas stamp sets. The sentiments are from the Magical Christmas and Great Joy sets.
Once the stamping was done, I added the little hats with foam dots. I love the oversized look!
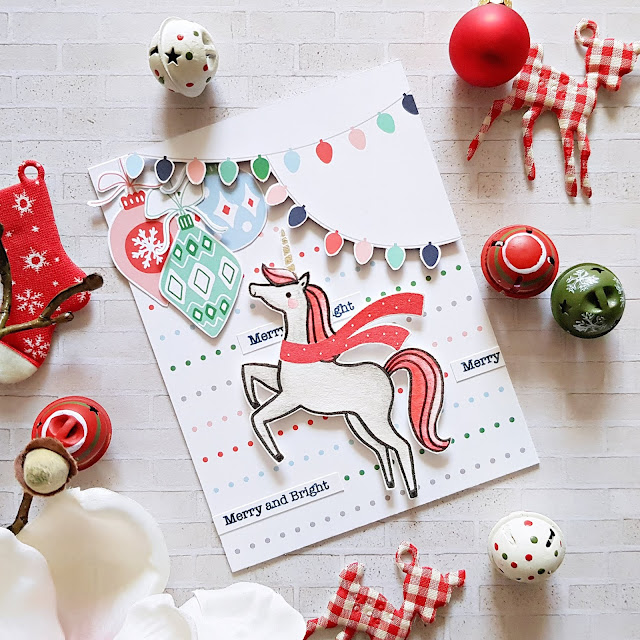
Next up is a card with the Magical Christmas stamp set (coordinating dies are also available, however I just quickly fussy cut out my unicorn because I often have no space to take out my die cutting machine). I cut an A2 size piece of the Home for the Holidays patterned paper for the background. This has some sentiments along with the polka dots on it, but I covered them up with the Merry and Bright sentiment from the Great Joy stamp set.
I fussy cut out some lights from the 12x12 Seasons Greetings patterned paper and adhered it to the top of my card, using foam tape. I added a bit of water color to my unicorn, stamped its scarf in red ink, embossed its horn with gold embossing powder, then attached it to the card with foam dots. Last but not least I hung some fussy cut ornaments from the top. These are from the 12x12 Christmas Cheer paper.
I've created a shaker card next. Using the Great Joy coordinating dies I cut out a window from and A2 size patterned paper (Let It Snow). I also cut the wreath from white card stock which I then stamped and embossed using the Great Joy stamp set. I adhered these two to acetate then added foam tape to the back.
I covered my card base with the Home for the Holidays paper, placing it in a way that the Holiday Vibes sentiment would show in the shaker window. I placed some sequins and beads in the middle and attached the card front to the card base. I added a few details: die cut and twine bows plus a few fussy cut pieces (again, from the Christmas Cheer paper), to add some dimension.
Then we've arrived to my last card for today! This is a very simple one! I adhered a piece of the Very Merry patterned paper to my white card base. I stamped my sentiment right in the middle in black ink. I've used the Magical Christmas stamp set for this.
Now, there were lots of partial presents in the 12x12 Christmas Cheer paper and as I don't like to throw away any scraps, I tried to use as many of those as I could. The rest of the presents I had to trim down after adhering them to the background paper. I also added a few candy canes, some fussy cut, some stamped. The tiny candy cane stamp is from the adorable Train Ride stamp set.
That's it for today guys! I hope I could inspire you to mix and match stamp sets for your holiday projects!
Thank you for stopping by! Have an awesome day!
X
* Full disclosure: I'm using affiliate links in this blog post at no cost to you. *


