Showing posts with label Crate Paper. Show all posts

Friday, June 15, 2018

Spellbinders Special Moments Collection by Marisa Job - Part 3

Hello crafty friends,

I'm back with you to share my third and final post showcasing the wonderful Special Moments collection by Marisa Job for Spellbinders. If you've missed my previous two posts, you can find them here and here.

Today I'm sharing 3 cards I've made with this collection. As before, I started out by making A2 size  top folding card bases. 

One of my favourites in this collection must be the super duper gorgeous Shapeabilities Laced Flowers Etched Dies . For my first card I die cut these flowers from a purple patterned paper, layered them up using foam adhesive to create just one big, dimensional flower. I added a pink flower button to the middle.


I adhered a 4.24x5.5" size white card stock to the card base, then cut a few strips of patterned papers and glued them down. I actually did paper weaving in the top left corner but then covered it all up with the flower :). I never plan out my cards, which of course would have saved me some time here, since it was completely useless to do the paper weaving ha! Oh well! Next time! Finally, I added a phrase sticker for my sentiment.


For my next card I die cut 3 flowers with the same die as above, plus another 3 using the Shapeabilities Floral Oval Etched Dies. The shape of these flowers is the same so I thought mixing up these two dies would be a great way to create something different. I layered a bigger and a smaller one adding pop dots in between the layers. I added some Nuvo drops for the middles.


I then took one of the circle dies from the Shapeabilities Special Day Frame Etched Dies set and die cut a sentiment from a 12x12 cut apart paper. I again added a white 4.25x5.5" card stock to the card base and the bottom part I covered with a piece of patterned paper. I adhered the circle on top and glued down the flowers too.


I cut some flamingo patterned paper to cover my card base on my third card. I die cut two circles from different patterned papers using the Shapeabilities Special Day Frame Etched Dies. I also die cut a circular Happy Birthday sentiment, which comes in the Shapeabilities Happy Birthday w/Numbers Etched Dies set. I layered up the circles, adding foam adhesive between the biggest and the middle layer. I just love dimension!


I die cut some more flowers, because...well, flowers make everything better, am I right? To finish off this card, I added a few white enamel dots. That's it!


I've loved working with this collection, it's just super pretty! Anything with flowers and I'm good :). I hope you enjoyed the cards I've created and I could inspire you in one way or the other!

I wish you all a wonderful day!

Zsoka

Spellbinders supplies:
  • S4-943 Shapeabilities Happy Birthday w/Numbers Etched Dies Special Moments Collection by Marisa Job
  • S4-945 Shapeabilities Laced Flowers Etched Dies Special Moments Collection by Marisa Job
  • S5-374 Shapeabilities Special Day Frame Etched Dies Special Moments Collection by Marisa Job
  • S5-378 Shapeabilities Floral Oval Etched Dies Special Moments Collection by Marisa Job
Other supplies:
  • patterned paper, phrase sticker, button - Crate Paper
  • Nuvo drops
  • enamel dots
  • twine
  • white heavy weight card stock for card base
  • diecutting machine
  • trimmer
  • liquid adhesive, double sided adhesive, foam adhesive

Wednesday, June 6, 2018

Ready, set, go time - DT layout for Just Nick

Hi there crafty friends,

I'm back today with a new layout I've created for Just Nick!

This time I've used the Starburst cut file. I wanted to use the super cool Crate Paper Cool Kid collection which I haven't used in ages, so I needed a cut file that's good for boys, so stars it is! Although let me tell you, the other day I was shopping for clothes for my son and when I showed him a pullover I bought, mint with a big navy star on the front, he said his classmates told him stars were for girls. I'm like what the what?! Mom knows better haha! Anyway, back on topic...


I cut the cut file from white card stock and backed the open stars with different patterned papers. Now, I don't like to work with a lot of white on my cut files so the full white stars had to go ha! I hand cut some stars from patterned papers, in varying sizes and layered them up. I stitched them down in the middle and folded them up to give them some dimension. Next, I glued them down on the white stars.


Originally I wanted to go with a yellow background but then I didn't like it, so I added some woodgrain paper and a black strip in the middle for accent. I layered some tags, scraps and tissue paper behind my photos and stuck them down. I added a chipboard frame to one and a star clip to the other one. I also attached the "dude" chipboard to both photos and a die cut on the right.


I added foam adhesive to the back of the cut file and adhered it to the background. I picked out some puffy sticker stars from the collection and glued down those too as well as a rubber charm. Finally I added the stars banner chipboard piece. I'm happy I could finally use this, I generally never find the right spot for these banner type embellishments for some reason.


Last but not least, I arranged the puffy sticker title in a bit of a crooked way and glued it down. 


I wrote my journaling and stamped the date and the layout was done. I love this Crate Paper collection, for boys it's one of my favourites. I wish they came out with more like this and my other fave, Little You!


I hope you like how this layout turned out and I could inspire you in some small way!

Thanks for stopping by today!
Have an awesome day!

X


Wednesday, April 18, 2018

Spellbinders blog hop featuring Sharon Sowell, Marisa Job, Stacey Caron and Lene Lok


Hi there crafty friends,

Today I'm joining the Spellbinders blog hop showcasing the following four collections:


You should have arrived here from the super talented Rubeena's blog!

To create today's card I used a wonderful floral die from the Blooming Garden collection by Marisa Job. I die cut the shape twice, once from patterned paper and a second time from white card stock. I created an A2 size card base from white heavy weight card stock and adhered an A2 size striped patterned paper panel on the front.


I then glued down the patterned paper die cut using liquid glue. Now, I prefer dimension on my cards so I added foam dots to the negative shapes in the flowers I cut from white card stock. I adhered these down. I fussy cut some black and white leaves from a patterned paper and attached them around the flowers. For my sentiment I used a die cut circle. To finish off my card I added some Nuvo Jewel Drops. 


I don't like to waste anything, so I thought I'd use at least a part of the white die cut shape too. I fussy cut out one of the flowers and glued it onto the flap of a black envelope. I also added in the negative shapes I had left from the patterned paper die cut. Done! I hope you like how it turned out!


SUPPLIES:


Now for the fun part! Giveaway yay! There's two chances for you to win, here's how:

1. To celebrate this release, Spellbinders is giving away a $50 gift certificate to a lucky winner. Please leave a comment on the Spellbinders blog by Sunday, April 22nd 11:59 pm EDT for a chance to win. The winner will be announced in the blog hop post on the Spellbinders blog the following day. Winner is responsible for shipping cost, duties and taxes.

2. You can also win a $25 gift certificate to the Spellbinders shop right here on my blog! To be eligible please leave a comment on this post by Sunday, April 22nd 11:59 pm EDT. Easy peasy! I will announce the winner in this blog post shortly after the giveaway closes. The winner is responsible for shipping cost, duties and taxes, if applicable.

--------------------------------------------------------------------
GIVEAWAY NOW CLOSED!

Winner is Marie Siler - Please check my answer to your comment!

Thanks so much everyone for all your kind comments! X
--------------------------------------------------------------------

Your next stop is the wonderful Elena Salo. You can find the full blog hop list below:
Thanks for stopping by today! Happy hopping!
Have a wonderful day!

X

Tuesday, April 10, 2018

Love you to the moon and back - DT layout for Just Nick

Hey there friends,

I'm stopping by to share my latest creation for Just Nick!

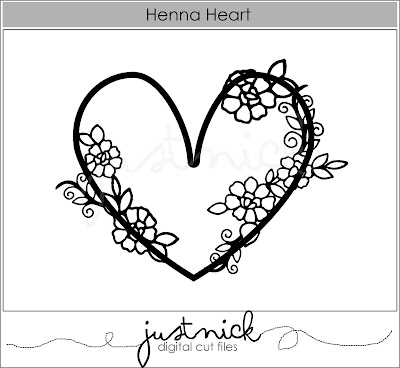
This week we have free reign on which cut files we use and I chose one I've used many times but can't get tired of: the Henna Heart. I've used the adorable Little You collection from Crate Paper on this layout.


I cut the cut file from textured white card stock, then backed the flowers with yellow card stock, the leaves with different patterned papers. I layered some tissue papers behind my photo and adhered it onto the patterned paper I chose for my background. I added some paper strips at the top and at the bottom and used my sewing machine to add some texture to these.


I kept embellishing to a minimum: I used some enamel dots and wooden buttons for my flower centers and attached some stickers here and there.


For the title I went with a generic chipboard sticker because the photo is generic too, no special event or anything, it just captures my son's favourite position to sleep in. Finally I added an adorable paper clip to my photo, wrote my journaling and splattered some black ink all around my page. That's it!


I hope you like how it turned out!

Thanks for stopping by today and have an awesome week friends!

X


Friday, February 9, 2018

The Greatest Love of All - DT layout for Just Nick

Hello scrappy friends,

Today I have a new layout to share that I created for Just Nick. 

This week we are focusing on LOVE, so I've picked the Free Love cut file. I've used this as part of my title - the rest of the title was created using the Outline Alpha cut file.


When I think of love, the very first person that comes to my mind is my son, of course. I've come across this photo of him recently, as a tiny baby lying on his daddy's back. I thought this would be perfect for today's layout. Also, I haven't used the super cute Crate Paper Little You collection in ages so I was happy to bust it out!

First I created my title - I made LOVE the biggest so it remains the focus, plus I knew I wanted to place my photo behind the O. I welded all letters in every word to make my life easier ha! Then I backed each word with different patterned papers. I have a ton of papers left from this collection but unfortunately not many different ones and I'm missing the ones that have a bit of yellow in them. I didn't want my layout to be only blue so I decided to use yellow card stock behind my title. On the left I have my fave paper and on the right a simple blue-white striped paper that is actually not even from this collection.


I adhered the title to the background with the help of foam adhesive. Once done, I started embellishing. There's so many cute embellishments in this collection! I added a few chipboard pieces, stickers, a sweet little lion clip and scattered some enamel dots around the page. 


To finish off the layout I added my journaling and some black paint spatters. I could not stamp the date because I don't find it anywhere in the photo properties. Around the time Maxim was 4 my boyfriend did something on our computer, copied the photos from one place to the other or something like that, and all photos from before that time have the same date stamp on them. This still makes me so mad! Sure, in some cases I can figure out the year and the month, but in this case, I have no idea. Of course this is not the end of the world, but you know...just really sad that I don't know how old my kiddo is in some pictures. If any of you knows a solution to this problem, I'm all ears! 


That's it for today! Hope you like the layout!
Thanks for stopping by and have a great day!
X


Monday, January 29, 2018

Capture - DT layout for Just Nick

Hi there friends,

I'm back today with a new layout for Just Nick!
I've picked a cut file I've worked with several times before, but I just love it so much: the Lotus Lace.


Here's my finished layout:


There's really no reason why I picked this cut file and used this collection, other than I love them and I felt like it at the time! I haven't used Maggie Holmes Gather in a long time and I try to bust out older collections for my Just Nick projects. The blues and yellows in this collection are just my favorite! So I can't wait to get my hands on the blue papers in Maggie's new line!


I backed each flower the same way, because it's a busy background anyway. For background I chose a paper with blue pattern too to tone it all down a notch.


Since I had spent quite some time on the background, I was not going to cover it all up with photos and embellies! I just created one cluster and kept everything there, photos, title, journaling, embellishments.


I added a few layers of patterned papers, tags, tissue paper behind my photos to help them stand out from the background. I then went through my embellishments and checked what fits. I might have used some from other Maggie Holmes collections too, because I don't have much left of Gather.


I picked out some chipboards, buttons, die cut pieces and arranged them around my photos. The journaling I wrote on a label sticker, I think this is from Chasing Dreams.


To finish off my page, I added some enamel dots and stamped my date!

That's it for today folks! Hope you like how this turned out!

XOXO


Friday, January 26, 2018

Valentine's slider cards with free cut file! - DT project for Scrapbook Werkstatt

Hey friends,

I thought I'd drop in to share a quick tutorial with you on how I made these slider cards! Unfortunately without step by step photos because I had no time to make any new cards for this purpose. I hope you'll understand it anyway! Just let me know, and please also let me know if you have trouble downloading the cut file - I am a bit challenged when it comes to technology!

First, some examples that I created for Scrapbook Werkstatt, using the wonderful February kit.


Click HERE to (hopefully) download the free cut file :).

Sooo, here's a screenshot of the different parts you'll find in this Studio file:


These are sized to what you see on my finished cards. Of course you can size them however you want, just always remember to mark all pieces when you scale them up or down, so you keep the same ratio!

WHAT YOU NEED:
  • 1 card base (I made 5 different ones, with different windows for you to choose from)
  • 2 U pieces, which I call channels but I don't really know what they are called ;P
  • 1 slider
  • 2 tabs for the slider (not necessary!)
The scallop circle is just an extra piece if you want to change up your circle window a bit, like I did on one of the cards above.

If you like, cut all pieces you need from a piece of card stock, just to test how it all comes together, then you can decide what patterned paper you want to use for which piece - if you like patterned paper like I do!

HOW- TO:
So, it's actually very simple. Start by adhering the two U pieces together, so you have one thicker U piece. Then adhere this piece inside your card base, in a way that the legs of the U face the middle cut in the card base, if that makes sense? Then place the slider piece in the middle, close your card and pull the slider through the middle cut. Then glue the front and back of the card together, with the slider in between the U piece. Gosh it's so hard to describe these simple steps! I hope you understand, once you have the pieces in your hands!

Now this is only to describe how all pieces work together, but if you want to decorate the single pieces, you need to do that before assembling the card! 

For instance, the first, color changing slider card is put together as follows: I adhered a piece of patterned paper from the Crate Paper Main Squeeze collection to the inside of the card base, in between the channel. Just close the card base to see what peaks through the window to adhere it in the right place! I then took a piece of acetate and an embossing pen and drew around the cute image.  Then I embossed it with black embossing powder. I hate to emboss acetate, no matter what type I try, even ones for embossing, I have warping and I can't stand it! That is why I only made one card like this hehe! I then used my ATG to glue this behind the window. You could also add some machine stitching if you like! Now you can place the slider piece inside the card base - this will hide your image. Then glue your card base together and once you pull the slider out, it will reveal the color piece behind it. MAGIC :).

The other three cards I just decorated with patterned papers, stamps, embossing and embellishments, no acetate window, whatsoever.

I hope you'll give these a try! I hope the tutorial makes sense, at least once you have the pieces cut out! Don't be overwhelmed by all this text, I simply talk too much! Just cut the pieces and you'll see it all comes together easily!

If you create something with this cut file and share it, please link back to this blog post - I'd appreciate it X. Also, tag me in your post on Instagram so I can leave you some love!

Most of all: HAVE FUN!

XXX


Friday, January 5, 2018

Sweet - DT layout for Just Nick

Hi there friends,

I'm back today with a new layout for Just Nick! I'm happy to be doing layouts because I've been working on some other projects for awhile and was missing layouts!

I've used the beautiful Henna Heart cut file on this one. I was thinking Valentine's day is coming soon so a heart layout would be a good choice. I adore this cut file! I love the non-traditional heart shape and all the flowers!


I used a mixture of Maggie Holmes' Gather and Chasing dreams collection with a bit of My Mind's Eye On Trend 2.


I started out by designing my layout in Silhouette Studio, then cut my partial hearts from textured white card stock.


I chose some patterned papers that I thought had looked good together and started backing my cut files. I adhered them to the background, except for the bottom one. There I tuck my photo behind the heart first, put 3d foam adhesive on the left side of the heart and then I glued it all down. I also layered some tags, die cuts and tissue paper behind the photo.


Once done, I went through all the embellies in these collections and picked out the ones I thought were a good fit: stickers, chipboards, tags, buttons and diecuts! The beautiful gold mirrored piece I used for my title is from My Mind's Eye. I wrote my journaling on one of the die cuts and stamped the date using a roller stamp.


I hope you like today's inspiration.
Thank you for stopping by!

Till next time,

X