Showing posts with label Just Nick. Show all posts

Thursday, June 21, 2018

Adventure - Saying Goodbye to the Just Nick Design Team

Hey there crafty friends,

Today's post is bittersweet for me. I am posting my last layout for the Just Nick Design Team...The year went by so fast, I can't believe it. I guess it's true that the older we get, the faster time flies by. It's been a pleasure to be on this team and I want to thank Nicole for having me! I'm sure our paths will cross somewhere sometime! THANK YOU!

For today's layout I chose the wonderful Compressed Chevron cut file. I'm not sure if I've used this one before to be honest, but I don't think so.


I also looked for a collection that I haven't used in ages, Shimelle's Little by Little. This is my most favorite collection from her to date and I barely used it so it was time!


When I took out the collection, I found this photo and all the fussy cut hearts - then I remembered I was planning to make this layout last year but had no time to finish it, then I completely forgot about it. Well I'm happy it's finally finished!

I took a photo where I have not cropped off the top of the layout so you can see how the balloons hang off the page!


Another funny thing is, there actually is a beautiful chevron patterned paper in the collection! Had I known, I would have sized the cut file in a way the patterned paper fits! Would have been a lot quicker! Instead, I backed the chevrons with different patterned papers, going from yellows through pinks and greens to navy.


I adhered the cut file to the background paper as well as the photo on it. I then started arranging the hearts above the photo and once I was happy with how they looked, I glued them down, then machine stitched over them.


I went through my embellishment stash and pulled out a few that fit the colors of my layout, stickers, puffy stickers, buttons, flair button, clips and more.


Last but not least I added my title, a short journaling and date! Done!


I hope you like this layout as much as I do! This photo makes me smile, balloons and colors make me smile...

Thanks for stopping by today! Have a wonderful day!

X


Wednesday, June 6, 2018

Ready, set, go time - DT layout for Just Nick

Hi there crafty friends,

I'm back today with a new layout I've created for Just Nick!

This time I've used the Starburst cut file. I wanted to use the super cool Crate Paper Cool Kid collection which I haven't used in ages, so I needed a cut file that's good for boys, so stars it is! Although let me tell you, the other day I was shopping for clothes for my son and when I showed him a pullover I bought, mint with a big navy star on the front, he said his classmates told him stars were for girls. I'm like what the what?! Mom knows better haha! Anyway, back on topic...


I cut the cut file from white card stock and backed the open stars with different patterned papers. Now, I don't like to work with a lot of white on my cut files so the full white stars had to go ha! I hand cut some stars from patterned papers, in varying sizes and layered them up. I stitched them down in the middle and folded them up to give them some dimension. Next, I glued them down on the white stars.


Originally I wanted to go with a yellow background but then I didn't like it, so I added some woodgrain paper and a black strip in the middle for accent. I layered some tags, scraps and tissue paper behind my photos and stuck them down. I added a chipboard frame to one and a star clip to the other one. I also attached the "dude" chipboard to both photos and a die cut on the right.


I added foam adhesive to the back of the cut file and adhered it to the background. I picked out some puffy sticker stars from the collection and glued down those too as well as a rubber charm. Finally I added the stars banner chipboard piece. I'm happy I could finally use this, I generally never find the right spot for these banner type embellishments for some reason.


Last but not least, I arranged the puffy sticker title in a bit of a crooked way and glued it down. 


I wrote my journaling and stamped the date and the layout was done. I love this Crate Paper collection, for boys it's one of my favourites. I wish they came out with more like this and my other fave, Little You!


I hope you like how this layout turned out and I could inspire you in some small way!

Thanks for stopping by today!
Have an awesome day!

X


Wednesday, May 30, 2018

Peace - DT layout for Just Nick

Hi there friends,

I'm back today with another post, this time for the Just Nick Design Team.

I've used an older cut file again that I haven't used in ages! The Rosette Background is so fun! It's so versatile too. Having said that, I didn't do anything special with it this time :).


I chose the beautiful Be You collection by Pinkfresh Studio for today's layout. I cut the cut file from a navy patterned paper as an exception - I mostly use white cut files. I then backed the rosettes with various patterned papers from the collection.


I adhered the cut file to the patterned paper I chose for background and played around with photo placement a little bit. Once I settled on one I liked, I layered some tissue paper behind the photo and glued it down. I then pulled out all embellies from this collection and selected the ones I felt fit well.


I tucked in a bunch of die cut and chipboard leaves here and there, I love the rose gold foiling in this collection! I added a few ephemera pieces, wooden buttons, a bow, banners, chipboards...There's so many gorgeous embellishments with Pinkfresh Studio collections!


I used the rose gold puffy alphas from this collection for my title. I don't know about you but I dislike working with puffy stickers. I love them but they simply dont stick well and I'm yet to find an adhesive that doesn't peel off their backs ones it dries. I prefer things that stay put. Which is why I placed the alphas on a fabric die cut and stitched over them with my sewing machine. This way at least I'm sure they don't go anywhere ha!


Aaand my fave die cut piece had to go on this layout too! I love this little bird, so adorable right?!


That's it from me for today! I hope you like this layout!

Thank you so much for stopping by! Have a great day!

X

Monday, May 7, 2018

Cheers - DT layout for Just Nick

Hi there friends,

I hope your iNSD weekend was awesome and you got a lot of crafty time in!

I'm back today with a new layout for Just Nick! This week we are celebrating mothers so I picked a photo of my mom (and sister). I've used the beautiful In Bloom cut file and the Maggie Holmes Flourish collection.


I cut several flowers in various sizes from white textured card stock. I then backed them with patterned papers, some of the leaves I just left as they were. I layered some tissue paper behind my photo and glued it down on my background paper.


I arranged the flowers in a circle to create a wreath, which is probably my most favorite design concept. I adhered these to the background. For some of them I used foam adhesive in order to create a more dimensional look.


I placed my title on the photo and glued it down. Then I scattered a few embellishments around the wreath: stickers, die cut butterflies and buttons. I also wrote my journaling on one of the flowers. 


That's it guys! 

I hope you like how it turned out!

Thanks for stopping by and have a wonderful week!

X


Monday, April 23, 2018

Dreamer

Hey there crafty friends,

Today I'm back with a new layout I've created for the Just Nick Design Team.

This week we are focusing backgrounds and I've picked a gorgeous one that I don't think I've used before. Not that I can remember anyway! It's called Crazy Daisy background 2 and you can buy it here


I went with the beautiful Let Your Heart Decide collection from Pinkfresh Studio on this layout. I cut the cut file from white textured card stock and backed each flower the same way, using a different patterned paper for each petal.


I then adhered this onto the background paper I chose. Guys, I generally don't like red. Sure, I love red lipstick, red pumps and purses, accessories etc, but when it comes to paper crafting for instance, it's the last thing I would pick. Unless it's in a rainbow. But this paper is so awesome, it has a texture printed on it, almost like a knit. Then I love the gradient look from dark to light. Plus I just liked the way the cut file looked on it. Hence, red background paper!


When I use a full background cut file that I back with patterned paper, I usually don't embellish much. I created a cluster with the photo: I added some tissue paper behind the photo, a die cut frame on top as well as some other die cuts on two sides. 


For my title I also used a die cut from the ephemera pack which I popped up using foam adhesive.


I wrote my journaling on a sticker and created a small cluster at the right bottom. Then done! I don't like to cover up backgrounds like this, I spend way too much time on backing it for that!


I hope you like today's inspiration and give this look a try!

Thanks so much for stopping by and I wish you a fabulous week!

X


Tuesday, April 10, 2018

Love you to the moon and back - DT layout for Just Nick

Hey there friends,

I'm stopping by to share my latest creation for Just Nick!

This week we have free reign on which cut files we use and I chose one I've used many times but can't get tired of: the Henna Heart. I've used the adorable Little You collection from Crate Paper on this layout.


I cut the cut file from textured white card stock, then backed the flowers with yellow card stock, the leaves with different patterned papers. I layered some tissue papers behind my photo and adhered it onto the patterned paper I chose for my background. I added some paper strips at the top and at the bottom and used my sewing machine to add some texture to these.


I kept embellishing to a minimum: I used some enamel dots and wooden buttons for my flower centers and attached some stickers here and there.


For the title I went with a generic chipboard sticker because the photo is generic too, no special event or anything, it just captures my son's favourite position to sleep in. Finally I added an adorable paper clip to my photo, wrote my journaling and splattered some black ink all around my page. That's it!


I hope you like how it turned out!

Thanks for stopping by today and have an awesome week friends!

X


Tuesday, March 27, 2018

Harvest - DT layout for Just Nick

Hi there crafty friends,

I'm back with you today sharing my latest layout I've created for Just Nick!

This week our theme is flowers, the easiest theme of all! Nicole creates the most wonderful floral cut files!

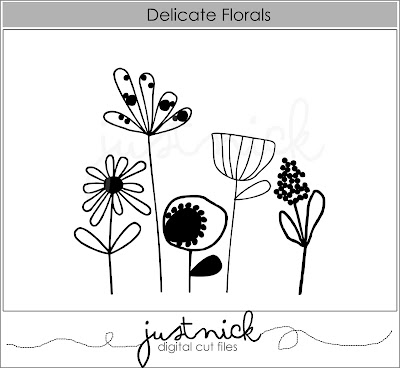
Another cut file I've wanted to use in ages was the Delicate Florals. I was just never quite sure what to do with it. Recently however I made another layout using similar cut files and now finally I felt inspired to use these gorgeous flowers!


I haven't had the chance to work with the new Pinkfresh Studio collections so I picked one of them for today's layout, the Let Your Heart Decide line. I think this is my favourite of the 3, although it's hard to decide! But the colors and flowers make my heart beat faster haha!


I cut the cut files from textured white card stock and I cut two of each flower. I then backed them with patterned papers. Each pair I backed with the same papers.


I chose a beautiful blue patterned paper for my background and adhered the flowers at the bottom - I kind of layered the same flowers on top of each other, if that makes sense. 


I added some tissue paper behind my photo, then tucked it behind one of the flowers and glued it down. I embellished around the photo using some labels, leatherette stickers and card stock stickers. I picked a different color for each of my letters in the title and arranged them in kind of a crooked way so that the layout is more fun.


Down at the bottom I also embellished a little with wood veneer stickers, die cuts and some fussy cut flowers.


To finish off my page, I stamped the date and wrote my journaling.

That's it for today lovelies!
Hope you like how this layout turned out!

Thanks for stopping by and have and awesome day!

X


Thursday, March 8, 2018

Sleep - DT layout for Just Nick

Hi there friends,

I'm dropping in to share a new layout I've created for Just Nick!

I've used the Optical Illusion Background cut file on this page.


I haven't really created a typical boy page in ages and while I don't particularly miss them, sometimes I want to use collections I haven't used in awhile. And the super cool Good Fellows collection from Fancy Pants Designs was one of these. Plus I wanted to use a cut file that was not floral.


I started out by manipulating the cut file in Silhouette Studio - I took it apart and repeated the pattern to get smaller and more cubes. I cut the cut file from white, textured card stock. I chose three papers from the Good Fellows collection and backed a few of the cubes the exact same way. There's so many ways you could go with this cut file! It doesn't even need to be cubes, you could back it totally differently playing with different color and pattern papers. Can you see flowers in there?!


Once done, I adhered the cut file to my background. I layered different papers behind my photo and glued everything down. Then I went through my embellishments and pulled out everything that could have worked and started tucking them in and adding them on top of my photo. I used tags, die cuts, and puffy stickers to decorate my page.


For the title I used chipboard alphas from the Fancy Pants Family&Co collection. I didn't have two E's in the same color so I replaced one with a 3. 


I also adhered two strips of patterned papers at the bottom of the layout as well as some die cuts and puffy stickers, then added some machine stitching as a finishing touch. 


As a last step, I splattered some black ink around my page and wrote my journaling.

I hope you like how this turned out! 
Thanks for stopping by and have a wonderful day!

X