Showing posts with label Maggie Holmes. Show all posts

Thursday, June 7, 2018

Spellbinders Exclusive Indie Collection - Part 3

Hi there crafty friends,

I'm stopping by today with the third and last blog post in my Exclusive Indie collection inspiration series. If you missed my previous two posts, you can check them here and here.

If you read my other posts you know that I love the layering dies in this collection :). Surprise surprise, I picked layering dies for today's projects as well! I can't help myself!

Here are the two cards I made for this post:


The patterned papers I used are from the Maggie Holmes Chasing Dreams collection. This is still one of my favorites from her to date. I just love the colors!

For my first card I picked the gorgeous Shapeabilities Layered Rose Etched Dies. I die cut two roses, one from pink patterned papers, the other from yellows. For the yellow I also used some textured card stock because I didn't have different patterned papers for 3 layers. I die cut 3 pairs of leaves as well.


I layered them up and glued them together. Note that I only glued each layer down in the middle, never on the sides. I do this because this way I get some dimension. I am not going for a realistic look on my projects to be honest. I love dimension and texture, and this is one way to achieve the look I like. I added some patterned papers to my A2 size top folding card base and started adhering my design elements on the panel. I used foam adhesive for the flowers and tucked the leaves behind them. I placed some yellow enamel dots here and there. I cut apart the "you a happy birthday" sentiment stamp from the Wishing Expressions Stamp and Die Set so that I only had "happy birthday" left because I only wanted to add a thin paper strip to my card. I heat embossed the sentiment on yellow card stock and glued it on the card front. Done!


On my second card I used the lovely Shapeabilities Layered Foliage Etched Dies . I die cut 3 of them from various patterned papers and assembled the layers. I created another A2 size top folding card base (which is what I go for in 98% of the cases) and added some patterned paper strips.


I die cut "Wishing" from the Wishing Expressions Stamp and Die Set 4 times as before, once from patterned paper, 3 times from white card stock. I glued them together to create a nice, dimensional word. Before adhering this to the card front, I stamped the rest of the sentiment directly on the patterned paper using black ink. I then figured out where to place the die cut word and before gluing it down, I adhered the leaves to the card. I only attached the die cut word in the middle, so that the leaves can hide behind it. Surely, one could glue it all down, I just prefer a more dimensional look. I added some black enamel dots and done! Don't enamel dots just look good on pretty much anything?!


I hope you liked this series as much as I loved creating these cards! I also hope you found some inspiration in there somewhere!

Thanks so much for joining me - I may or may not be back soon with another series! Check this space!

Have a wonderful day!

X

Spellbinders supplies:
  • SDS-157 Wishing Expressions Stamp and Die Set - Exclusive
  • S4-921 Shapeabilities Layered Rose Etched Dies
  • S5-361 Shapeabilities Layered Foliage Etched Dies - Exclusive
Other supplies:

  • patterned paper and embellishments - Maggie Holmes
  • enamel dots
  • white heavy weight card stock for card base
  • color card stock - American Crafts
  • diecutting machine
  • trimmer
  • liquid adhesive, double sided adhesive, foam adhesive

Monday, May 7, 2018

Cheers - DT layout for Just Nick

Hi there friends,

I hope your iNSD weekend was awesome and you got a lot of crafty time in!

I'm back today with a new layout for Just Nick! This week we are celebrating mothers so I picked a photo of my mom (and sister). I've used the beautiful In Bloom cut file and the Maggie Holmes Flourish collection.


I cut several flowers in various sizes from white textured card stock. I then backed them with patterned papers, some of the leaves I just left as they were. I layered some tissue paper behind my photo and glued it down on my background paper.


I arranged the flowers in a circle to create a wreath, which is probably my most favorite design concept. I adhered these to the background. For some of them I used foam adhesive in order to create a more dimensional look.


I placed my title on the photo and glued it down. Then I scattered a few embellishments around the wreath: stickers, die cut butterflies and buttons. I also wrote my journaling on one of the flowers. 


That's it guys! 

I hope you like how it turned out!

Thanks for stopping by and have a wonderful week!

X


Wednesday, April 18, 2018

Spellbinders blog hop featuring Sharon Sowell, Marisa Job, Stacey Caron and Lene Lok


Hi there crafty friends,

Today I'm joining the Spellbinders blog hop showcasing the following four collections:


You should have arrived here from the super talented Rubeena's blog!

To create today's card I used a wonderful floral die from the Blooming Garden collection by Marisa Job. I die cut the shape twice, once from patterned paper and a second time from white card stock. I created an A2 size card base from white heavy weight card stock and adhered an A2 size striped patterned paper panel on the front.


I then glued down the patterned paper die cut using liquid glue. Now, I prefer dimension on my cards so I added foam dots to the negative shapes in the flowers I cut from white card stock. I adhered these down. I fussy cut some black and white leaves from a patterned paper and attached them around the flowers. For my sentiment I used a die cut circle. To finish off my card I added some Nuvo Jewel Drops. 


I don't like to waste anything, so I thought I'd use at least a part of the white die cut shape too. I fussy cut out one of the flowers and glued it onto the flap of a black envelope. I also added in the negative shapes I had left from the patterned paper die cut. Done! I hope you like how it turned out!


SUPPLIES:


Now for the fun part! Giveaway yay! There's two chances for you to win, here's how:

1. To celebrate this release, Spellbinders is giving away a $50 gift certificate to a lucky winner. Please leave a comment on the Spellbinders blog by Sunday, April 22nd 11:59 pm EDT for a chance to win. The winner will be announced in the blog hop post on the Spellbinders blog the following day. Winner is responsible for shipping cost, duties and taxes.

2. You can also win a $25 gift certificate to the Spellbinders shop right here on my blog! To be eligible please leave a comment on this post by Sunday, April 22nd 11:59 pm EDT. Easy peasy! I will announce the winner in this blog post shortly after the giveaway closes. The winner is responsible for shipping cost, duties and taxes, if applicable.

--------------------------------------------------------------------
GIVEAWAY NOW CLOSED!

Winner is Marie Siler - Please check my answer to your comment!

Thanks so much everyone for all your kind comments! X
--------------------------------------------------------------------

Your next stop is the wonderful Elena Salo. You can find the full blog hop list below:
Thanks for stopping by today! Happy hopping!
Have a wonderful day!

X

Thursday, March 15, 2018

In the spotlight: Spellbinders / Sharyn Sowell Flower Garden collection, Part 2

Hello there,

I'm back today, sharing my second of three blog posts showcasing cards I've created with various die sets from the Sharyn Sowell Flower Garden collection for Spellbinders! If you've missed my first post, you can find it here.

I love all colors. If you follow me on Instagram you know that I don't like white space. Well, actually that is not entirely true. I love white on white on cards, but generally I will go with colors. For today's cards I went with one of my favorite colors, cobalt blue. I call this cobalt blue but I might be totally off, anyway, this shade is my absolute favourite. The last couple of Maggie Holmes collections have it so I purchased plenty, because who knows how long it will be available, ha!

On my first card I've used the Shapeabilities Botanical Dragonfly Etched Dies. I die cut all pieces, plus two of each wing. I then embossed all these with the most gorgeous embossing powder I've ever owned! Unfortunately my photos don't do it justice, but it's full of glitter and sparkle! I actually did this because for two of the wings one has to use the backside of the die cut and I haven't figured out yet how to keep that side tidy and nice. Mine always looks horrible from the cut lines in the plate.


I've used an A2 top folding card base and adhered the same size floral patterned paper on it. I also layered a piece of white and a piece of white-gold floral paper on top. I assembled the dragonfly - I've used liquid glue for this. Then I added a piece of foam adhesive around the middle of its body and placed it on my card.

Next, I die cut a small white flower using dies from the Shapeabilities Bird on Cherry Branch set and some leaves from the Shapeabilities Dimensional Floral Panel set and adhered these onto my dragonfly. For the flower center I just added some Nuvo drops. To finish off my card, I attached a sentiment and a piece of gold decorative ribbon. 


My second card is very simple. I glued a piece of patterned paper panel (as well as a thin strip of coral paper for contrast) onto an A2 top folding card base. I die cut three roses and some leaves from the Shapeabilities Corner Floral die set. 


I first adhered the leaves to the roses and cut off the ends so they are not visible. Then I layered all three roses on top of each other and glued them together with some liquid glue. I created a little nest  for my roses to sit on, using gold metallic thread and glued everything down.


For the sentiment I've used the "Love" die from the Shapeabilities Rose Bird Topiary die set. I die cut it 3 times from a coral patterned paper, glued them together to have a dimensional piece, then adhered it to my card base.


Last but not least I added some Nuvo drops here and there and used some twine to create a bow at the top of the card.

That's it for today! I hope you like these cards and I could inspire you to go to your desk and create!

Spellbinders supplies:
  • S2-284 Shapeabilities Corner Floral Etched Dies, Flower Garden by Sharyn Sowell
  • S2-285 Shapeabilities Bird on Cherry Branch Etched Dies, Flower Garden by Sharyn Sowell
  • S2-287 Shapeabilities Botanical Dragonfly Etched Dies, Flower Garden by Sharyn Sowell
  • S4-846 Shapeabilities Rose Bird Topiary Etched Dies, Flower Garden by Sharyn Sowell
  • S4-851 Shapeabilities Dimensional Floral Panel Etched Dies, Flower Garden by Sharyn Sowell
Other supplies:
  • Patterned papers: Maggie Holmes - Flourish, Cocoa Vanilla Studio - More Than Words
  • Neenah solar white card stock 80LB
  • Tonic Studios Nuvo drops
  • WOW embossing glitter - Midnight Dream
  • gold sewing thread, twine
  • die cutting machine

I will be back with a final post soon to conclude this series. I hope you'll join me then too!

Have a wonderful day!

X
Zsoka


Monday, January 29, 2018

Capture - DT layout for Just Nick

Hi there friends,

I'm back today with a new layout for Just Nick!
I've picked a cut file I've worked with several times before, but I just love it so much: the Lotus Lace.


Here's my finished layout:


There's really no reason why I picked this cut file and used this collection, other than I love them and I felt like it at the time! I haven't used Maggie Holmes Gather in a long time and I try to bust out older collections for my Just Nick projects. The blues and yellows in this collection are just my favorite! So I can't wait to get my hands on the blue papers in Maggie's new line!


I backed each flower the same way, because it's a busy background anyway. For background I chose a paper with blue pattern too to tone it all down a notch.


Since I had spent quite some time on the background, I was not going to cover it all up with photos and embellies! I just created one cluster and kept everything there, photos, title, journaling, embellishments.


I added a few layers of patterned papers, tags, tissue paper behind my photos to help them stand out from the background. I then went through my embellishments and checked what fits. I might have used some from other Maggie Holmes collections too, because I don't have much left of Gather.


I picked out some chipboards, buttons, die cut pieces and arranged them around my photos. The journaling I wrote on a label sticker, I think this is from Chasing Dreams.


To finish off my page, I added some enamel dots and stamped my date!

That's it for today folks! Hope you like how this turned out!

XOXO


Friday, January 5, 2018

Sweet - DT layout for Just Nick

Hi there friends,

I'm back today with a new layout for Just Nick! I'm happy to be doing layouts because I've been working on some other projects for awhile and was missing layouts!

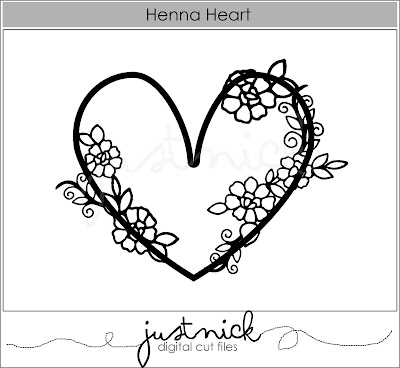
I've used the beautiful Henna Heart cut file on this one. I was thinking Valentine's day is coming soon so a heart layout would be a good choice. I adore this cut file! I love the non-traditional heart shape and all the flowers!


I used a mixture of Maggie Holmes' Gather and Chasing dreams collection with a bit of My Mind's Eye On Trend 2.


I started out by designing my layout in Silhouette Studio, then cut my partial hearts from textured white card stock.


I chose some patterned papers that I thought had looked good together and started backing my cut files. I adhered them to the background, except for the bottom one. There I tuck my photo behind the heart first, put 3d foam adhesive on the left side of the heart and then I glued it all down. I also layered some tags, die cuts and tissue paper behind the photo.


Once done, I went through all the embellies in these collections and picked out the ones I thought were a good fit: stickers, chipboards, tags, buttons and diecuts! The beautiful gold mirrored piece I used for my title is from My Mind's Eye. I wrote my journaling on one of the die cuts and stamped the date using a roller stamp.


I hope you like today's inspiration.
Thank you for stopping by!

Till next time,

X


Friday, November 24, 2017

Thankful - DT cards for Just Nick

Hi there friends,

This week we are focusing on Thanksgiving at Just Nick! Since we do not celebrate it here in Europe, I thought I could create a bunch of Thank You cards instead of a layout! These always come in handy anyway right?

I selected a few cut files with this theme as well as some florals and butterflies, because well, I love them...When I was little my parents' botanist friend thought I'd become one too (botanist that is), I was so interested in flowers. I even got a book from her called Zsofi's garden - it was the most similar name to mine that she could find :). At some point I did want to become a florist, but in the end that did not happen.

The cut files I chose for my cards are the following:


I cut out all shapes from textured white card stock. On my first card I backed the oval wreath with some patterned paper from the Maggie Holmes Chasing Dreams collection (all supplies I used for these cards are from this collection). I then added some foam to the back so it pops off the card. I created a 4x6" card base with two different patterned papers, then glued the wreath on top. I added Grateful and completed my sentiment with For you using the gold puffy alpha stickers. I fussy cut two butterflies from one of the papers and glued them down on top of the wreath. I also used a third butterfly; this one is a chipboard piece.


I created another 4x6" card base using patterned papers. I backed a few of the flowers from the Floral and Fauna cut file set. Some I didn't back. I layered these on top of each other randomly, to give my card an airy feel. I glued Thanks in the middle of my card and completed the sentiment using stickers. As a finishing touch I added a few enamel dots. 


My third card design is also on a 4x6" base. I cut part of the Delicate butterflies cut file and backed these with patterned paper. I glued Thankful at the bottom and hand stitched around the letters to give them more definition and texture. I added two stickers to finish off my card.


That's it for today! I hope you like my cards!

Thanks so much for stopping by!

X