Showing posts with label Cocoa Vanilla Studio. Show all posts

Wednesday, April 18, 2018

Spellbinders blog hop featuring Sharon Sowell, Marisa Job, Stacey Caron and Lene Lok


Hi there crafty friends,

Today I'm joining the Spellbinders blog hop showcasing the following four collections:


You should have arrived here from the super talented Rubeena's blog!

To create today's card I used a wonderful floral die from the Blooming Garden collection by Marisa Job. I die cut the shape twice, once from patterned paper and a second time from white card stock. I created an A2 size card base from white heavy weight card stock and adhered an A2 size striped patterned paper panel on the front.


I then glued down the patterned paper die cut using liquid glue. Now, I prefer dimension on my cards so I added foam dots to the negative shapes in the flowers I cut from white card stock. I adhered these down. I fussy cut some black and white leaves from a patterned paper and attached them around the flowers. For my sentiment I used a die cut circle. To finish off my card I added some Nuvo Jewel Drops. 


I don't like to waste anything, so I thought I'd use at least a part of the white die cut shape too. I fussy cut out one of the flowers and glued it onto the flap of a black envelope. I also added in the negative shapes I had left from the patterned paper die cut. Done! I hope you like how it turned out!


SUPPLIES:


Now for the fun part! Giveaway yay! There's two chances for you to win, here's how:

1. To celebrate this release, Spellbinders is giving away a $50 gift certificate to a lucky winner. Please leave a comment on the Spellbinders blog by Sunday, April 22nd 11:59 pm EDT for a chance to win. The winner will be announced in the blog hop post on the Spellbinders blog the following day. Winner is responsible for shipping cost, duties and taxes.

2. You can also win a $25 gift certificate to the Spellbinders shop right here on my blog! To be eligible please leave a comment on this post by Sunday, April 22nd 11:59 pm EDT. Easy peasy! I will announce the winner in this blog post shortly after the giveaway closes. The winner is responsible for shipping cost, duties and taxes, if applicable.

--------------------------------------------------------------------
GIVEAWAY NOW CLOSED!

Winner is Marie Siler - Please check my answer to your comment!

Thanks so much everyone for all your kind comments! X
--------------------------------------------------------------------

Your next stop is the wonderful Elena Salo. You can find the full blog hop list below:
Thanks for stopping by today! Happy hopping!
Have a wonderful day!

X

Saturday, March 17, 2018

In the spotlight: Spellbinders / Sharyn Sowell Flower Garden collection, Part 3

Hi there crafty friends,

I'm dropping in today to share my third and final blog post using products from the Spellbinders / Sharyn Sowell Flower Garden collection. If you missed my previous posts, you can find them here and here.

I've really enjoyed working with these lovely products! I just love flowers above anything and because I only have a son, I can't go all girly on my scrapbook pages most of the time! So I love that with cards I can do whatever I want!

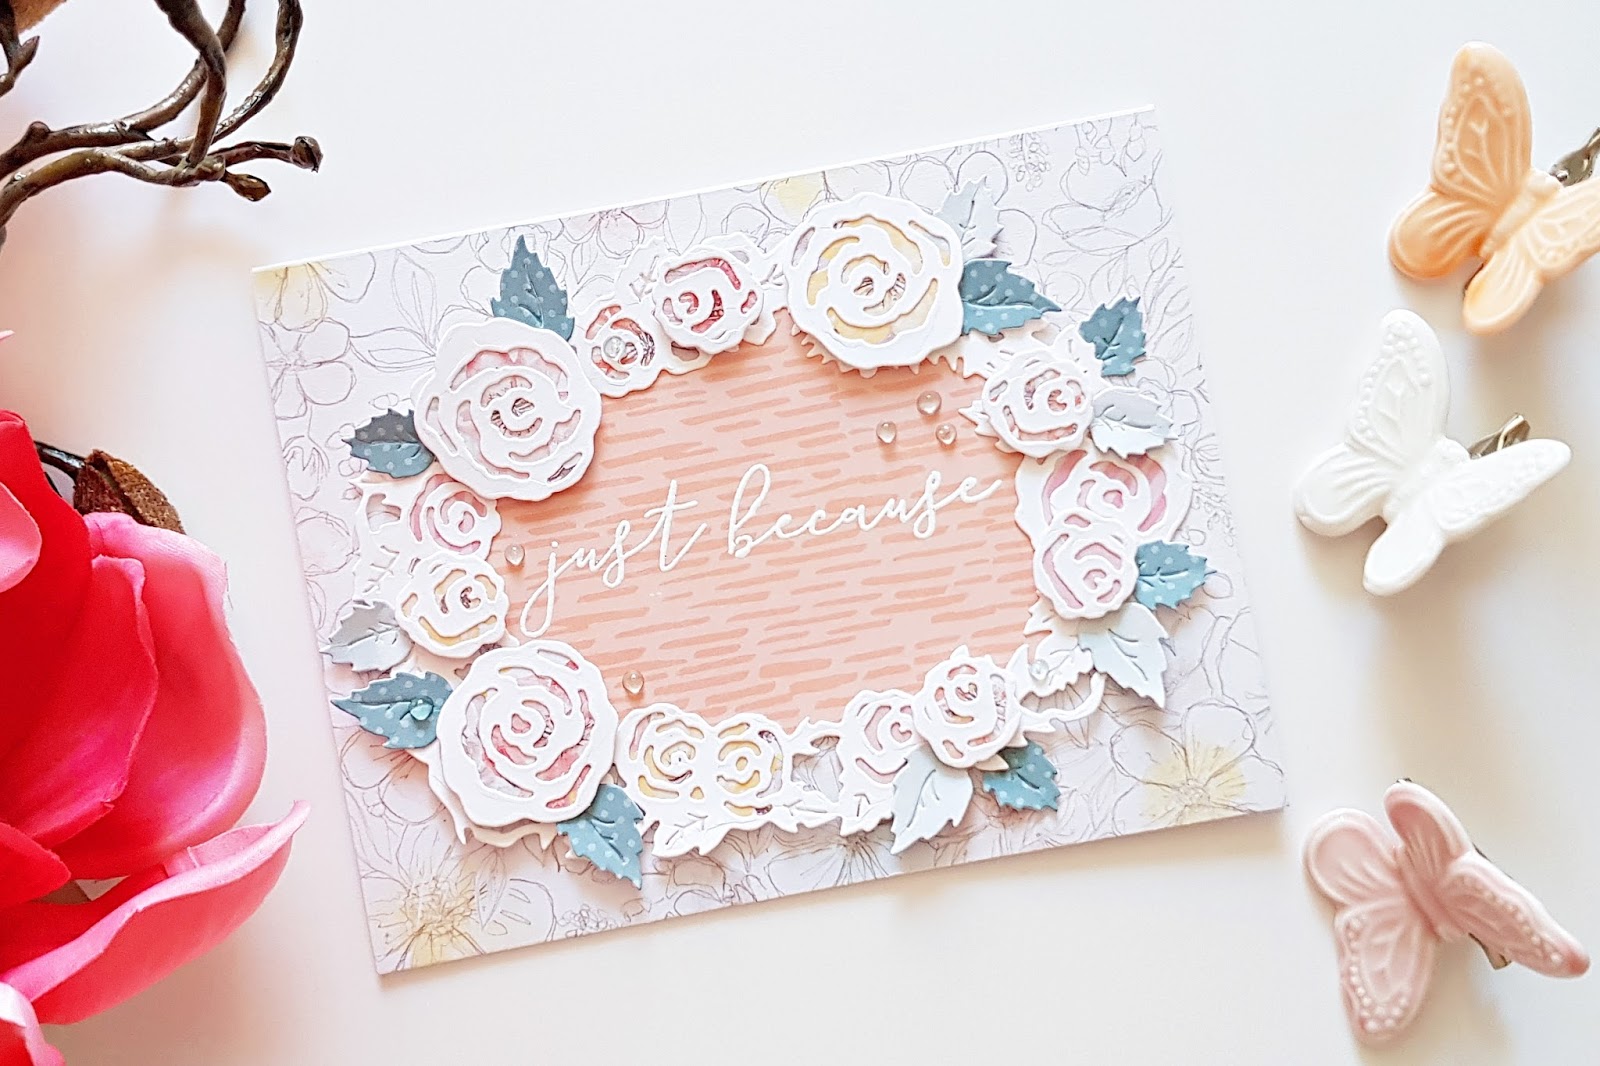
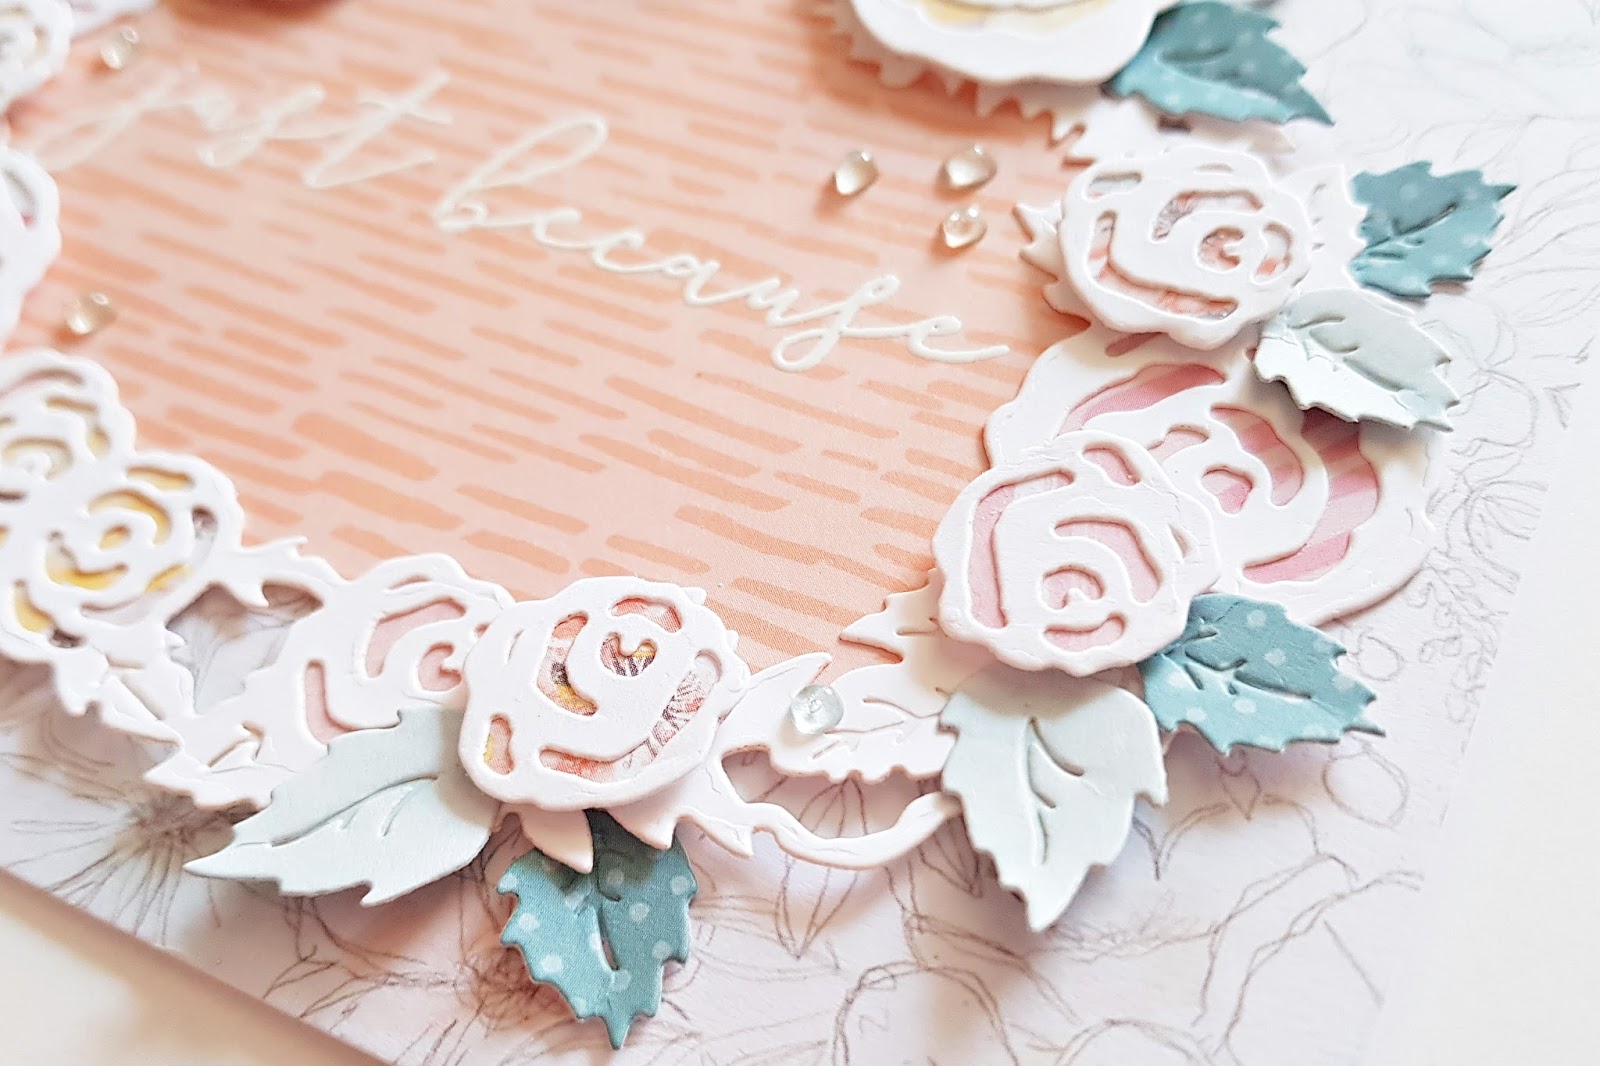
For my first card today I picked the gorgeous Shapeabilities Dimensional Floral Panel Etched Die. I was especially happy about this one, because wreaths are one of my favorite things to do on my scrapbook pages too! So I did exactly what I would do with digital cut files on my pages: I cut the design from white card stock, then backed the flowers with different patterned papers to give them colors. 


To add more dimension, I die cut some of the single roses and backed these with patterned papers too. Next, I prepared my card base: I adhered an A2 size patterned paper panel to my A2 size top folding card. I set it aside while I finished my rose wreath: I glued the wreath on a coral patterned paper and fussy cut it out. I embossed a sentiment in the middle using white embossing powder. 


I glued my wreath on the card base using a tape runner. I then started layering additional roses onto my wreath to achieve the design and dimension I like. I used pop dots for this. Next, I die cut several leaves from two different patterned papers and tucked these under the wreath and the roses in quite a few places. 


Last but not least, I added a few drops of glossy accents!

For my next card I also used an A2 top folding card base, to which I added a floral patterned paper panel. I also glued a light pink chipboard frame on this. 

The dies I've used here are from the Shapeabilities Butterfly Etched Die and the Shapeabilities Bird on Cherry Branch Etched Die sets. 


I die cut the butterfly from white card stock. I cut two wings but I only wanted one to show from above, if that makes sense. There's a little tab on the wings which go under the body of the butterfly - I glued the two tabs together and then folded the top up to give dimension to the butterfly. It's hard to describe what I mean, but you'll see in the close-ups. The body I cut from a raspberry card stock, then cut it in half and attached it to the wings. I glued on the antenna as well.


I then glued my butterfly onto the chipboard frame. At this point I felt like I was still missing something! Flowers, of course :). I die cut a few tiny flowers from a pink patterned paper, attached one to the butterfly and used another 3 to create a flower cluster at the right top of my frame. 


I die cut the little banner that is in the Shapeabilities Tiny Shadow Box Etched Die set, from pink patterned paper. I then embossed my sentiment on it, using white embossing powder. Recently I was looking for something in my ancient craft stash I never use (non-papercraft supplies I built up over 20+ years) and found a few different lace ribbons. These tiny things make me happy, you know, when you finally use something you spent money on at one point! So I cut a piece for my panel and glued my sentiment on top of this.


To finish off my card, I added a few Nuvo Jewel Drops.

 Spellbinders supplies:
  • S2-285 Shapeabilities Bird on Cherry Branch Etched Dies, Flower Garden by Sharyn Sowell
  • S2-286 Shapeabilities Botanical Butterfly Etched Dies, Flower Garden by Sharyn Sowell
  • S4-851 Shapeabilities Dimensional Floral Panel Etched Dies, Flower Garden by Sharyn Sowell
  • S5-339 Shapeabilities Tiny Shadow Box Etched Dies, Flower Garden by Sharyn Sowell
Other supplies:
  • Patterned papers, chipboard frame: Cocoa Vanilla Studio - More Than Words
  • Neenah solar white card stock 80LB
  • American crafts pink textured card stock
  • Tonic Studios Nuvo drops
  • Ranger Glossy Accents
  • WOW embossing powder
  • Pinkfresh Studio sentiment stamps
  • white lace ribbon
  • die cutting machine
That's it from me for today! I hope you like these cards!
Thanks so much for stopping by! Have an amazing day!
X

Zsoka

Thursday, March 15, 2018

In the spotlight: Spellbinders / Sharyn Sowell Flower Garden collection, Part 2

Hello there,

I'm back today, sharing my second of three blog posts showcasing cards I've created with various die sets from the Sharyn Sowell Flower Garden collection for Spellbinders! If you've missed my first post, you can find it here.

I love all colors. If you follow me on Instagram you know that I don't like white space. Well, actually that is not entirely true. I love white on white on cards, but generally I will go with colors. For today's cards I went with one of my favorite colors, cobalt blue. I call this cobalt blue but I might be totally off, anyway, this shade is my absolute favourite. The last couple of Maggie Holmes collections have it so I purchased plenty, because who knows how long it will be available, ha!

On my first card I've used the Shapeabilities Botanical Dragonfly Etched Dies. I die cut all pieces, plus two of each wing. I then embossed all these with the most gorgeous embossing powder I've ever owned! Unfortunately my photos don't do it justice, but it's full of glitter and sparkle! I actually did this because for two of the wings one has to use the backside of the die cut and I haven't figured out yet how to keep that side tidy and nice. Mine always looks horrible from the cut lines in the plate.


I've used an A2 top folding card base and adhered the same size floral patterned paper on it. I also layered a piece of white and a piece of white-gold floral paper on top. I assembled the dragonfly - I've used liquid glue for this. Then I added a piece of foam adhesive around the middle of its body and placed it on my card.


Next, I die cut a small white flower using dies from the Shapeabilities Bird on Cherry Branch set and some leaves from the Shapeabilities Dimensional Floral Panel set and adhered these onto my dragonfly. For the flower center I just added some Nuvo drops. To finish off my card, I attached a sentiment and a piece of gold decorative ribbon. 


My second card is very simple. I glued a piece of patterned paper panel (as well as a thin strip of coral paper for contrast) onto an A2 top folding card base. I die cut three roses and some leaves from the Shapeabilities Corner Floral die set. 


I first adhered the leaves to the roses and cut off the ends so they are not visible. Then I layered all three roses on top of each other and glued them together with some liquid glue. I created a little nest  for my roses to sit on, using gold metallic thread and glued everything down.


For the sentiment I've used the "Love" die from the Shapeabilities Rose Bird Topiary die set. I die cut it 3 times from a coral patterned paper, glued them together to have a dimensional piece, then adhered it to my card base.


Last but not least I added some Nuvo drops here and there and used some twine to create a bow at the top of the card.

That's it for today! I hope you like these cards and I could inspire you to go to your desk and create!

Spellbinders supplies:
  • S2-284 Shapeabilities Corner Floral Etched Dies, Flower Garden by Sharyn Sowell
  • S2-285 Shapeabilities Bird on Cherry Branch Etched Dies, Flower Garden by Sharyn Sowell
  • S2-287 Shapeabilities Botanical Dragonfly Etched Dies, Flower Garden by Sharyn Sowell
  • S4-846 Shapeabilities Rose Bird Topiary Etched Dies, Flower Garden by Sharyn Sowell
  • S4-851 Shapeabilities Dimensional Floral Panel Etched Dies, Flower Garden by Sharyn Sowell
Other supplies:
  • Patterned papers: Maggie Holmes - Flourish, Cocoa Vanilla Studio - More Than Words
  • Neenah solar white card stock 80LB
  • Tonic Studios Nuvo drops
  • WOW embossing glitter - Midnight Dream
  • gold sewing thread, twine
  • die cutting machine

I will be back with a final post soon to conclude this series. I hope you'll join me then too!

Have a wonderful day!

X
Zsoka


Sunday, October 15, 2017

Daydreamer - DT layout for Just Nick

Hey there,

I'm back again with a new layout I created for Just Nick this month!

This time I used the Loopy Circle Background cut file. You probably know by now how much I love my circles, so obviously I had to use this cut file :).


I used the beautiful new Bohemian Dreams collection from Cocoa Vanilla Studio. I cut the design from white textured card stock and partially backed the circles with different patterned papers. I didn't want to back the full circles to allow for some dimension.


I had to dig out some photos of myself, which I don't have a lot of, because this collection is so feminine! I'm a sucker for all things feminine but I've never liked having my photo taken...Anyway, I've found a couple of old pictures, this is one of them. In fact it's a part of a series which is why I did not add any journaling to this particular layout. I will add it to another layout using a different photo from this series.


I glued down my cut file, only attaching the parts where you see patterned paper. This way the rest of the cut file lifts off the page a little. I adhered my photo on top and embellished around it. For this I used die cuts, chip boards, stickers, tags, labels and a flair button. I tucked some of these behind the photo in several layers, some I glued onto my photo directly. I love layers!

For my title I used some old American Crafts alpha thickers, I'm not sure which collection these belonged to.


To finish off my layout, I added a few drops of blue ink and stamped my date.


It's a simple layout, but I like how it turned out. I hope you like it too!

Thank you for stopping by today! I'll be back with new inspiration next month!

Have a wonderful day,

X

Thursday, October 5, 2017

In the spotlight: Cocoa Vanilla Studio - Bohemian Dream at Scrapbook Werkstatt

Hi there,
 
I haven't done this in a while so I thought it would be about time...Here's a summary of my projects I created with the beautiful new Bohemian Dream collection!
 
I'll be honest, I prefer Wild at Heart from Cocoa Vanilla, but this collection is still gorgeous. I am crazy about the floral paper! And there are some new products in this collection too: 6x6 paper pad, a stamp set and white chipboard titles. You can buy all these and more at Scrapbook Werkstatt! The embellies might be sold out now but not to worry, a new batch is on its way. So if you missed out on this collection, make sure you keep checking the SBW website!
 
Without further ado...these are my projects:


Hope you like them! Should you have any questions, just write a comment :).

Thanks for looking and have a great day!


Supply list:


Tuesday, September 26, 2017

Love You - DT layout for Just Nick

Hi there scrappy friends,

I'm back today with a new layout I created for Just Nick.

I chose the Graphic Background cut file for this. I have used this cut file before, but not in a long time, so I thought why not use it again?


I went with white card stock again, like most of the time... I picked the wonderful Cocoa Vanilla Wild at Heart collection for this layout. I love this navy floral paper and I thought the white cut file looks great on it. I stitched down each part of the cut file with navy thread to add some interest.


I placed my photo a bit off center, to the right, and layered a few pieces of die cuts, chipboard frame and tissue paper behind it. 


Then I started embellishing. I wanted to keep all embellishments around the photo so that most of the background is still visible.  I added lots of die cut flowers; some of them I glued down with liquid glue, others I popped up with foam adhesive to create dimension. I really love dimension on my layouts! I also used flair buttons, stickers, chipboard pieces and some resin flowers from one of the earlier Cocoa Vanilla collections. I think those are my favorites, so cute right?


I know the title is not very original, but I love the way these big chipboard letters look and well this title does fit my photo so why not? With the amount of layouts I make it's hard to come up with creative titles, especially ones that are short (because I prefer them short). So I end up with a lot of Sweet, Cute, Love, Awesome etc titles I'm afraid, especially if the photo just captures a candid moment, not any special event.


Other than the stitching, which took a bit of time, this layout came together very quickly, which is unusual for me! I really like how it turned out, I hope you do too!

Thanks for stopping by today! Until next time,

X


Tuesday, June 6, 2017

June Kit at Scrapbook Werkstatt

Hi All,
 
While we are already working on the July (and August!) kits at Scrapbook Werkstatt, I thought I'd show you my projects with the June kit.
 
Without a doubt this is my most favourite kit so far. It is full of life and summer, which is just what I needed after all the greyness! Pinks and tropical patterns, but also pastels are included. There is a wonderful bottle of gold acrylic paint in there too yay! Really, it's a gorgeous kit and it was so much fun to work with it! The layouts came together very quickly! It happens to me a lot that I love a kit at first sight but then I struggle with my projects for some unknown reason. This kit wasn't one of those! So here's Tausendschoen for you:
 
https://www.scrapbook-werkstatt.de/navi.php?a=37265&lang=eng

What you get in this kit:
8 12x12 inch patterned papers from the following collections:
  • Elle's Studio (Live Laugh Love)
  • Cocoa Vanilla (Endless Summer)
  • My Mind's Eye (Pakm Beach)
Embellishments:
  • Foam Letter Thickers from American Crafts
  • Gold Acrylic Paint from American Crafts (59ml)
  • Puffy Stickers from Elle's Studio Live Laugh Love
  • Die Cut Ephemera from Cocoa Vanilla Studio Endless Summer
  • Cut Apart Word Flags from Pretty Little Studio
  • Lil' Snippets Labels from Elle's Studio Live Laugh Love
  • 1 flair button *Juni* from Scrapbook Werkstatt 
This week you also get 20% birthday discount on the kit and most of the items in the shop! Hurry up!

And here are my projects:


I also used the kit for my June sketch layout. Here you see the fab sketch that was created by Nicole this month and my take on it:
 

I hope I could inspire you in one way or another!
Thanks for stopping by!
Till next time!
X