Showing posts with label My Mind's Eye. Show all posts

Tuesday, September 1, 2020

In the spotlight: Spellbinders Small and Large Die of the Month kits - September 2020

Hi there crafty peeps,

It's that time again! The Spellbinders September Club Kits are here! I can't believe summer is over, this whole year is flying by......Fall is my least favorite season, I think, we get a lot of rain and grey skies! It's not like fall you see in magazines and movies with beautiful colorful leaves and sunshine haha! So I don't particularly like it, it's depressing :( Anyway, my projects today are not fall themed, so all good! :D

As a reminder, Spellbinders have several monthly kits, which are really great! You can subscribe to:

You can find all necessary information about these kits here. 

This time I'll start with the Small Die Kit! You can create two different frames with the included dies, one is with simple leaves, the other is a bit more elaborate, you can add small, layered flowers to it. Moreover, you can create a couple of sentiments too, like you'll see here: Thank You and Hello (or a mixture of both obviously!)


The papers I've used here are from the My Mind's Eye Gingham Gardens line - it's a gorgeous collection, super feminine, soft and elegant!


For the die cut shapes I've used white card stock. The sentiments I've cut 4 times and then layered them up for a more dimensional look. I also used foam tape to attach the frame to my card base, to create more depth.


To decorate the simple frame on the second card, I added some flower stickers. I always glue these on a heavy weight card stock first, then fussy cut them, this way they are sturdier and I can layer them more easily.


To finish off this card, I added a few enamel dots in coordinating colors. 


The Large Die Kit this month includes everything for creating a fun slice of cake with various sentiments and little tidbits, like fruits, carrot, candle and more.


On my first card I decided to skip the cake altogether, because I love building patterns with the help of dies (or stamps) and I find these little fruits adorable! Love them on the gingham background, reminds me of summer picnics! Which, admittedly, I've never done in my life haha!


For my second card, I created a lemon cake with ombre cake layers. Now, I'm not up to date on cake trends; since I've started scrapbooking, I haven't baked any - but before that, ombre was a big trend! To me it still looks pretty, whether or not it's trendy :D.


Let's talk about the embossed background for a sec! The Sprinkles stamp set is an exclusive freebie this month if you are a VIP Value Club member. You get it if you are already a member or if you upgrade to the VIP Value Club in September. If this is confusing, check this link to read about the difference between Value Clubs and VIP Value Clubs.


I haven't used the sentiments, but they are sized to fit on the cake layers. I did a terrible job on the embossing, normally I would throw away a panel like this, but since it's white on white, the missing lines don't bother me. There's something about the card stock I've used, it's not great for stamping because it soaks up the ink right away. This would never have happened with Neenah Solar White, but I didn't want to use a bright white card stock with the gingham patterned paper. This stamp set is actually photopolymer, so it stamps great (unless you're me and use the wrong paper hehe).


I also made a carrot cake, just for fun! I love Starbucks carrot cake - thankfully we don't have Starbucks in  close vicinity to us, otherwise I'd eat it every day...Other than that, I'm not sure where it's available here!

I had this Alexandra Renke paper from her Easter collection, so I thought it'd be the perfect backdrop! I love that it's not traditional orange-green carrot colors, I don't like that combo at all. To be honest, I'm not a fan or orange either but hey, it's a fun change for once.


That's about it! What do you think? Fun products this month too, right? I also saw a sneak at some upcoming ones and I'll tell you, I can't wait to work with them!

Thank you for stopping by today!
Have a wonderful day!

X

Tuesday, October 2, 2018

A truck load of cards - Spellbinders Large Die of the Month Club Kit

Hi guys,

Quickly checking in to show you the most adorable Spellbinders die set I have ever worked with! You gotta see this, and yes, you totally NEED this hehe! Sorry, not sorry :).

I have mentioned it before but in case you've missed that post...I don't know if you know this but Spellbinders has a bunch of monthly kits you can subscribe to, Card Kit, Large Die of the Month Kit, Small Die of the Month Kit. My favorites are the die kits, they are always fab and you get value for your money that's for sure!

This month I worked with the Large Die of the Month kit and boy is it awesome! Check this out:

Large Die of the Month Membership

You get all of these dies in this kit! It's a truck that you can decorate for 4 seasons - which is exactly what I did! But of course I couldn't stop there, I also made a wedding themed card. Have a look:


Spring:


Summer:


Fall:


Winter:


Wedding:


So many occasions one could use these dies for! I'm sure I will be creating more when I have time. I'm so in love! What do you guys think?!

Thanks for stopping by, I hope you'll have an amazing day!
X

Wednesday, March 14, 2018

Spellbinders Blog Hop - featuring Classic Spellbinders, Joanne Fink, Stephanie Low and Tammy Tutterow


Hello crafty friends,

Welcome to the March 2018 Spellbinders blog hop! You should have arrived here from the super talented Yana Smakula's blog!

I'm super excited to be here among all these amazing Ladies! Still pinching myself if I'm being very honest!

For today's cards I've used some awesome dies from the Classics collection. I've wanted some basic dies for ages and when I saw these, I instantly fell in love. All the scalloped edges! Faux stitching! And of course I have to mention how much I love the color of the Spellbinders dies haha (because that's important!). In all seriousness though, these are amazing quality dies! I need every set from this collection!

I chose the My Mind's Eye Palm Beach collection for my cards because I am sooo missing sunshine! The weather has been crazy here, snowy, rainy, just grey. I needed colors!


On my first card I used 3 dies from the Nestabilities Fancy Edged Ovals Etched Die set. I adhered an A2 size patterned paper to my A2 size top folding card base. Next I die cut 3 oval shapes from 2 different patterned papers and 1 white card stock. I stamped my sentiment on the white oval shape, then layered these die cuts on top of each other. I added some foam adhesive between the layers to create dimension. To decorate my card I used some chipboards, ephemera pieces, gold metallic thread, an enamel charm and some Nuvo drops.


For my second card I created a card base where I used the biggest die from the Nestabilities Scored and Pierced Ovals Etched Die set to partially die cut the card front. I then die cut 2 more ovals from different patterned papers and adhered them to the card front. Again, I used some foam adhesive between the patterned paper layers. This time I created my sentiment using some alphabet stickers which I placed on a tab sticker. I fussy cut some flowers and leaves from one of the patterned papers and glued these down in a cluster at the top left. I also added a big chipboard flamingo to the right and a few brads and Nuvo drops as well.


For my last card I used the Nestabilities Fancy Edged Rectangles Etched die set. I die cut the biggest rectangle from a pink patterned paper and adhered it to my A2 size top folding card base. I then created a shaker window using a smaller rectangle die. I stamped my sentiment onto a slim piece of paper and glued it on top of the acetate window. To finish off the card I created 2 floral clusters in 2 corners of the frame. I used a flower from the ephemera pack, the rest I fussy cut from a patterned paper. I also added some gold metallic thread and Nuvo drops. 


I hope you like today's inspiration!

Now for the fun part! GIVEAWAY YAY!

Spellbinders is giving away a $50 gift certificate to one lucky winner. To be eligible, you need to leave a comment on the Spellbinders blog by Sunday, March 18th 11:59 pm EDT. We appreciate some love on all participating blogs too :). The winner will be announced in the blog hop post on the Spellbinders blog the following day. Winner is responsible for shipping cost, duties and taxes.

*********************************************************************************

AND THAT'S NOT ALL! Spellbinders is generously sponsoring a giveaway right here on my blog too! Leave a comment by Sunday, March 18th 11:59 pm EDT and you will be eligible to win a $25 gift certificate to the Spellbinders shop! I will a pick a winner the following day (best is to leave your email address in the comment section too so I can reach you in case you forget to check back). Winner is responsible for shipping cost, duties and taxes.

*******************THIS GIVEAWAY IS NOW CLOSED!*****************************

The winner of the $25 Spellbinders GC on my blog is:

Monika/BuzsyMarch 18, 2018 at 2:30 AM

Lovely cards! The layers of ovals look fantastic! I also love the combination of scallop edge and straight edge with stitched lines... the shaker is so pretty!


*********************************************************************************


And there's another awesome giveaway going on the Spellbinders website, check it out! Unfortunately this is for US residents only.


Your next stop is the wonderful Elena Salo!

Here's the full blog hop list:


Have fun hopping! Thanks for stopping by! Have a wonderful day!
X


Friday, December 22, 2017

DT layout for Just Nick

Hi guys,

I'm back today with the last layout I'm sharing for Just Nick this year!

I've used the wonderful Leaf Cluster 3 cut file.


This photo must have been on my desk for 2 years, I just never got to it. Total coincidence that the collection I chose went with the colors in the photo! I'm always happy when I can use a color photo - I mostly don't bother because black and white photos go with any collection so don't require planning. I am really not big on planning out designs ahead!

I went with one of my all time favorite Christmas collections, Christmas on Market Street from My Mind's Eye. I'm so sad that I hardly have any left! I used up most this holiday season.

I cut the leaf cluster 4 times from white card stock, then I spent some time on backing these with a variety of papers. I made sure I have solid reds and greens (well, polka dots are solids right?!) as well as patterned papers.


There's a gorgeous gold foiled poinsettia paper in the collection - I fussy cut out a lot of the flowers and floral pieces to tuck them behind my cut files and scatter some smaller ones around my page.


I've arranged the 4 cut files into the four corners, and once I liked how they looked, I started to glue things down. I also added the photo and my title in the middle.


I then added those fussy cut pieces, some embellishments like flair, stickers, chipboards and a few cute buttons (which I believe are from Crate Paper). 


I love how this one turned out. It's funny how much I dislike red, the red and green combo in general, and yet, this holiday season this has been my most favorite combo to work with ha! There's just something so festive about these colors! I would never use them during the year though!

I hope you like the layout too and are inspired to create something!

I wish you and your loved ones a magical holiday season!

Thanks for stopping by today!

X


Wednesday, December 13, 2017

Merry - DT layout for Paige Evans + Silhouette

Hey there friends,

I'm sharing a new layout today that I created for the Paige Evans + Silhouette Design Team.

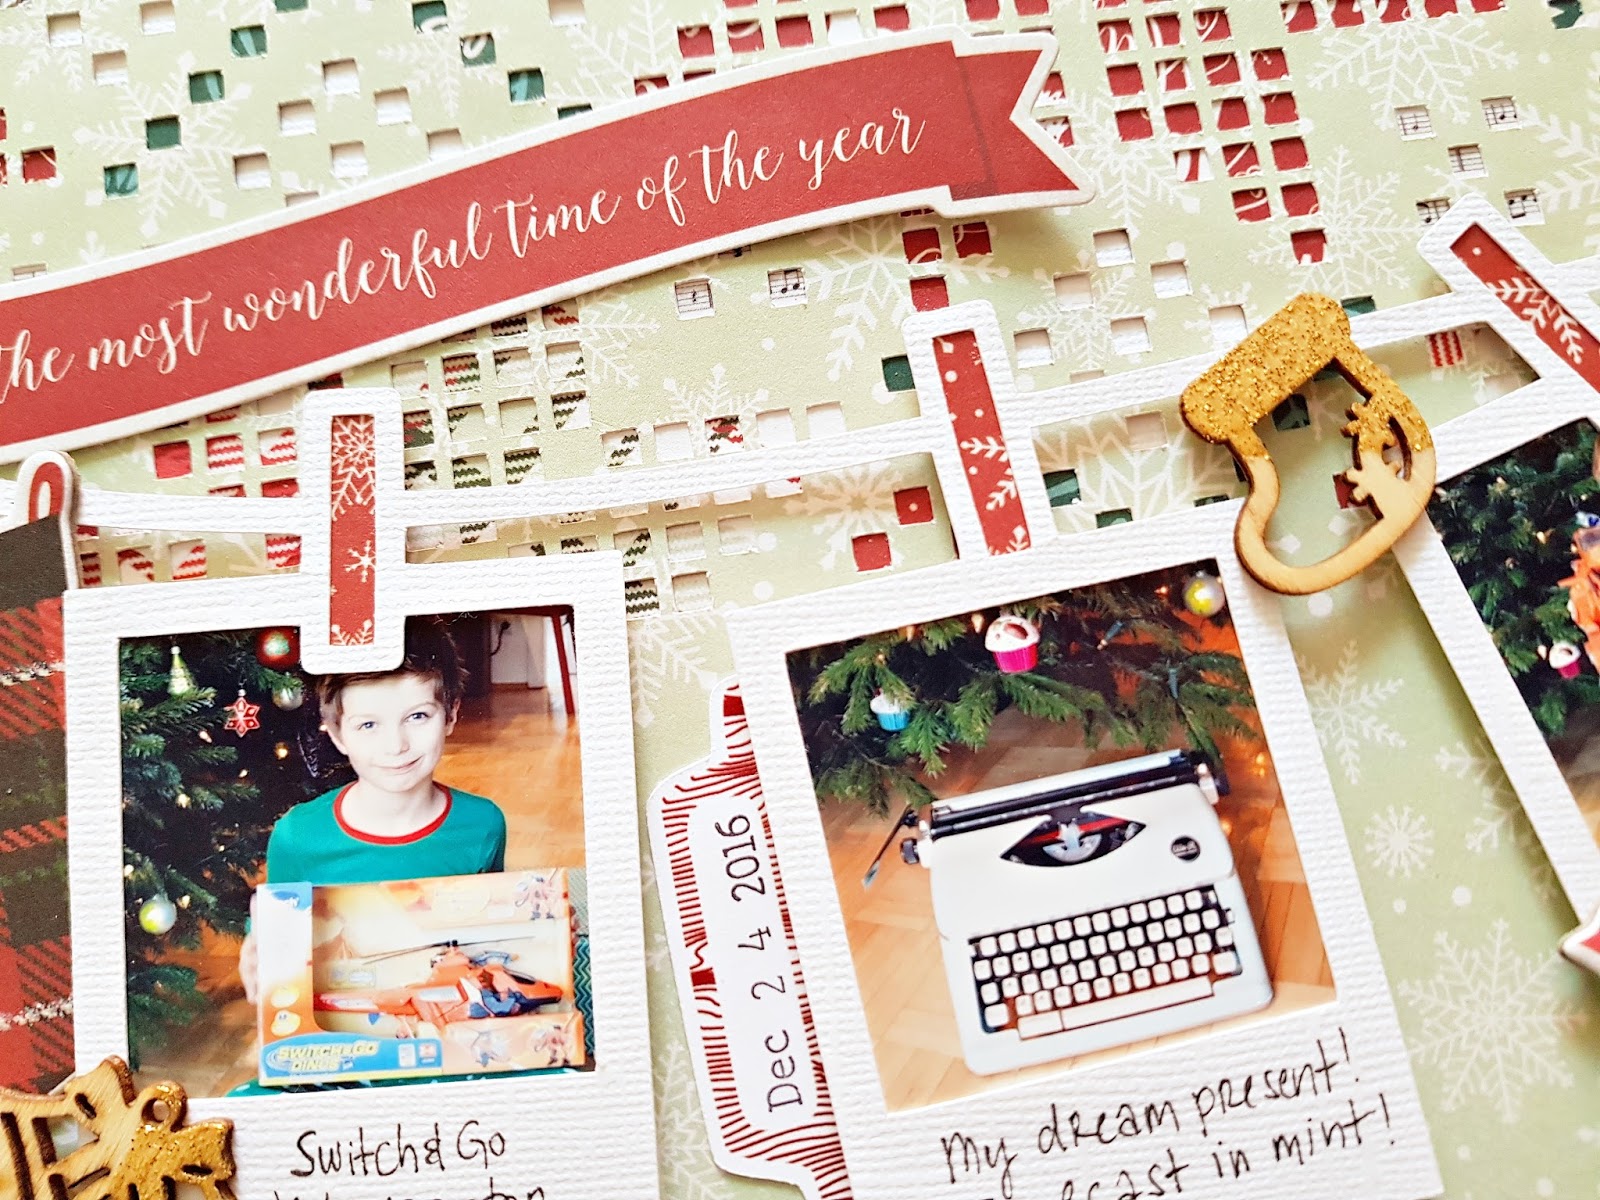
I used two cut files on this page, the Poinsettia Nordic Background (ID: #228022) and the Polaroid Frame Border (ID: #228024).


I only cut the middle part of the cut file and backed it with different papers from My Mind's Eye Comfort&Joy and Crate Paper Falala. My background paper is from the MME Comfort & Joy collection.

Then I designed the rest of my layout in the Studio program to make sure my idea doesn't only work in my head! 


Now, I generally don't use more than 1-2 photos (and never bigger than 4x4) on my layouts because I love working on the background design as much as I love having my photos documented. I realised I have many photos from Christmas last year that I haven't scrapped yet and when I saw the Polaroid Frames cut file I thought it would be a great way to use several photos at once.


I wanted to create two banners to hold 8 pictures, I figured otherwise I'd never catch up on documenting everything ha! I however wanted my photos to be a bit bigger than what the cut file provided, so I sized them in a way my photos fit (I'm not sure about the size now, it's what you get when you print 4 square photos with border on your Canon Selphy, maybe about 1.5x1.5 inch?) and then cropped them (I have 4 frames instead of the original 5 in the cut file).


I backed the little clothespins with patterned paper then adhered my photos behind the frames. I put foam adhesive behind each frame to pop them off of the background. 


I added many little pieces of embellishments to the clothesline and the frames: chipboards from MME Comfort & Joy and Christmas on Market Street, wood veneers which I partly embossed with gold embossing powder. I also found this chipboard banner I've been hoarding, waiting for the perfect opportunity to use it. Well I guess this was it! 


I wrote a couple of words on each frame instead of a long journaling and added my date to finish off my layout.

I hope I could show you a different way to incorporate many photos into a page design! Give it a try, it's fun! 

Thanks for stopping by, have a great day!

X