Showing posts with label stickers. Show all posts

Thursday, October 5, 2017

In the spotlight: Cocoa Vanilla Studio - Bohemian Dream at Scrapbook Werkstatt

Hi there,
 
I haven't done this in a while so I thought it would be about time...Here's a summary of my projects I created with the beautiful new Bohemian Dream collection!
 
I'll be honest, I prefer Wild at Heart from Cocoa Vanilla, but this collection is still gorgeous. I am crazy about the floral paper! And there are some new products in this collection too: 6x6 paper pad, a stamp set and white chipboard titles. You can buy all these and more at Scrapbook Werkstatt! The embellies might be sold out now but not to worry, a new batch is on its way. So if you missed out on this collection, make sure you keep checking the SBW website!
 
Without further ado...these are my projects:


Hope you like them! Should you have any questions, just write a comment :).

Thanks for looking and have a great day!


Supply list:


Monday, October 2, 2017

Guesting at Pinkfresh Studio - Boys Fort

Hi there,

Not so long ago I shared with you my projects I created with the wonderful Escape the Ordinary collection as part of my guest post at Pinkfresh Studio.
Today I'm sharing projects with another awesome collection, Boys Fort. It's hard to come by great boy collections. For little boys there are a couple but a truly masculine collection that one can use for bigger boys and adults is hard to find. This one here ticks all the boxes for me. I think it's so unique and awesome! But hey, that's Pinkfresh Studio for you!
I created 3 layouts and a card with envelope (well technically 10 but they are all the same :D). 
For my first layout I created a few pinwheels from different patterned papers (Wisdom, Bold,  Wowzers, You Rule). For my background I used gray card stock, because I had a lot of different patterns in the pin wheels already. However I don't like to work with plain backgrounds, so I cut down the gray card stock, distressed its edges and added my favorite patterned paper, Tough, behind it. I cut a yellow circle out of card stock to mat my photo and just to add a little color pop. I arranged my pinwheels around this circle and glued them down. I placed a wood button in the middle of each one. I also added a few other embellies to the circle: die cuts, different stickers, fabric pennants and wood veneer. To finish it off, I added my title, date, journaling and some black ink splatters.


For my next layout I just cut five wide strips of the following patterned papers: Thumbs Up, High Five, Bold,  Wowzers, You Rule, and adhered them to the top of the Game On background paper line up next to each other. I tore the bottom of each one at a different length. I then mirrored all this at the bottom. As a next step I created a cut file (from a star cluster cut file that is available in the Silhouette Design store) to add to the top part of my layout. I backed some of the stars with yellow card stock. I placed my photo on the paper strips and tucked some embellishments behind it: wood veneer and die cuts. I attached a couple of puffy stickers to my photo and scattered a few wood buttons around. I tucked my title, for which I used the chipboard alpha stickers, behind the paper strips at the bottom, wrote up my journaling  and I was done.


For my third layout I chose to work with another favorite from the collection, actually it is the B side of my other fave (Tough) so technically it's the same favorite ha! I love to create layouts at an angle and I love big, bold titles, so I combined these two on this page. I cut the title from white card stock then backed each letter with a different paper: Thumbs Up, High Five, Bold,  Wowzers, You Rule and yellow card stock. Once done, I popped up the title with the help of foam adhesive. Before gluing this to my background I tucked both my photos behind it. Then came the embellishments: wood buttons, puffy stickers, die cuts, wood veneer and some tags. I added my journaling, some black ink splatters and stamped my date.


My son's birthday was coming up in September so I thought I'd make invites for his party. I haven't had my Cuttlebug for very long so I barely worked with dies before. I like to try new (to me) things and the Let's Celebrate stamp and die set by Inna Moreva came in handy! Since my scrapbooking style involves more patterned papers than paint, I decided to create the cards from patterned papers. I used Bold, Tough, You Rule and some white and yellow card stock. I stamped the little images on these papers and fussy cut them all. I'll tell you, this took ages haha! Well mainly because I made 10 cards...so it was a lot of fussy cutting. I don't mind though, it's kind of relaxing. I loved to do this as a child too. Then putting the cards together took no time at all! I'll be honest, since I have my Cameo I haven't bought a single envelope. So I picked a simple envelope cut file and sized it to fit my cards. I cut the lining from yellow card stock and cut "You're Invited" in it. Then glued everything in place.
I also made favor boxes with the same collection, but I didn't edit the photo yet! They turned out really cool though, every kid loved them!


That's it folks! I hope you like my projects as much as I loved working on them!

Thanks for stopping by and have an awesome day,

X

Tuesday, August 29, 2017

Explore - DT layout for Just Nick

Hi there crafty friends,
 
Zsoka here with you today with a new layout. I chose the Sunburst Background 2 cut file for this, I just love it!
 
https://justnick.myshopify.com/collections/all/products/sunburst-background-2
 
 
I'm not sure if you can tell, but I modified the cut file a little bit. When you blow it up as big as I did, the outlines will be much thicker. I wanted them thinner so more patterned paper shows through once I back the rays. I released the compound path, deleted the original outline, made the circle thinner, then I made a compound path on the two circles. I moved the circle out of the way and added outlines to the rays, made compound path and moved them into the circle so that the rounded ends disappeared. As a last step I welded the circles and the rays together. I hope it makes sense?
 
 
A while back I received the Simple Stories Summer Days collection kit from the awesome SCT magazine and haven't had the chance to use it yet. So I decided to use it for this layout. I also used bits and pieces from Freckled Fawn (like that awesome acrylic word, the flip flops and wood veneer) and the wood grain paper is from Jen Hadfield I believe.
 
First I printed my photo in a big size and glued the cut file on top. Then I backed the rays with different patterned papers, but only glued them down where they touch the circle. This way the white card stock can be lifted up a bit to create a nice dimension.

 
I used the acrylic word for my title and created a little cluster at the bottom of the page with it. I really like the look of this.

 
I didn't feel like this page needed a lot of embellishments. I just added a few bradz, wood veneers and some cloud stickers. Oh and a mini clothespin I got at Michaels!


I hope you like how this one turned out! Thanks for stopping by! Till next time,
X


Wednesday, July 5, 2017

Too old for snapchat? - DT layout for Just Nick

Hi there,
 
I'm back with you today to share my very first layout for Just Nick! I'm so excited to be here, thank you Nicole for the opportunity!
 
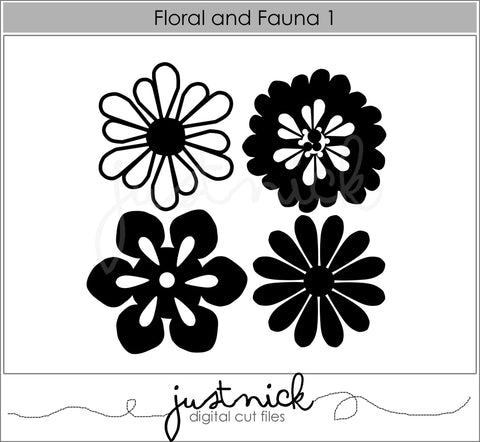
I picked one of the pretty flowers from the Floral and Fauna cut file set.
 
 
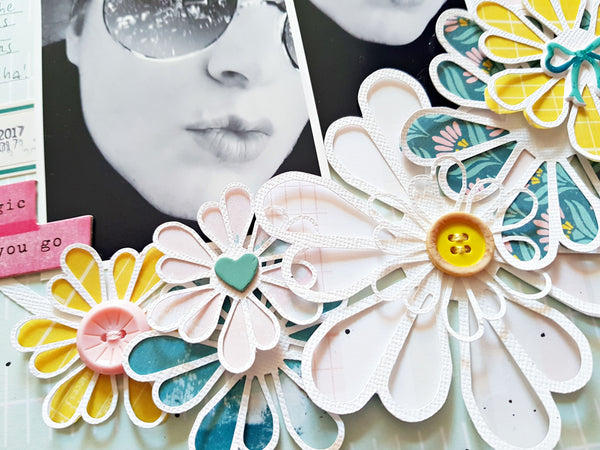
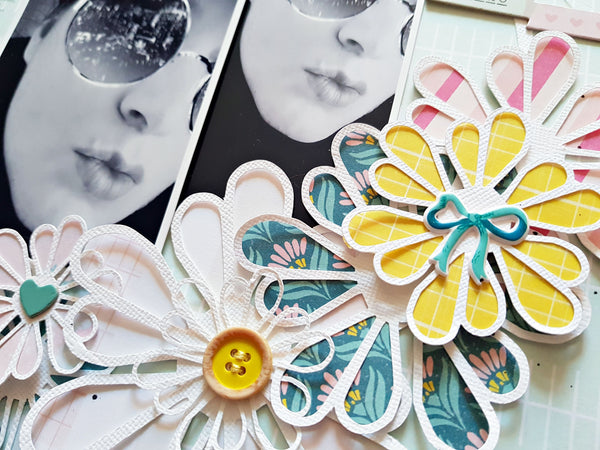
First I cut out a simple ring, then I cut several of the flowers, in different sizes. I backed my flowers with different papers from the gorgeous Maggie Holmes Chasing Dreams collection.
 
 
I created a bigger and a smaller cluster of flowers opposite each other on the ring. I added a few different bits and pieces to the middle of them: buttons, chipboard and puffy stickers.


I printed my photo in a couple of different sizes, I wasn't sure which one to add. I didn't like the shape of the photo for this background so I added the same photo in two different sizes.


Other than the flowers I didn't add a lot of embellishments because I wanted the flowers to shine! A couple of chipboards, stickers, title (which I stitched down so it doesn't go anywhere!), date and journaling plus some black paint splatters and done!
 
I hope you like my project! Thanks for stopping by today. See you next time X

Wednesday, June 28, 2017

July Kit at Scrapbook Werkstatt

Hi there,

I can't believe how fast the months are going?! Here we are again with new kit projects for Scrapbook Werkstatt. Unbelievable.

The July kit is a very bright, summer kit, hence its name "Glühwürmchen" ("Firefly"). I mean look at that neon yellow card stock from Bazzill!


Here's what you get in this kit:
  • 11 sheets of 12x12" patterned papers/card stock from Pink Paislee Summer Lights, Scrapbook Werkstatt, Crate Paper Oasis and Bazzill
  • 1 pack of thickers from American Crafts
  • 1 pack of die cuts from Scrapbook Werkstatt
  • 1 flair button from Scrapbook Werkstatt
  • exclusive clear stamp set from Scrapbook Werkstatt
  • 1 paper clip from Websters Pages
  • 1 sticker sheet from Pretty Little Studio

And below are the projects I created with this kit. Hope you like! For the travellers notebook cover and inserts you can find a tutorial here.


Thanks for stopping by today!

X


Monday, June 12, 2017

Fun trip - DT layout for The Cut Shoppe

Hey there scrappy friends,

Here I am with my last before one layout for The Cut Shoppe!

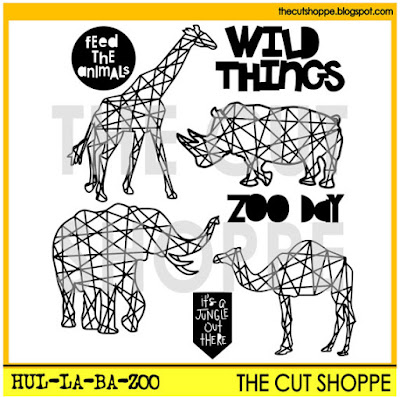
As I was browsing through my cut files, I realized I still haven't used the Hul-La-Ba-Zoo cut file even though I've been wanting to for ages.

While on Spring Break in April, we went on a Safari in Italy and we took many photos of all the different animals. For whatever reason I didn't take more than 2 photos of my favourite giraffes! Either way, I decided to use the giraffe cut file to go with my giraffe pictures and document this memory.

https://www.etsy.com/listing/468665995/the-hul-la-ba-zoo-cut-file-set-includes?ref=shop_home_active_41

I chose the wonderful Crate Paper Oasis collection which reminded me of Safaris, trips and getaways. Then I cut two giraffes in two different sizes (one image I mirrored so they are facing each other) then backed them with two patterned papers from the collection.


For my background I picked a wood grain paper and I used a very limited color palette, which I find matches the Safari theme. I used embellishments from the Oasis collection: die cuts, chipboard stickers, a chipboard frame and stickers as well as some wood veneers and plain chipboards from other manufacturers.


I created two clusters with tropical leaves, most of these came from the ephemera pack, some I fussy cut from a patterned paper. I also added some chipboard leaves for additional dimension. 


For my title I used the gold phrase stickers from the Oasis collection. I just love the font!


I hope you like how this layout turned out! I will be honest, I promised myself earlier to never use another animal cut file on a layout (long story!) but with these pictures this file was kind of the obvious choice right?! :)

Thank you for stopping by today! I hope you will check my last post for The Cut Shoppe in two weeks, which will only be posted on my blog!

Have a great day X